I intend to try and repair and get AIX/AUX (Apple/IBM Unix) running on my ANS 300 Prototype during October, and get some shares running on my network!
5 Likes
Hello, this sounds very interesting.
Do you have any photos you could share of the ANS 300 prototype?
What differences are there compared to the final version?
2 Likes
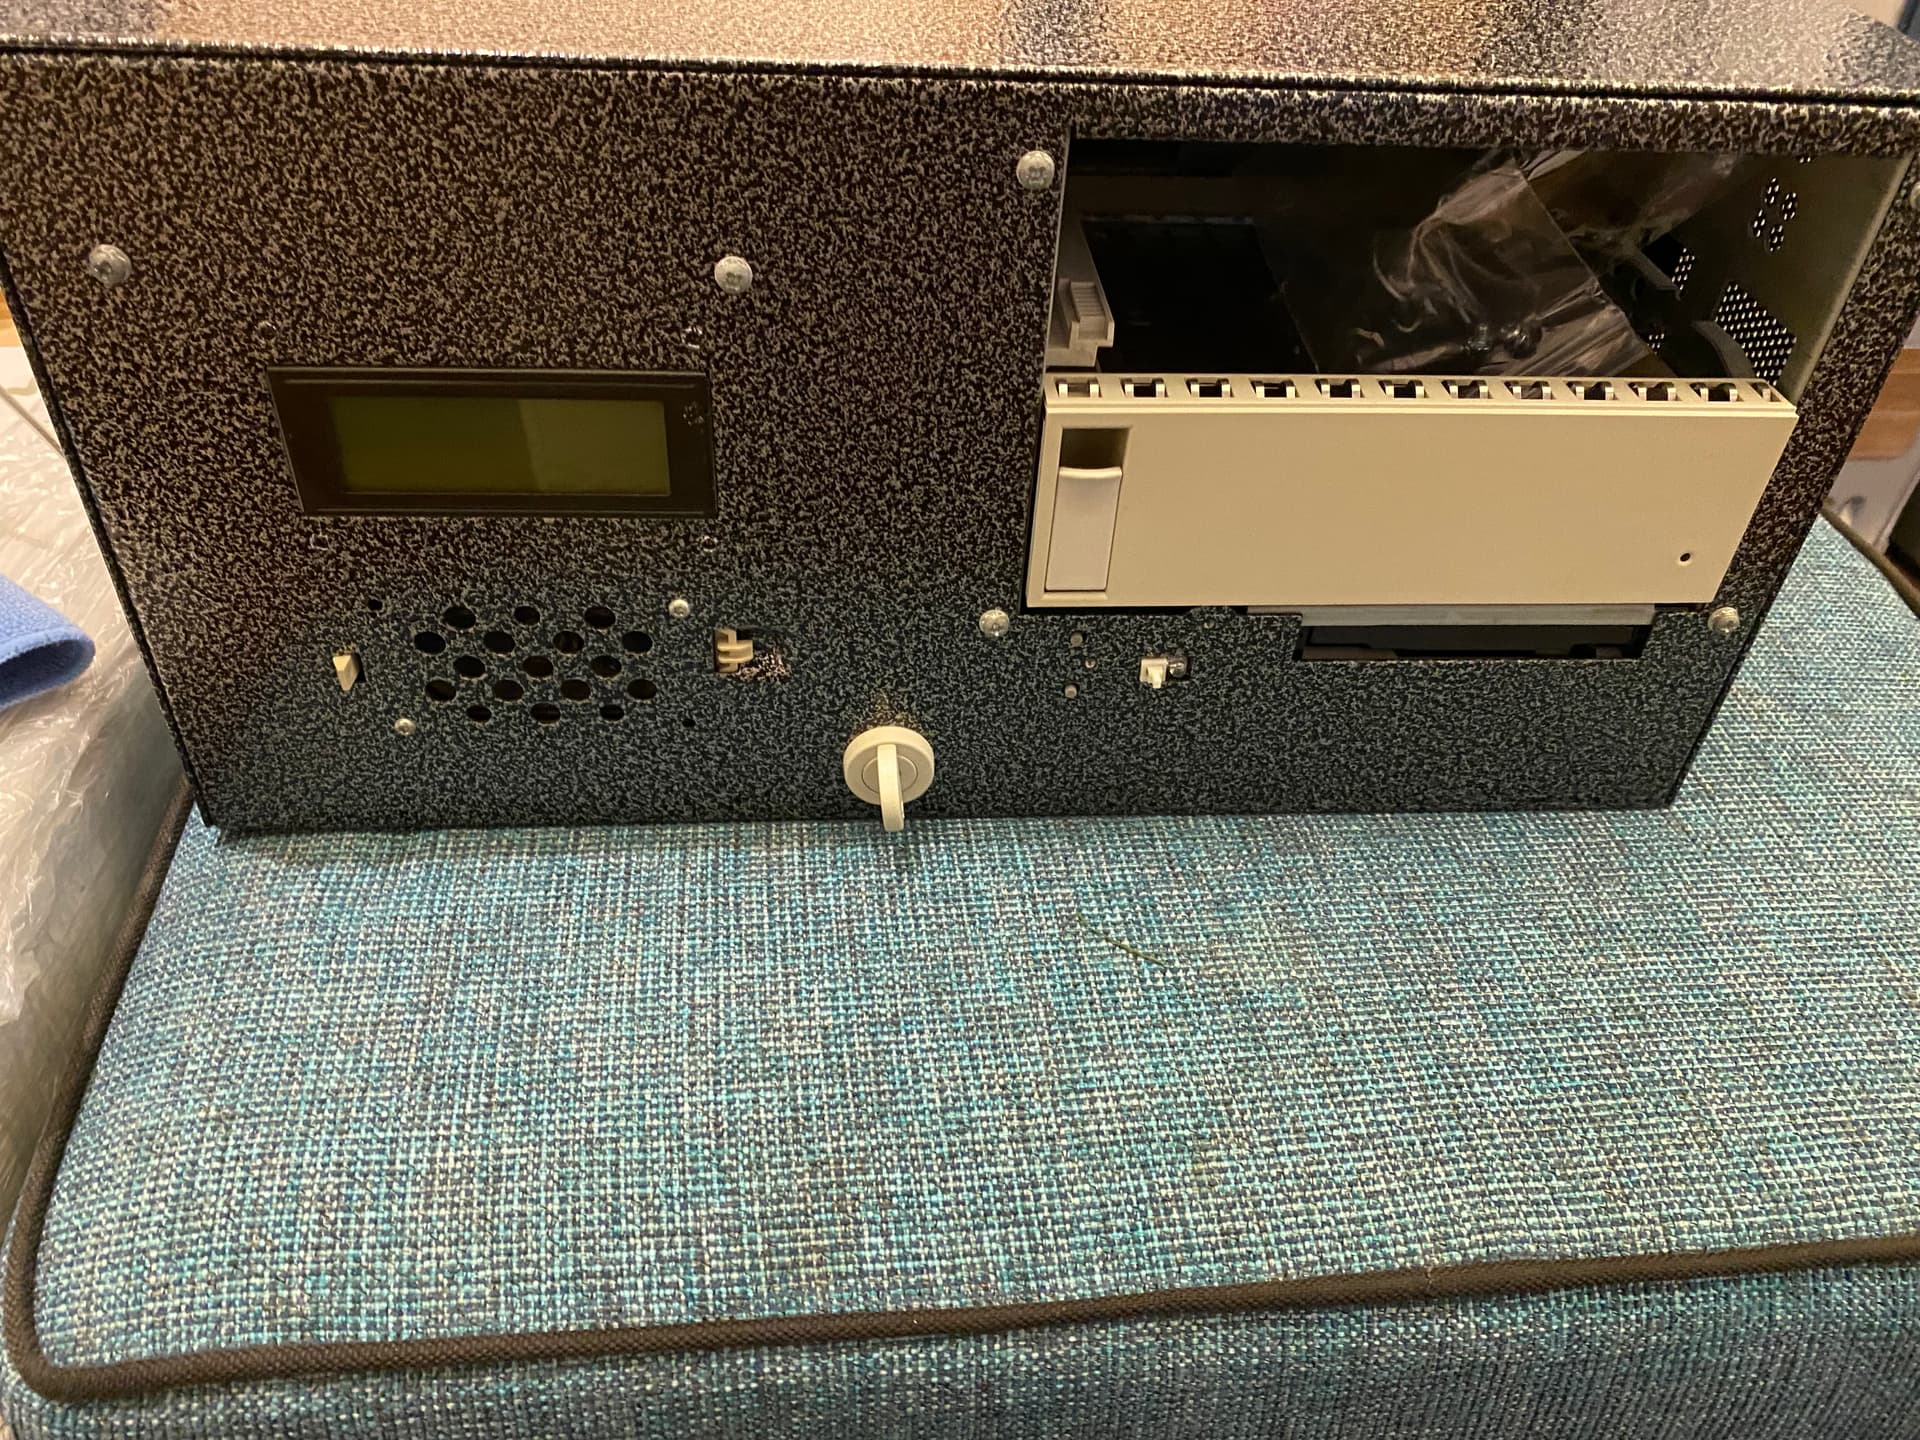
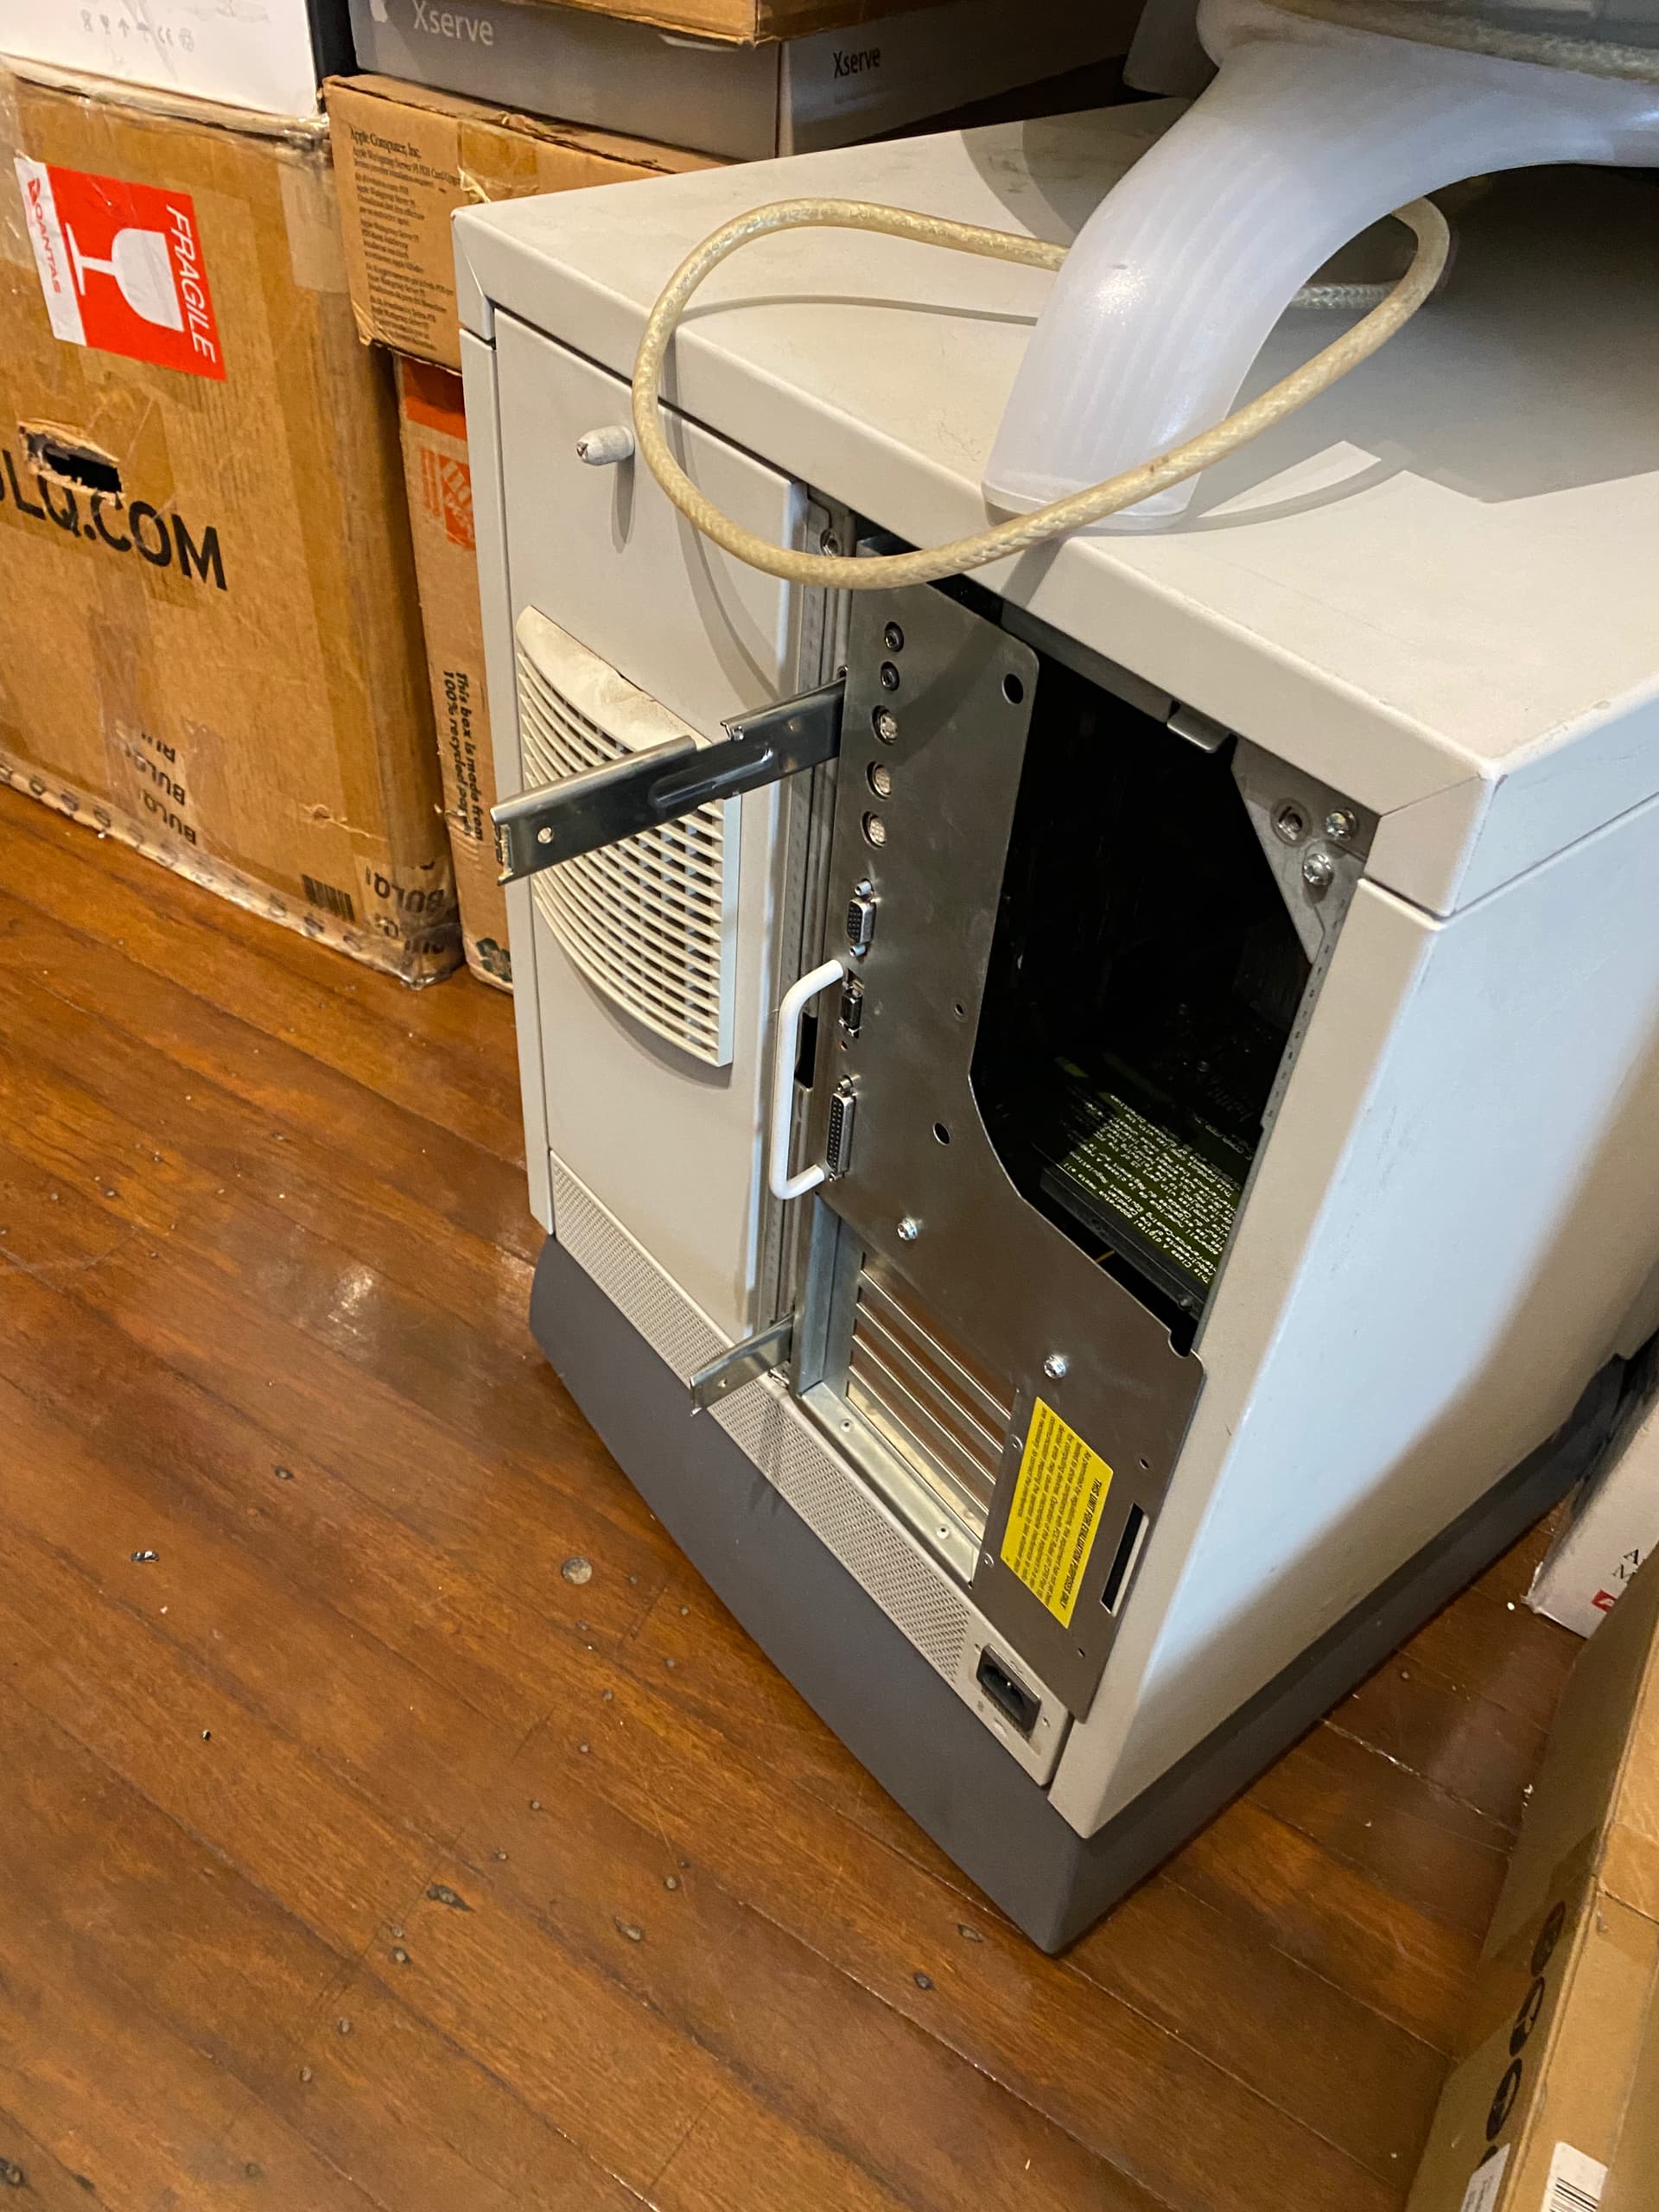
Currently I finally pulled the ANS from storage and replaced the damaged main board.
The main board had been partially destroyed by a leaking Maxell battery.
Having replaced that, I noticed that there was three bodge wires on the ANS 300 logic board.
I didn’t seem to have the ROM on me, so I installed my ANS 500 rom, cache and ram as the Logic board is the same across the 3,5,700 except for the bodge wires.
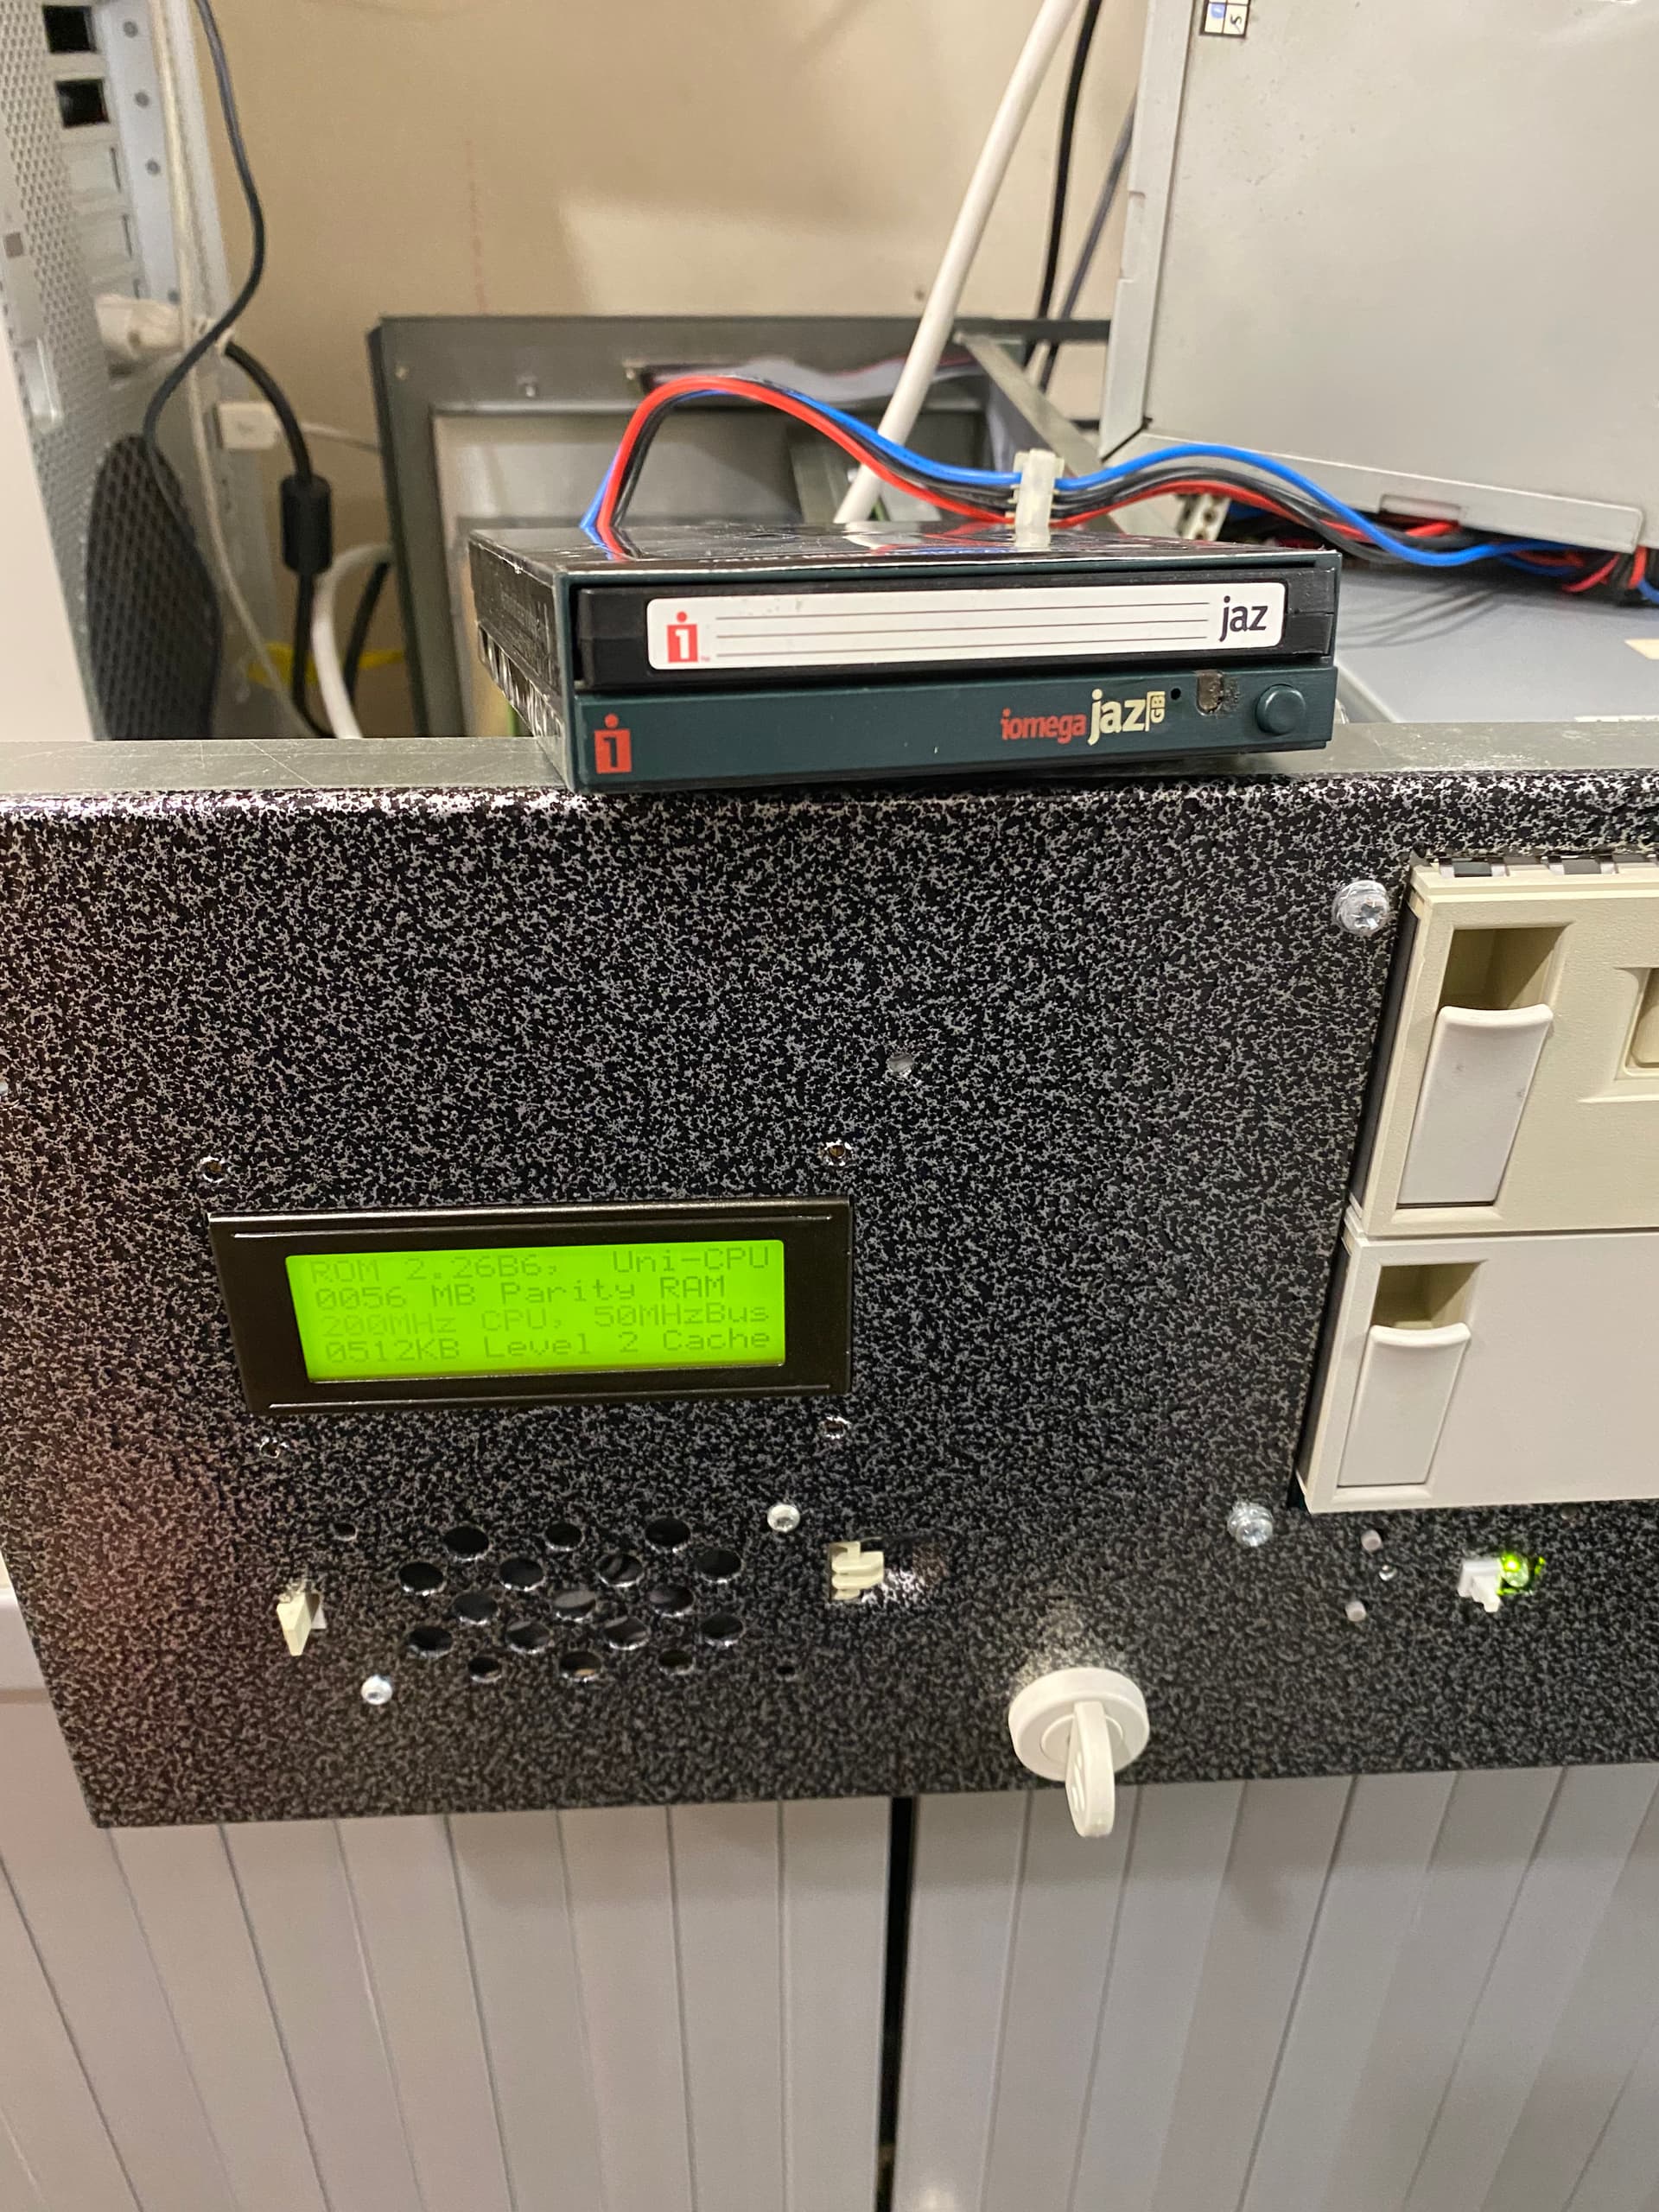
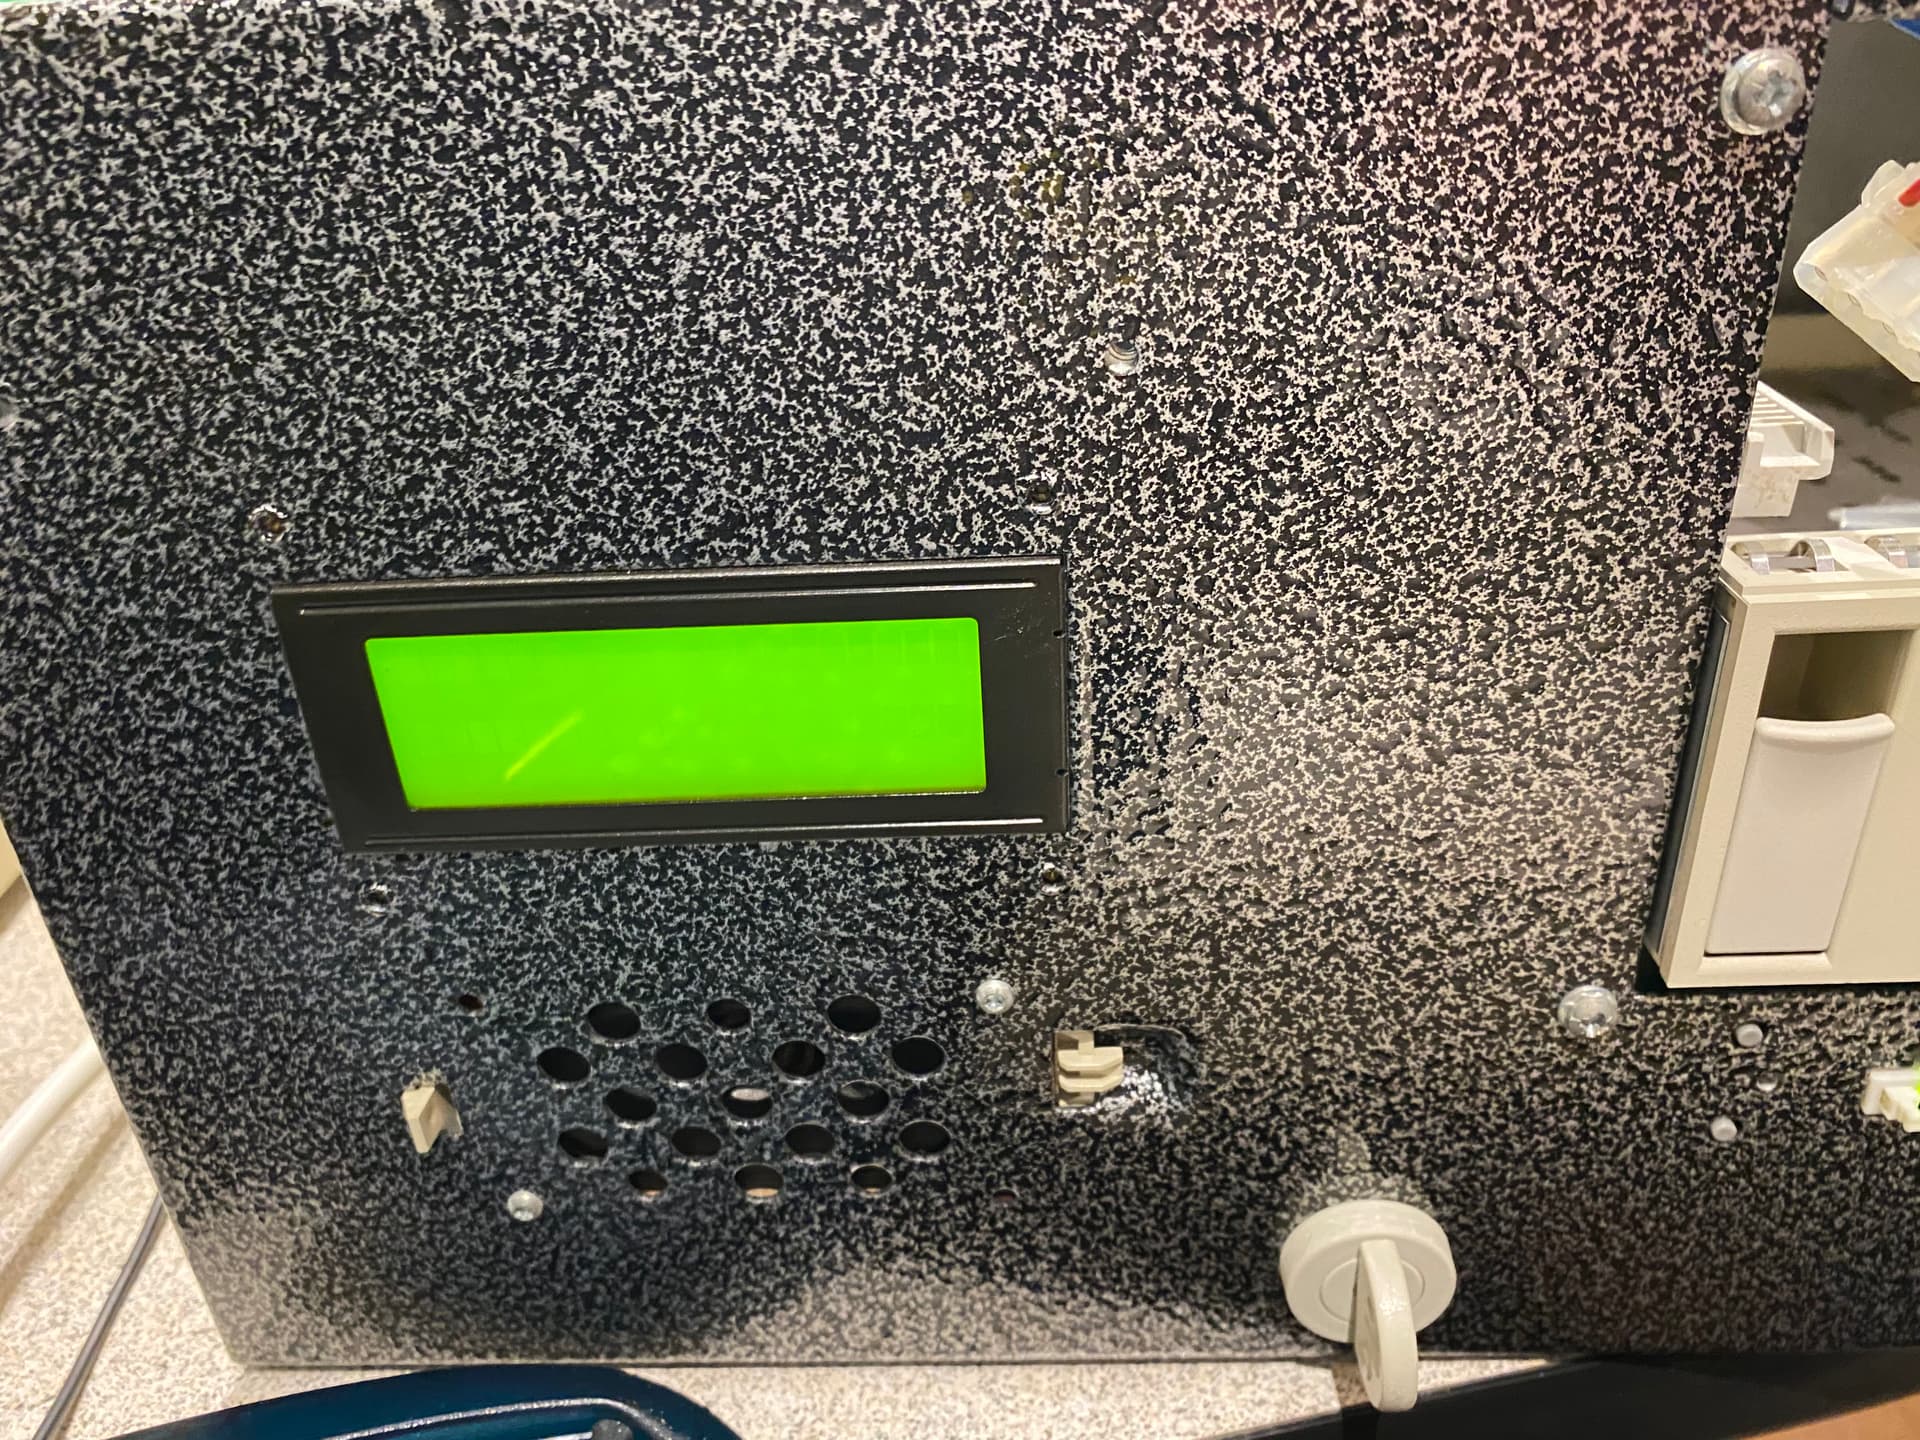
Upon turning the unit on after checking and cleaning I get no chime and black LCD display.
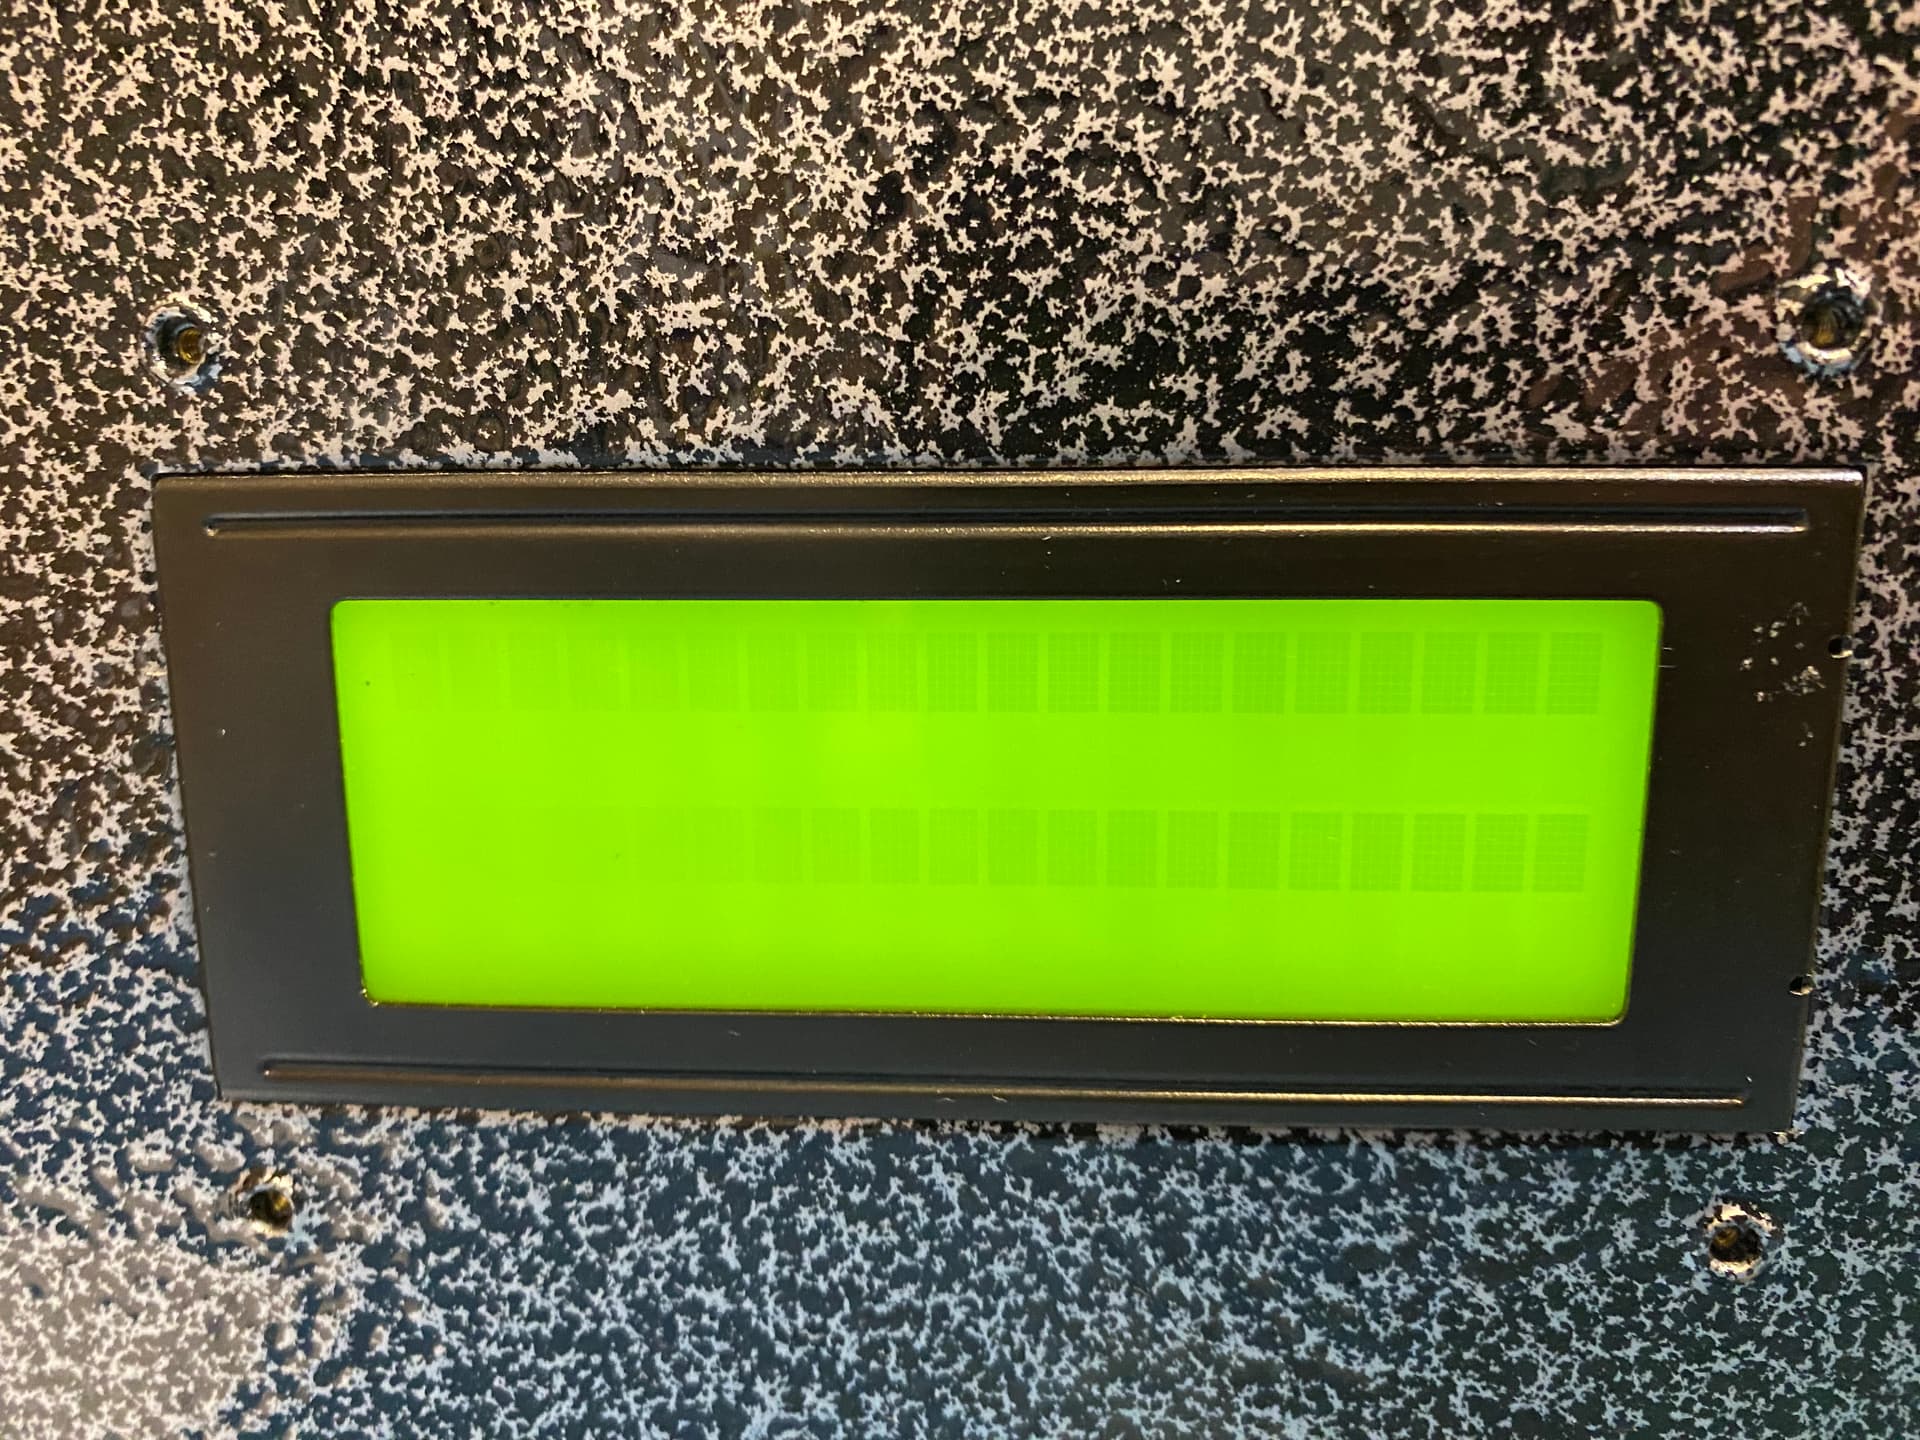
Now I need to do some more testing to understand what is going on.
Today I replicated the bodge wires, found the 300 prototype rom and ram and cache and installed them. There was no change.
My feeling is there is something wrong with the Delta PSU. Since playing around it seems the 5V rail is out. I’m now investigating there is too little power on the bus to fire up the computer.
The struggle continues.
1 Like
So. The issues continue.
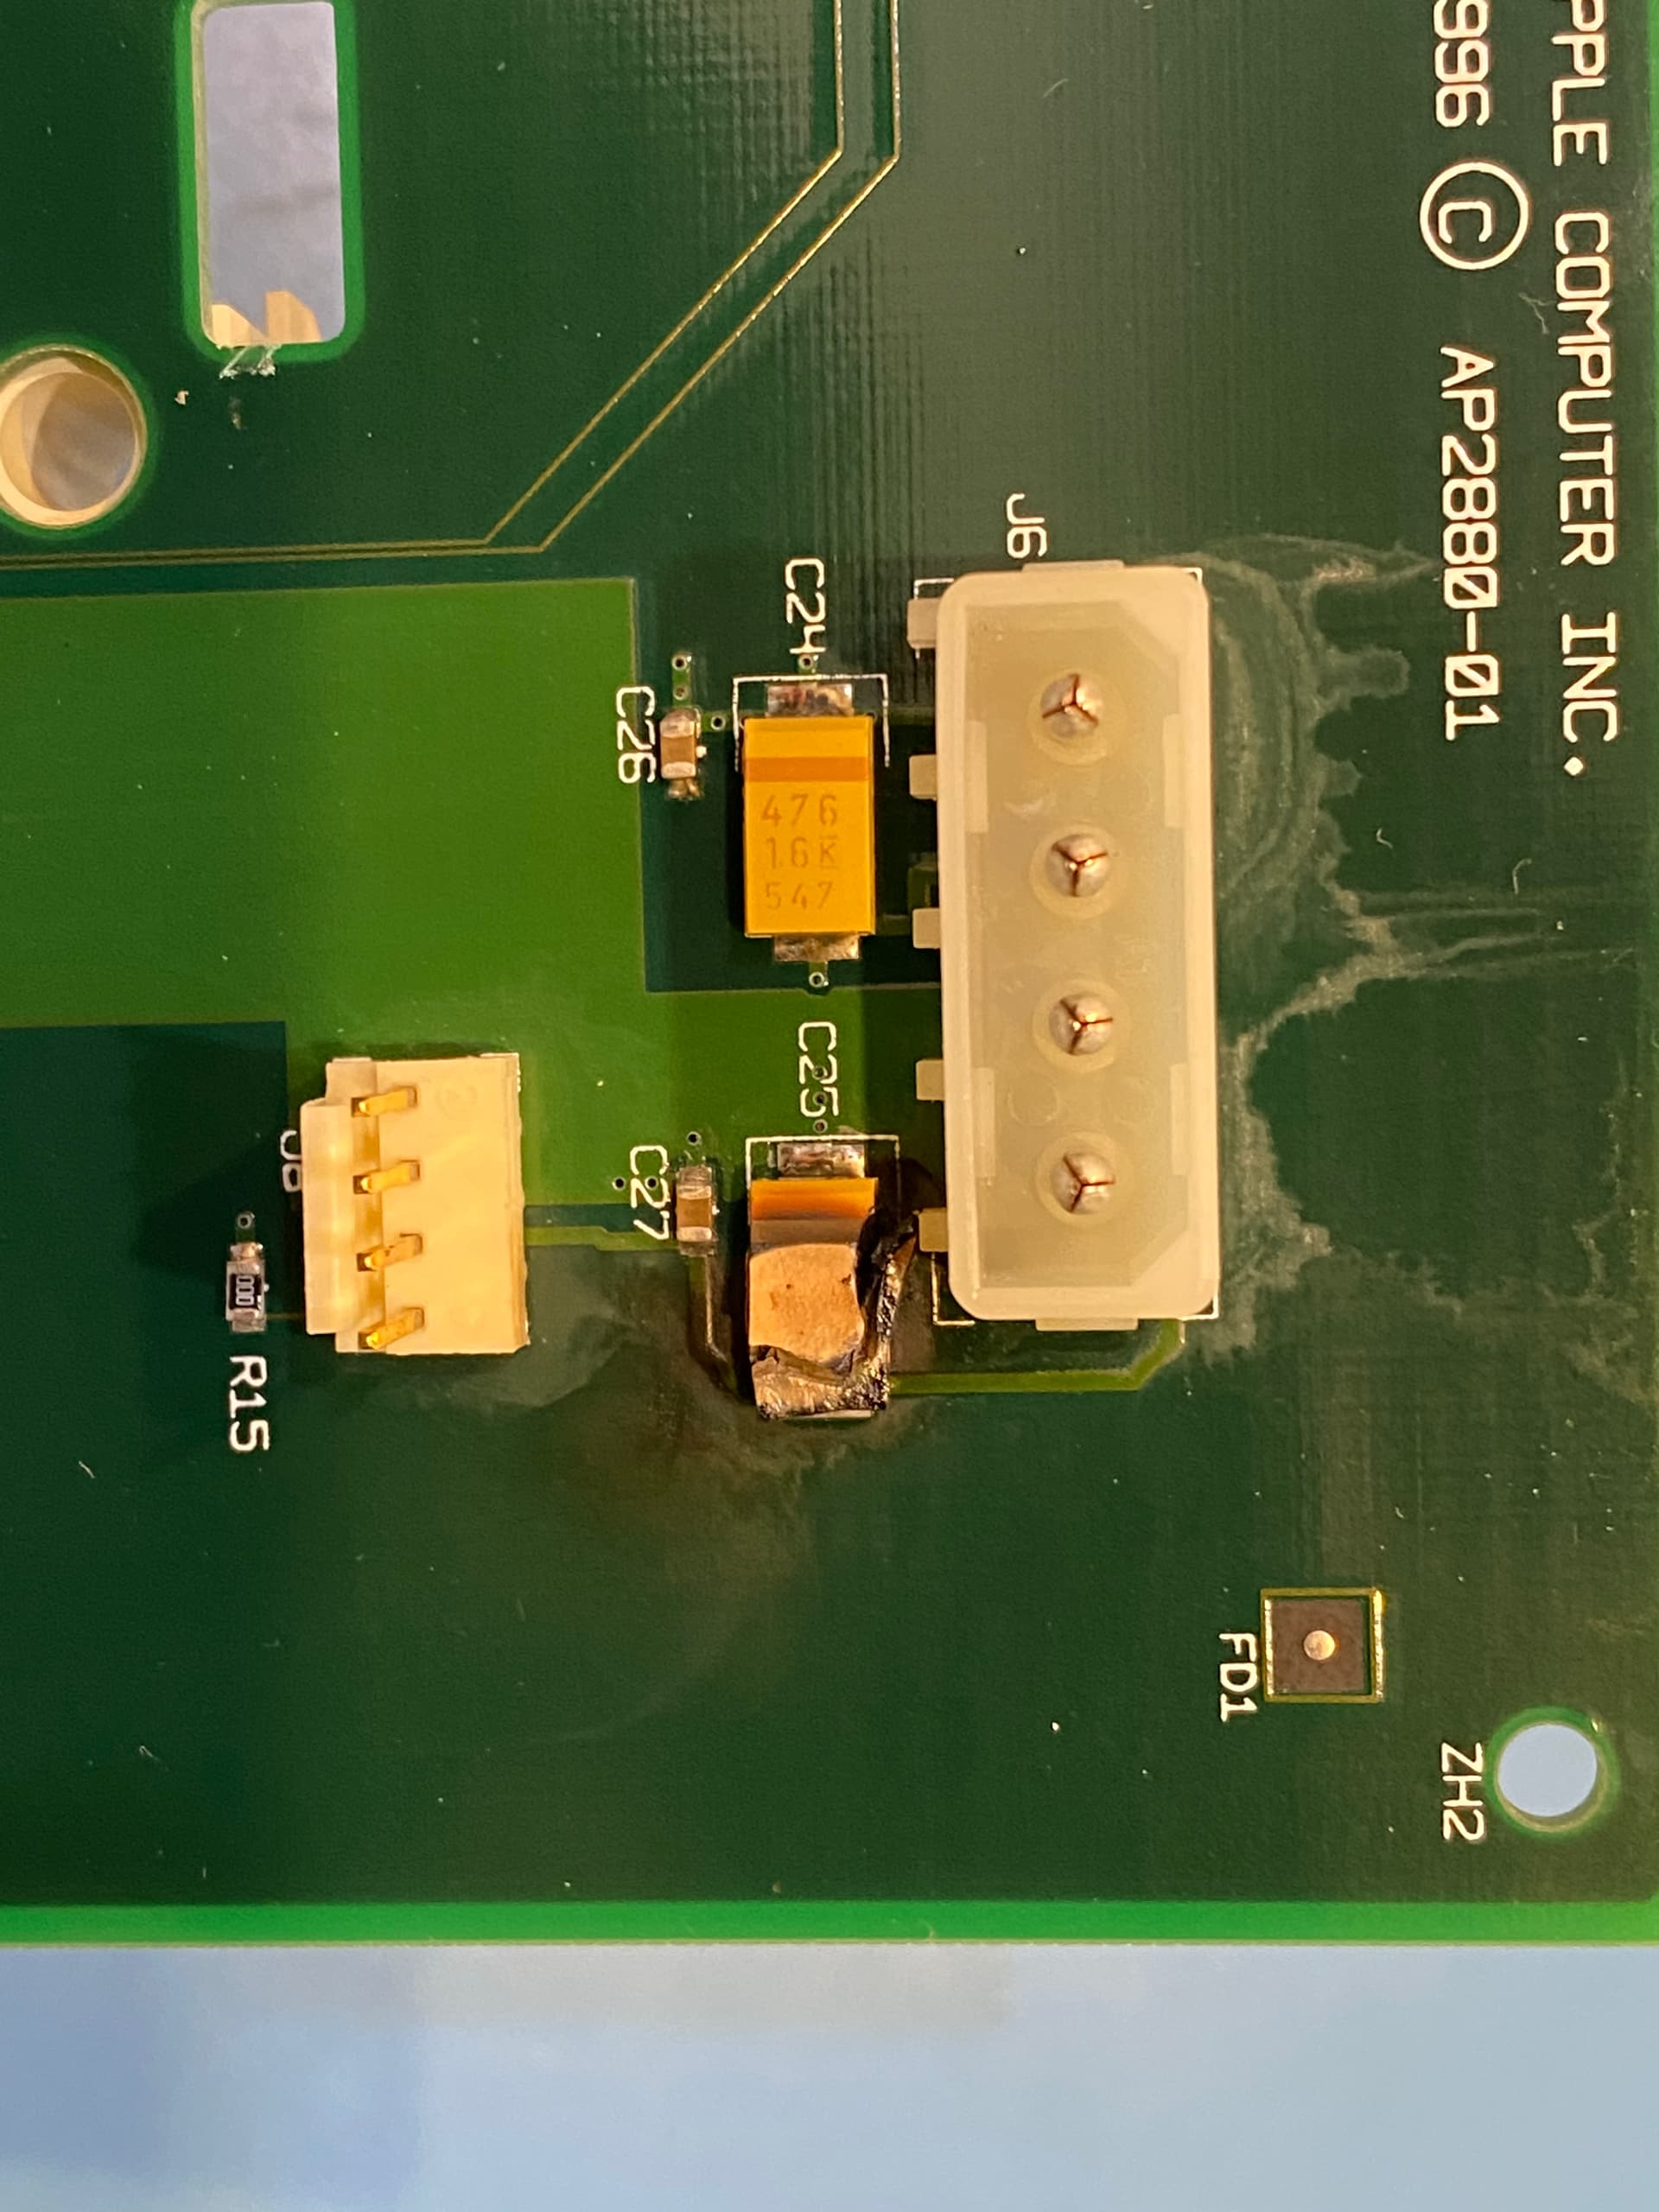
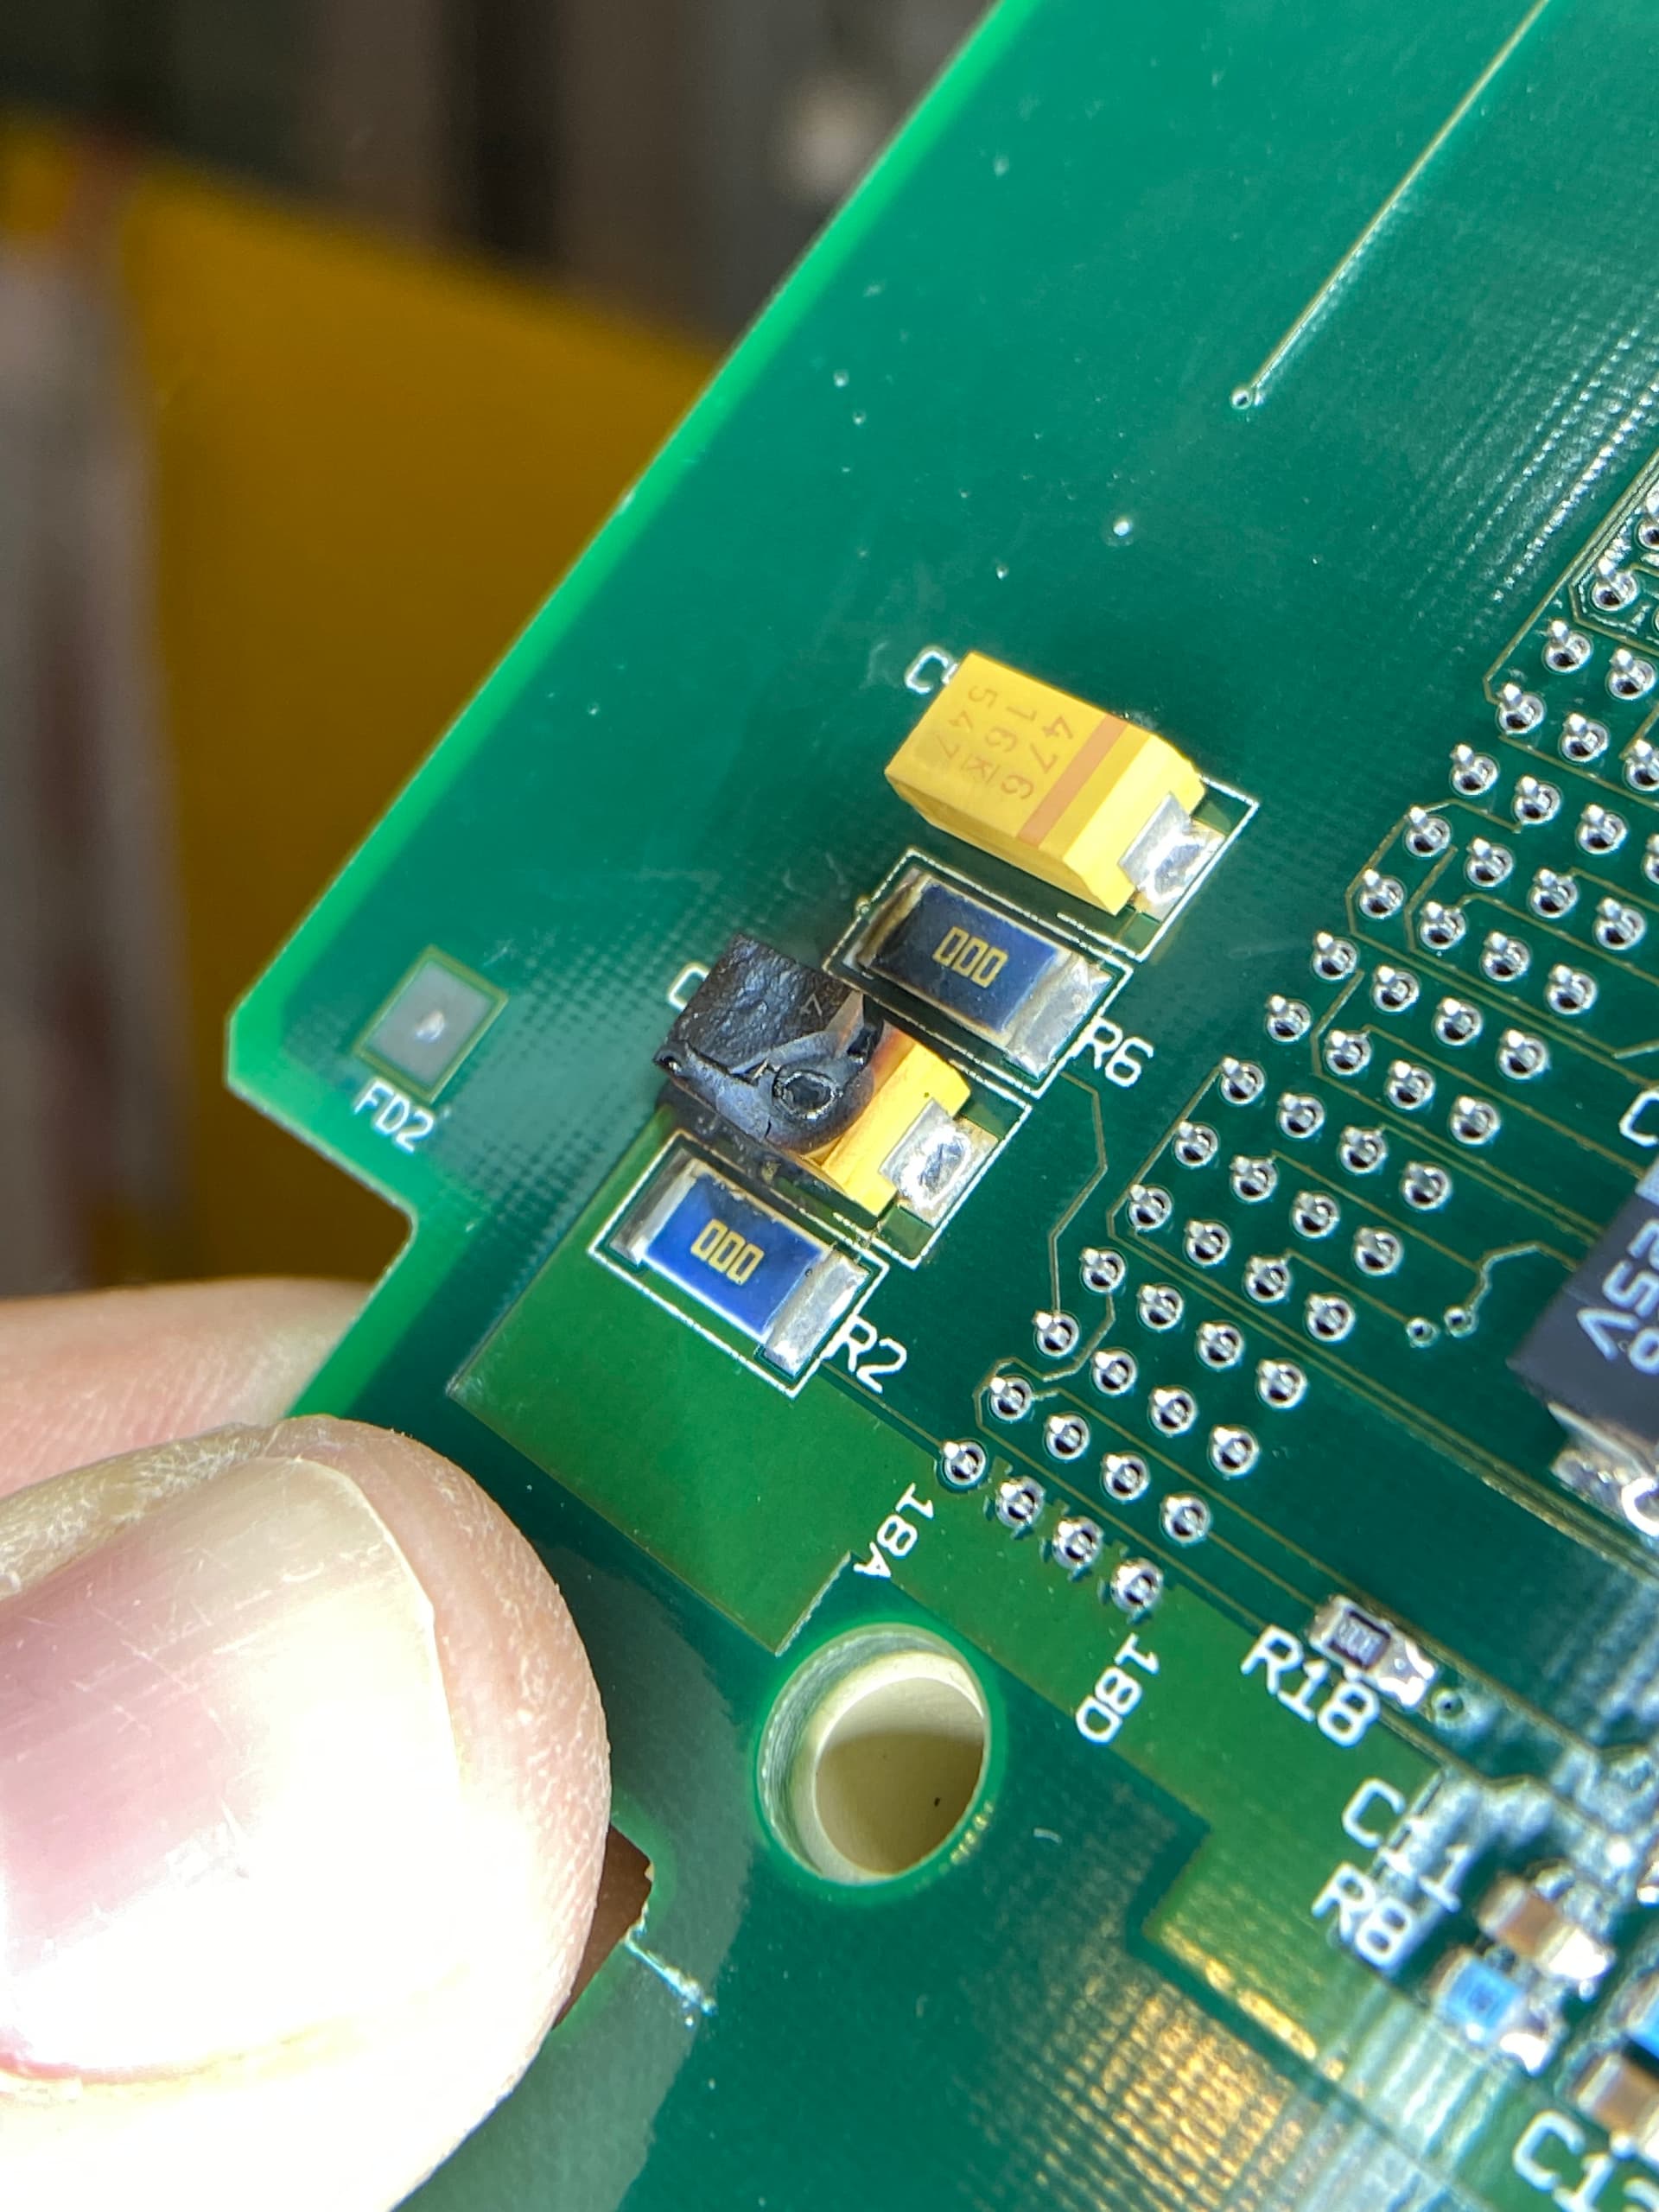
Doing some research, I find myself having a quirk on the Prototype Mezzanine whereby the 12v rail secondary (PC floppy style) power connector is shorted!
Huzzah I think, the 12v rail is short which is why the drive isn’t spinning and nothing is happening.
I remove it and sparks fly.
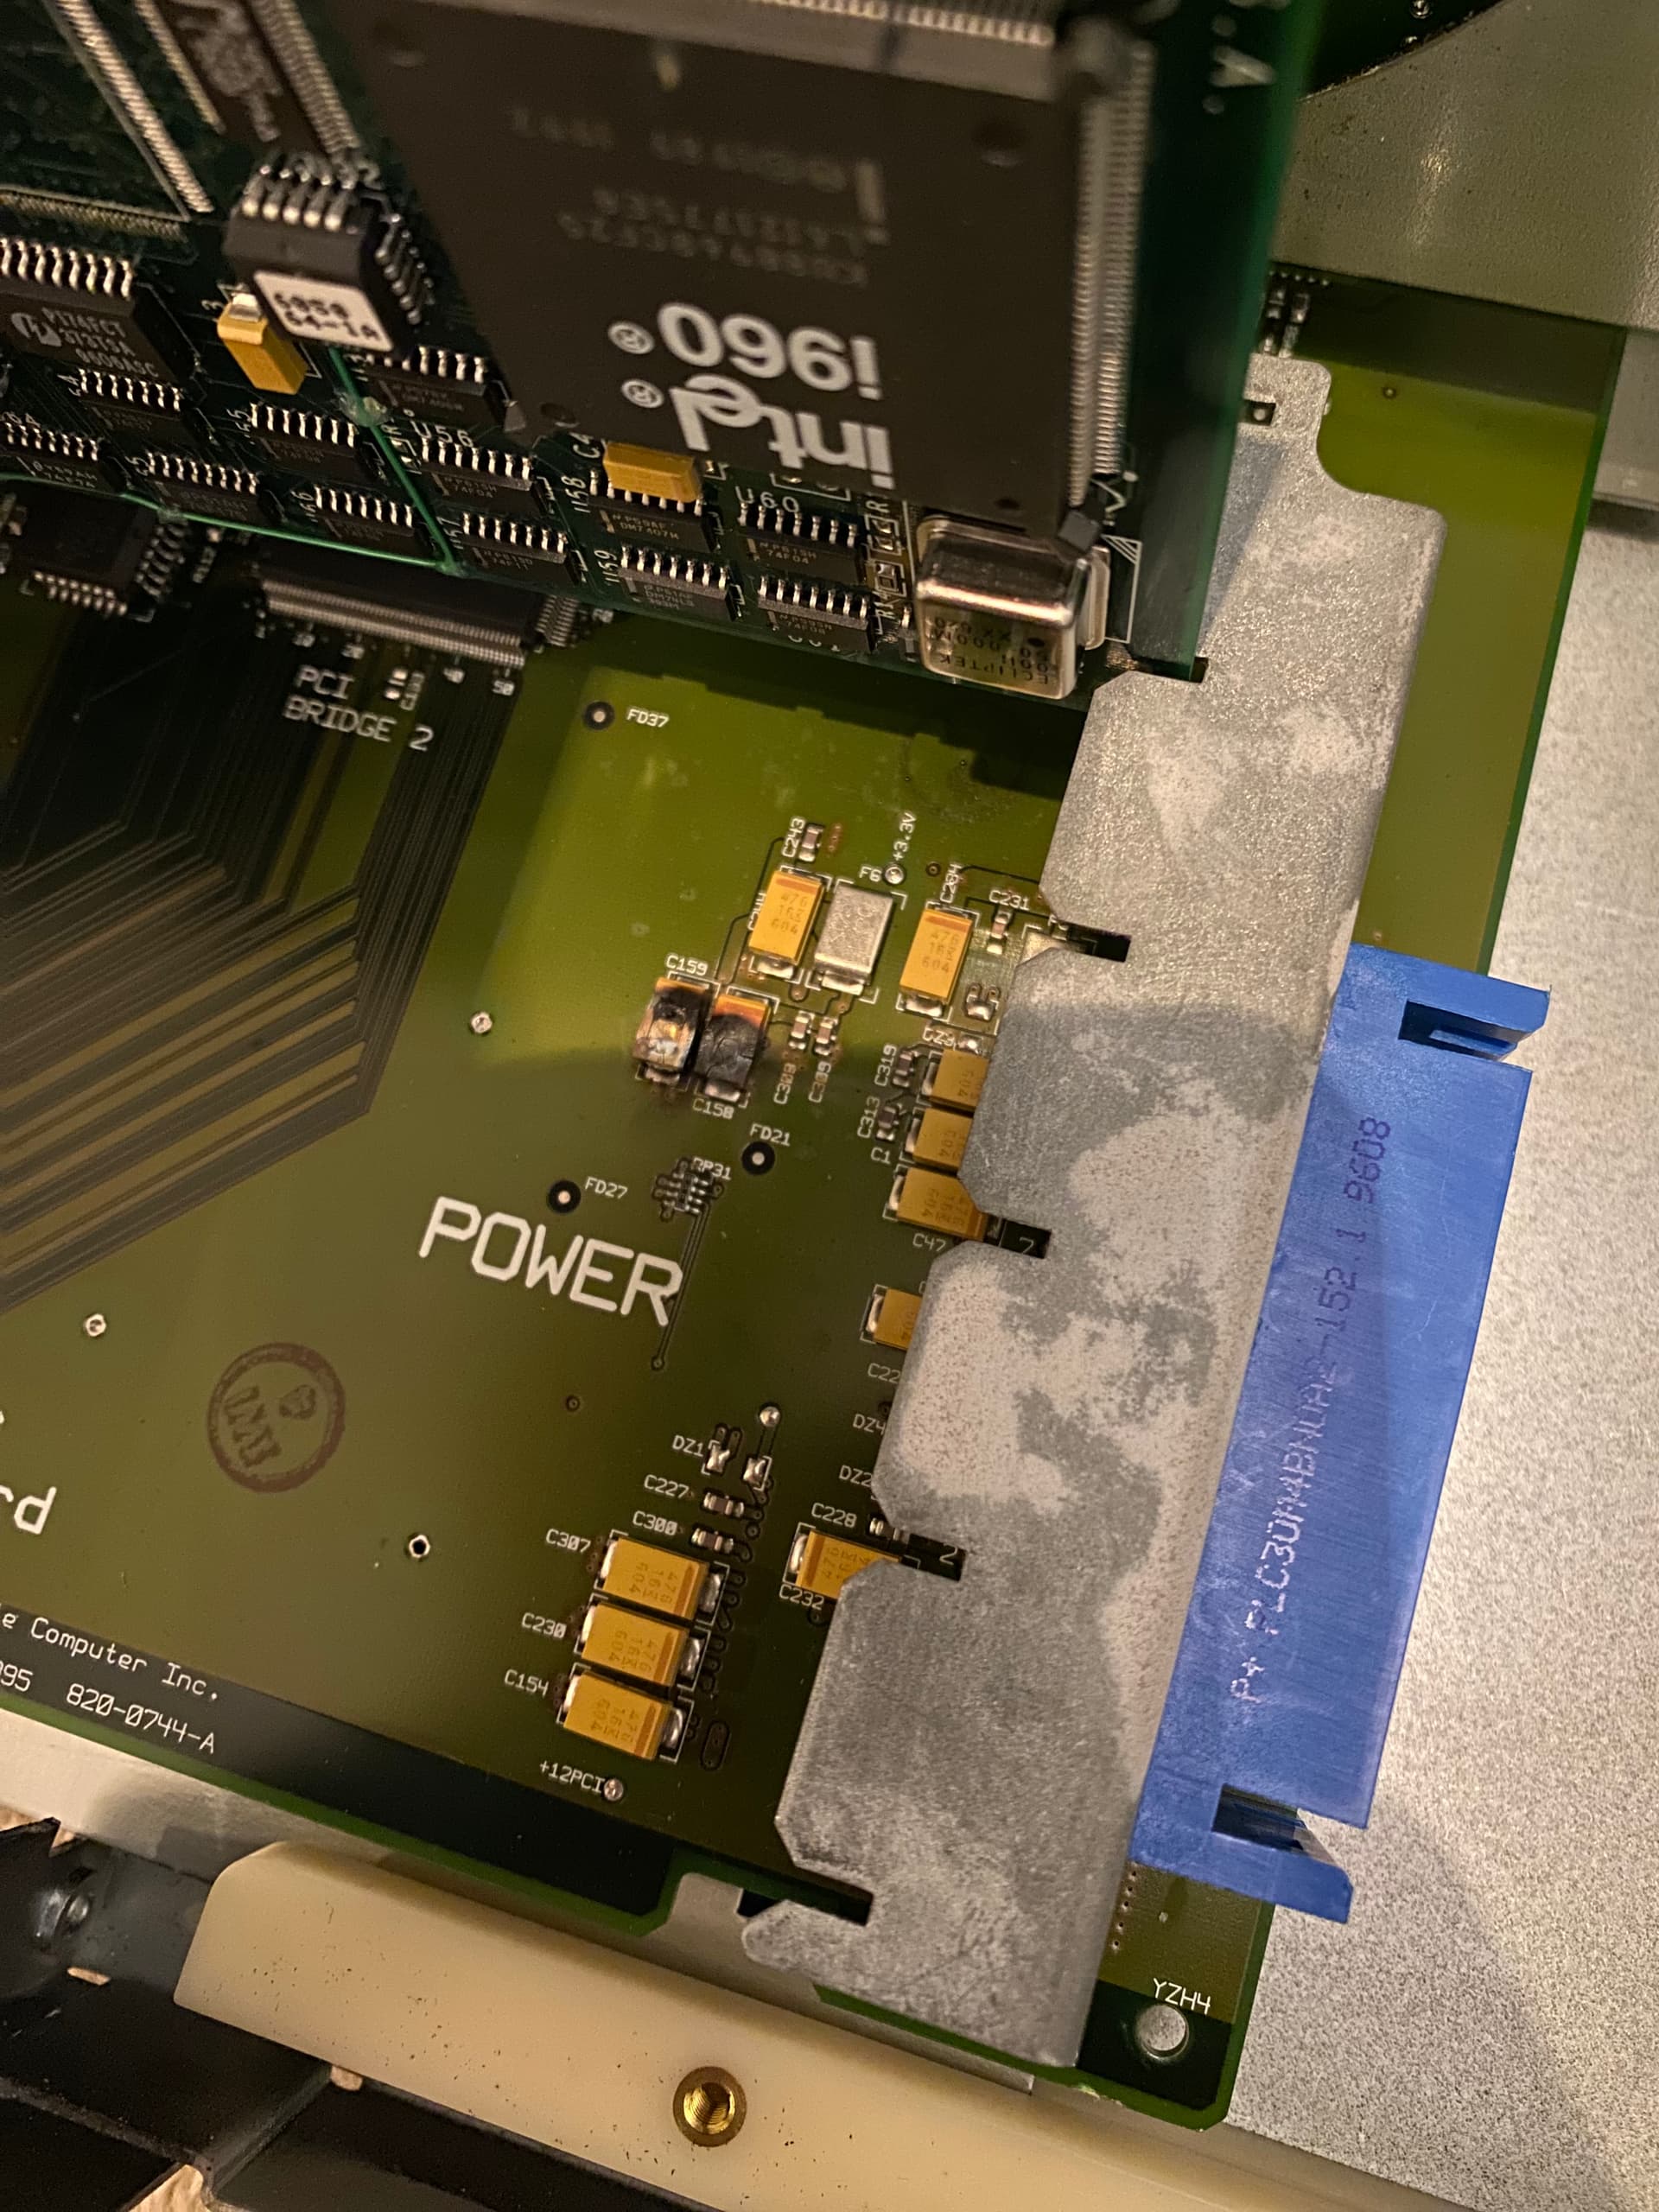
The early PSU (serial 000199?) which Apple pinched from the 9600 series for this machine is putting out some terrifying Voltage over 16v after every 12v tantalum 47uf 16v capacitor unilaterally and together explode.
Another unit with an early power supply on another test board does the same thing… what on earth is going on!
The short is the only thing that stopped this board from blowing up as well…
So a logic board repair and two mezzanines later, I raid my 9600/200MP for a known good psu… only to find someone dudded me- the unit has a 300mhz Sonnet upgrade processor installed… BOO.
Well anyway, same Delta PSU later - in the 98k serial region the ANS turns on, and the same result. But the Hd spins now.
A mess about and try another logic board and it works. The new logic board I have seems defective, even with the bodge work…. Is there other chips, traces or modifications to the ANS board to make it work in the prototype?
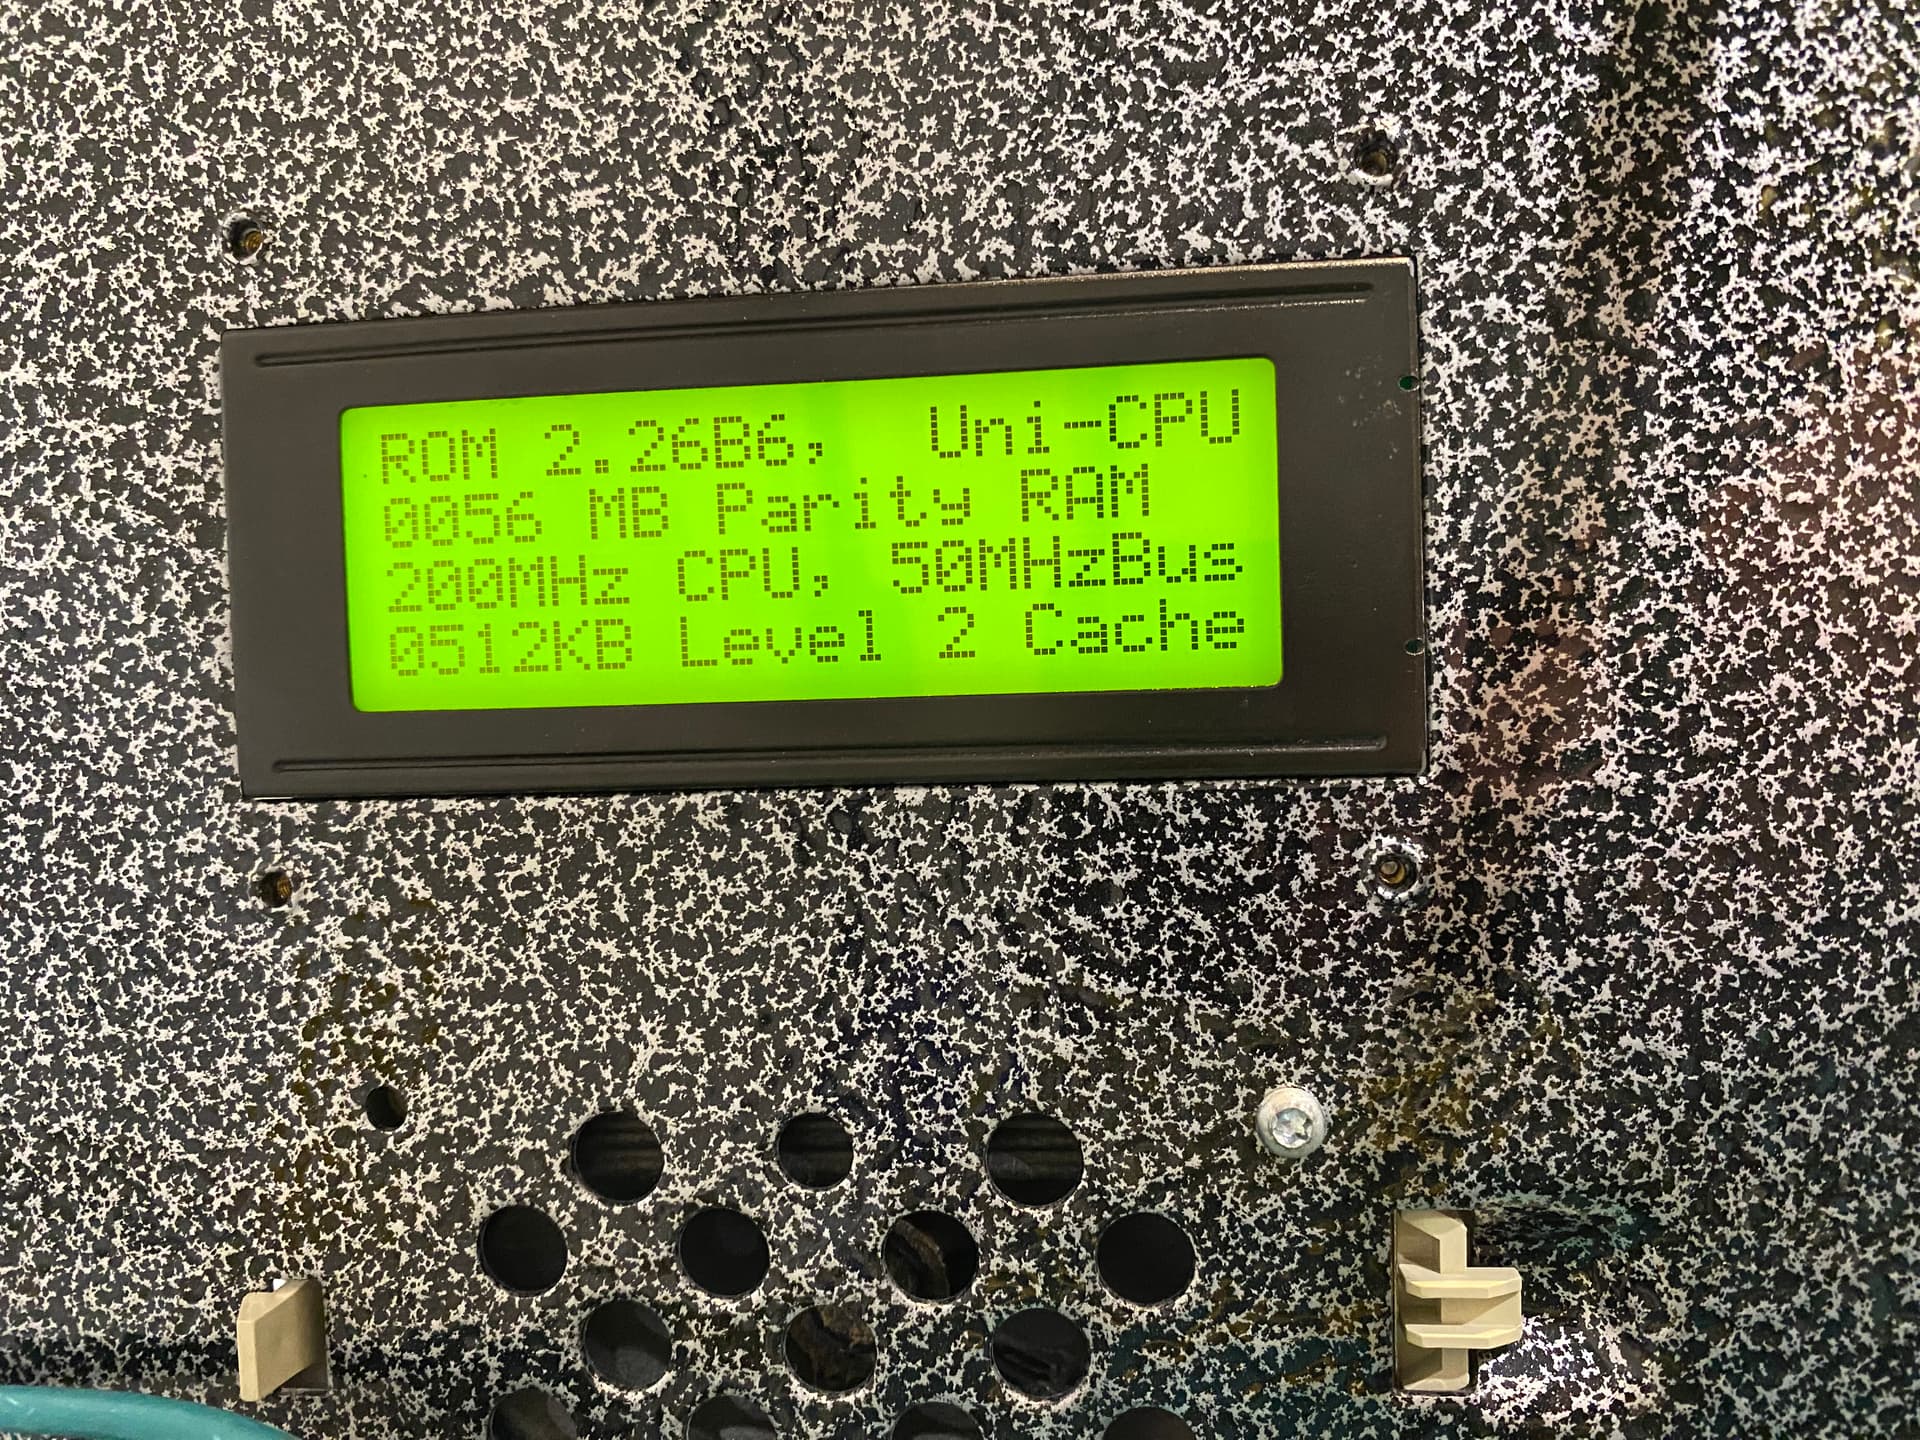
Either way, I have an ANS 300 working.
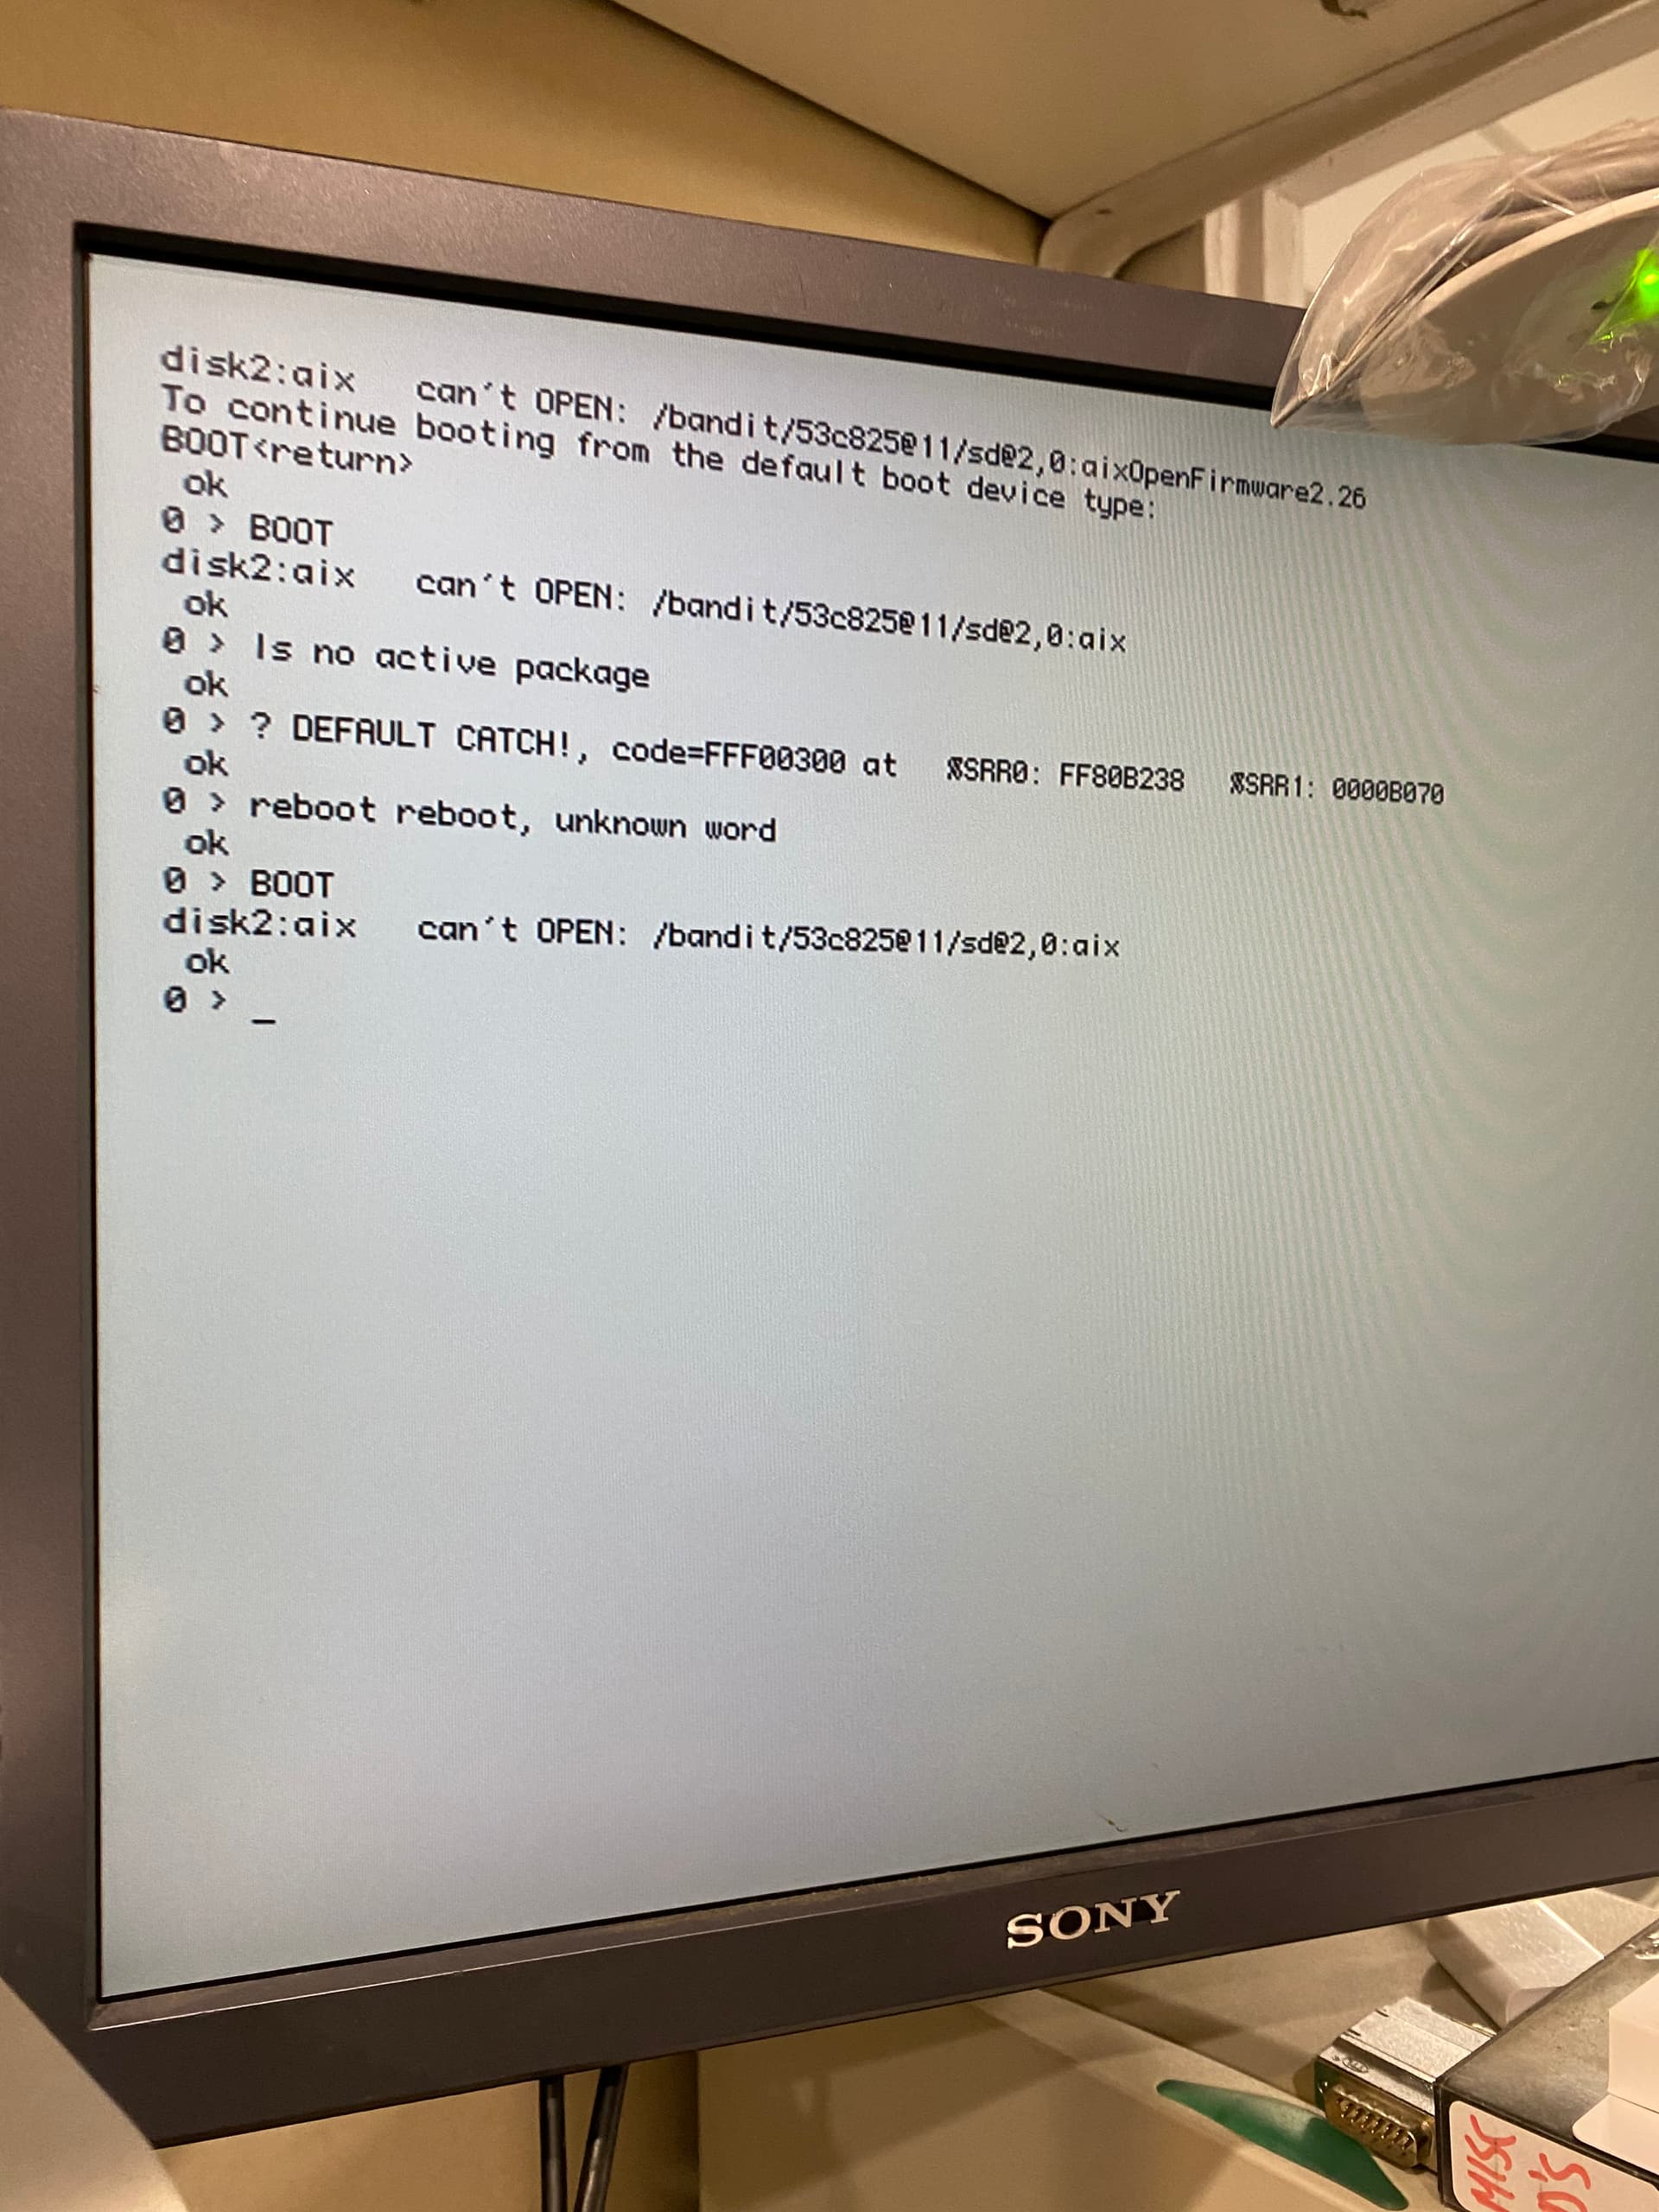
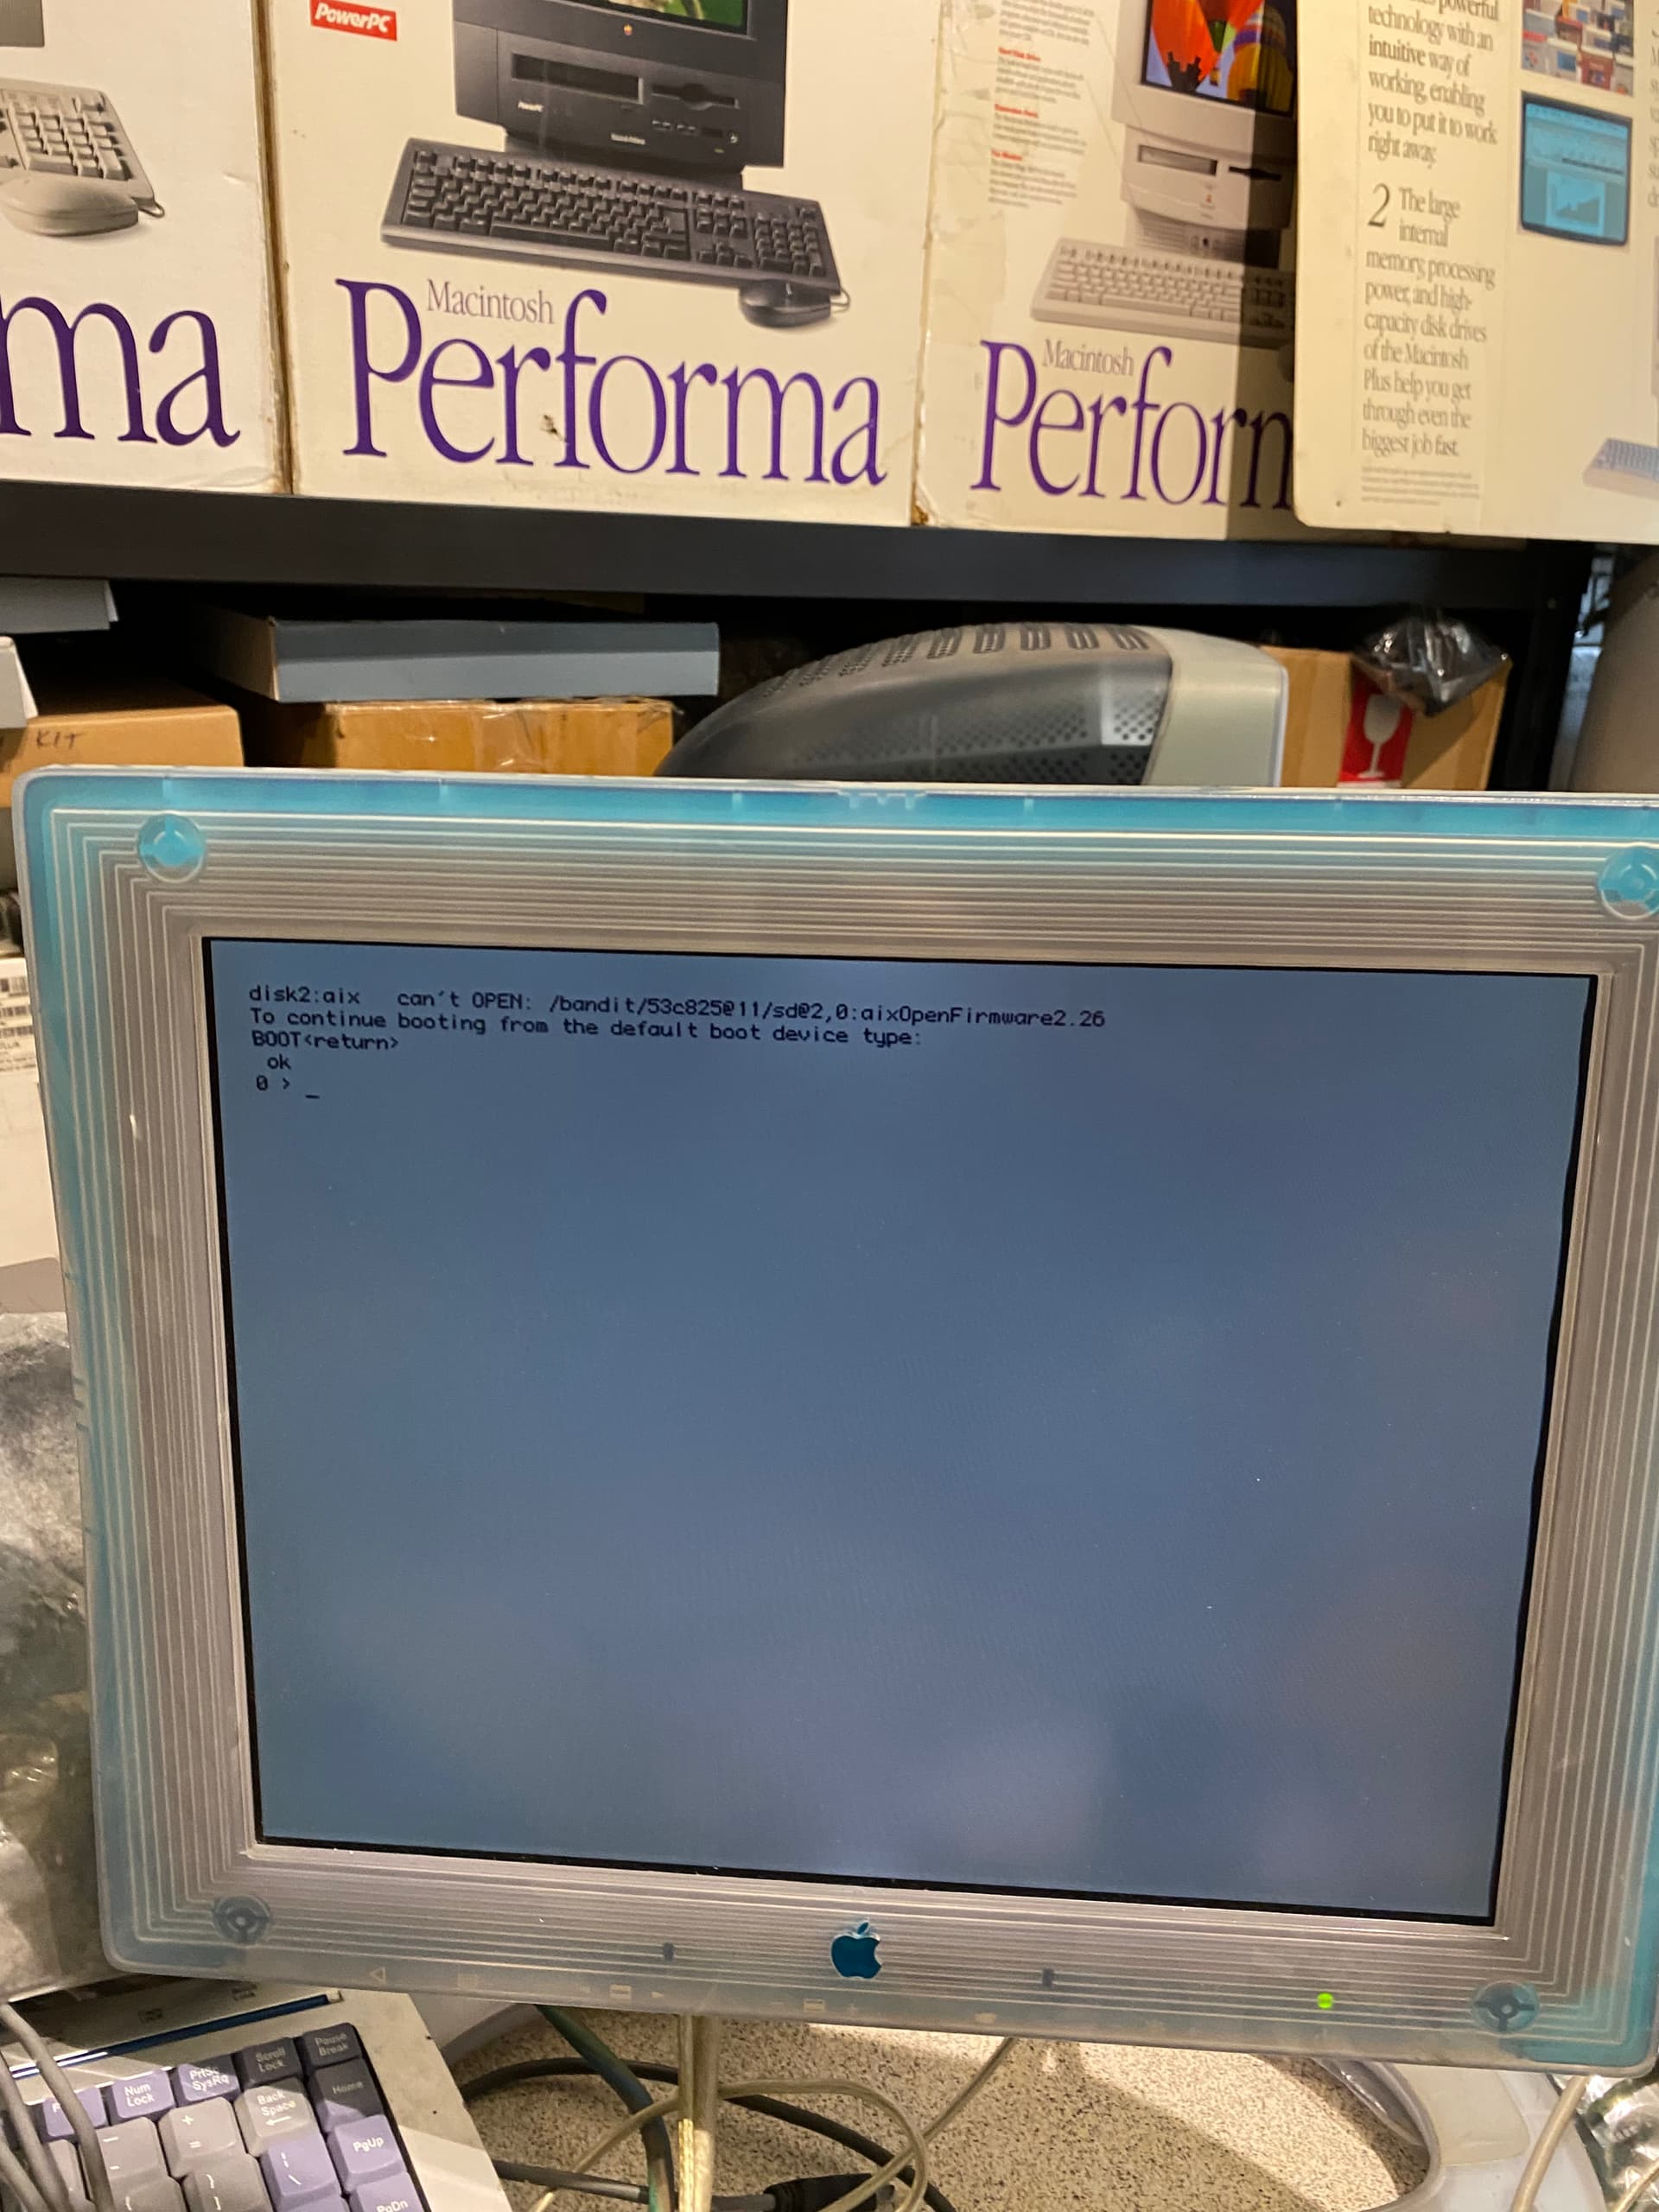
Now it can’t find the boot device as it’s been sitting off for 25 years… now to learn how to set the AIX boot device from the ROM command prompt- this will not be easy methinks!

2 Likes
Trying to get the 12v rails tested, found shorting the Yellow and Purple pins kicks the power supply on the DPS-360FB Delta 614-0062
5V is testing but 3.3v and 12v are running at 1/3-1/2 their rated voltage including on a good PSU.
What am I missing
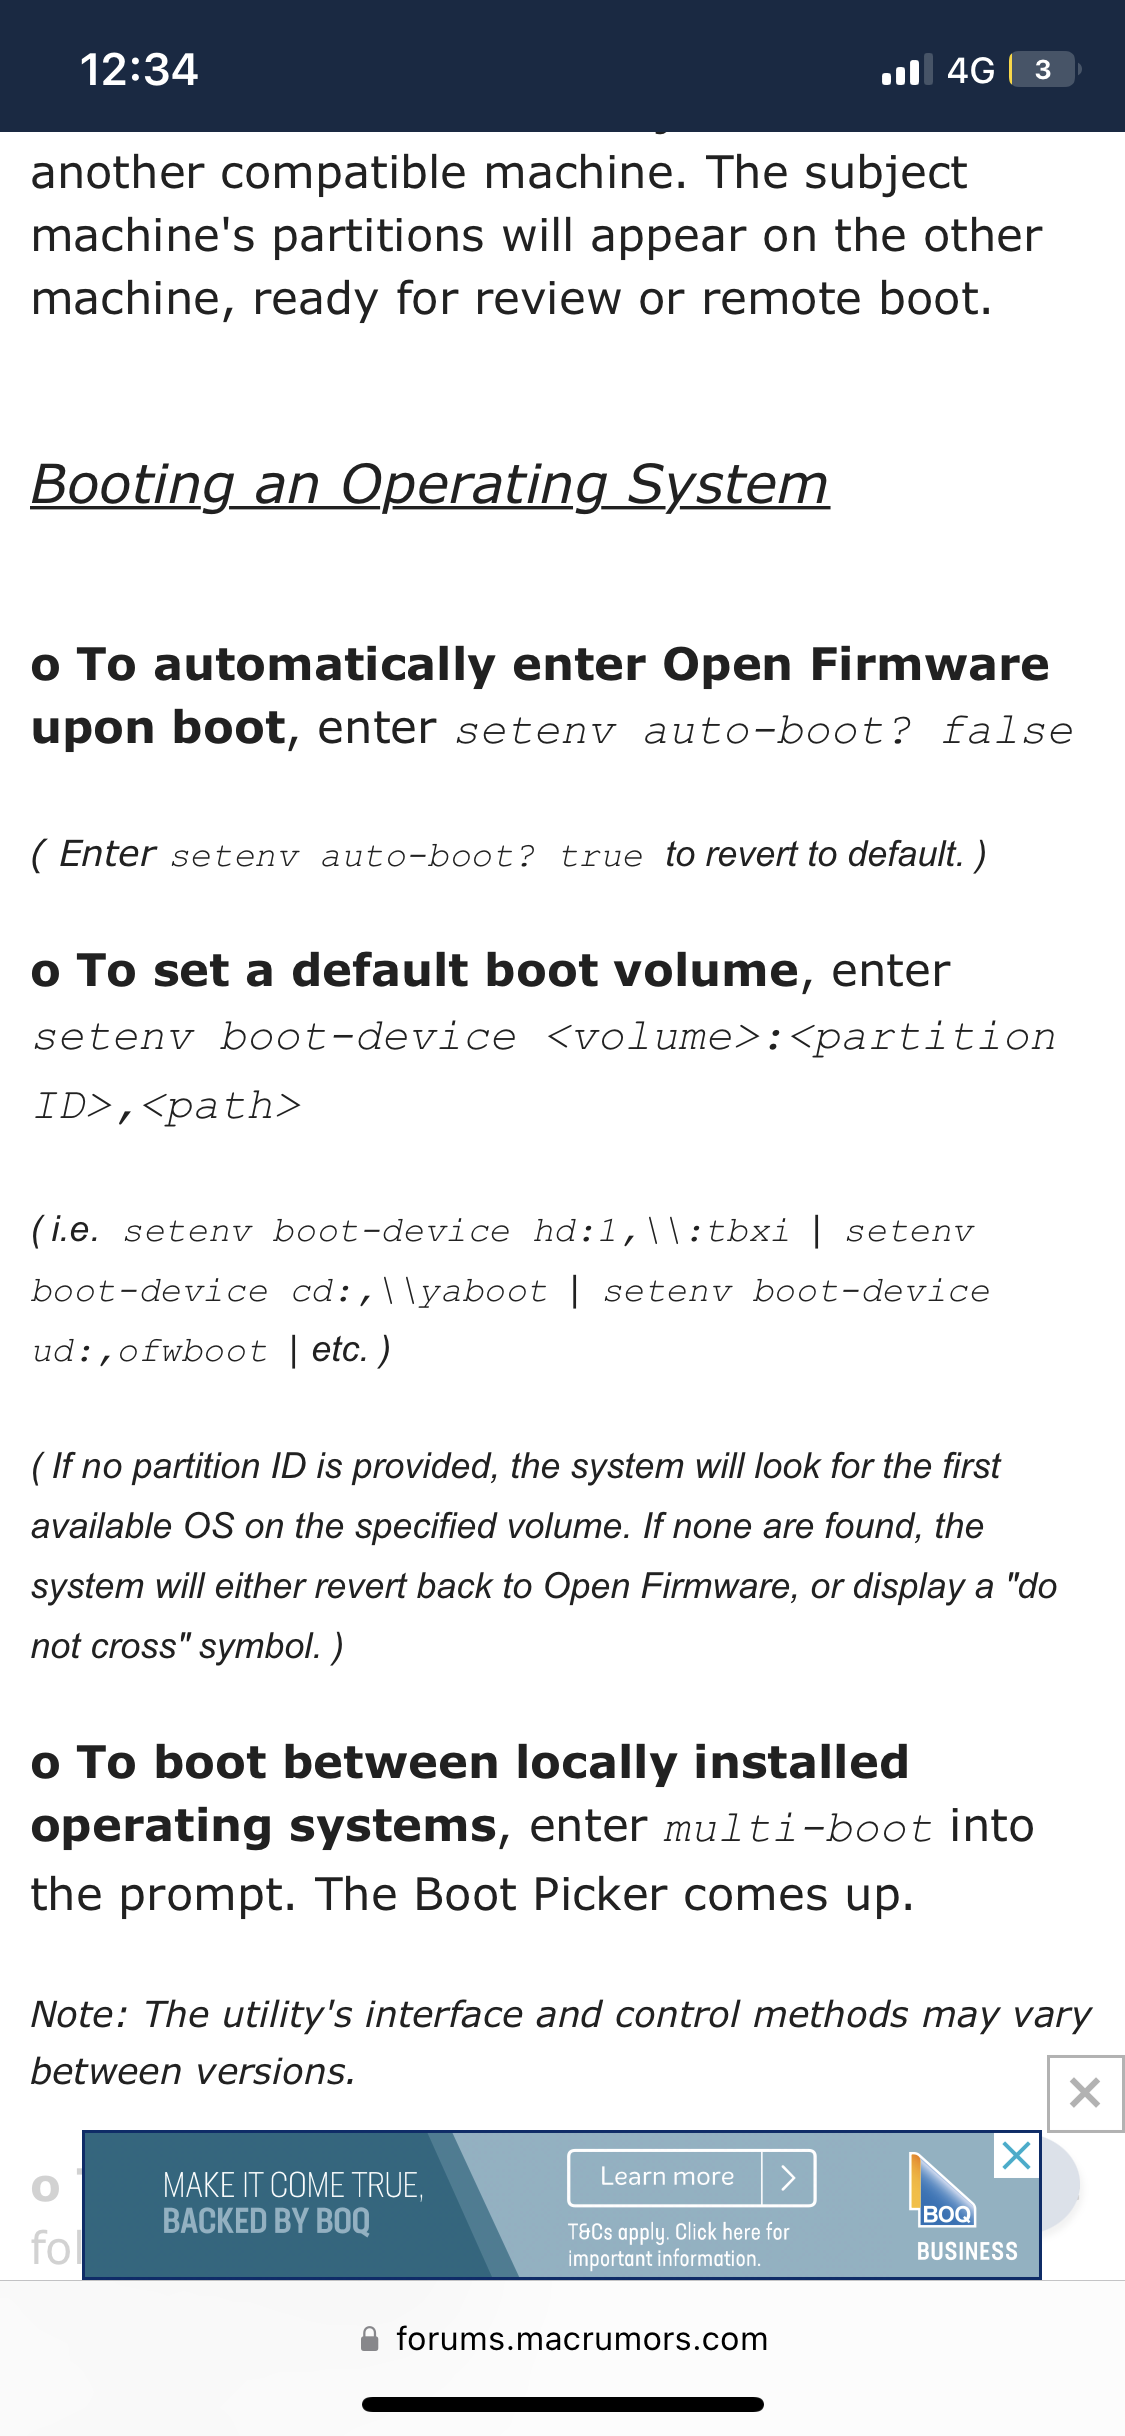
Now to learn Open Firmware, the default BIOS/EFI type boot system for the ANS which is a weird beast…
Digging through CD’s I find this resource to help, which weirdly isnt in the manuals
To start up Open Firmware, hold down these keys while the server is
restarting:
Command-Option-O-F
Enter Open Firmware commands at the >ok prompt. Separate each command
by one or more spaces. A summary of general commands available in this
implementation of the IEEE standard is provided at the end of this section.
Using Open Firmware
These commands provide low-level information about your Network Server:
printenv
Displays configuration settings stored in NVRAM. For example,
one configuration setting specifies the boot path for the
operating system. This setting is named boot-device. There is
also a setting named diag-device which identifies the boot path
for loading diagnostics when the server key switch is in the left
(service) position.
The configuration setting name appears in the left column, the
current setting appears in the middle column, and the default
setting is in the right column. Use the set-default command to
restore default settings when appropriate. If you encounter
difficulties starting up the Network Server operating system,
try setting defaults. Also, you should copy down the current
settings after you install the operating system. If you later
experience problems starting up the operating system, you can
use printenv to check the settings using this command to
determine verify the configuration settings.
devalias
Displays name aliases to devices stored as properties in the
device tree. A name alias is an abbreviated way of referring to
a device path name. For example, to boot the Network Server
Diagnostic Utility, you specify the name alias for the floppy
drive, fd:
boot fd:diags
probe-scsi1
Searches the Fast and Wide SCSI bus 0 and for each device
attached displays the SCSI ID, the type of device, and other
pertinent information such as the device’s firmware version
number. Use this command to verify that the devices in the top
four drive trays are correctly recognized by the Network
Server.
probe-scsi2
Searches the Fast and Wide SCSI bus 1 and for each device
attached displays the SCSI ID, the type of device, and other
pertinent information such as the device’s firmware version
number. Use this command to verify that the devices in the
bottom four drive trays and the two rear bracket-mounted
internal drives (Network Server 700 only) are correctly
recognized by the Network Server.
dump-device-tree
Displays the device tree, which lists all features and
devices in the Network Server encoded into a specific data
format. Use the spacebar to control scrolling of the list.
The following command are used to change configuration settings stored in
NVRAM. The name-alias variable is the setting name. The value variable
can be a number, logical name (true, false), or a sequence of text.
setenv name-alias value
Use this command to change the specified
configuration setting to the indicated value. For example, to change the OS boot device:
setenv boot-device disk3:aix
This adds disk 6 to the boot search path:
setenv diag-device cd disk6 fd:diags
set-default name-alias
This command restores the default of the named
configuration setting. This example restores the boot device setting to disk2:aix:
set-default boot-device

This command restores the default diagnostic device to disk2:aix:
set-default diag-device
set-defaults
Restores the factory defaults for all the configuration settings.
Configuration Settings to Check in Case of Problems
If you encounter problems when the operating system starts up, check these
configuration settings:
auto-boot?
Must be true in order to enable automatic booting of the
operating system or the diagnostics when the key switch is the
in the service position.
load-base
The Network Server Diagnostic Utility expects this number to be
4000 or greater.
diag-device
In order to be able to boot the Network Server Diagnostic
Utility from the floppy drive, the value of diag-device must
include fd:diags. Any device preceding fd:diags must be
unmounted or removed. For example, the default setting for
diag-device is cd fd:diags. This means that the search order for
a bootable device begins with the CD-ROM drive and proceeds to
the floppy drive only if the CD-ROM drive does not contain a
bootable CD. You must remove the CD-ROM disk in this case in
order to boot the floppy drive.
boot-device
The factory default for booting the operating system is disk2
or the hard drive contained in drive tray three (Fast and Wide
bus 0 SCSI ID 2). If this value becomes corrupt or changes,
the AIX operating system won’t boot. If you are
unable to restore this setting to the default or you cannot
change the setting with the setenv boot-device command, then
you may still be able to boot AIX by manually entering the boot
command: boot disk2:aix
Open Firmware Command Summary
Command Stack Comment
Changing the Number Base & Number Input/Output Commands
decimal ( – ) Set the number base to 10.
d# number ( – n) Interpret the next number in decimal.
hex ( – ) Set the number base to 16.
h# number ( – n) Interpret the next number in hex.
u. (n – ) Display the unsigned number.
.d (n – ) Display n in decimal without
changing number base system.
.h (n – ) Display n in hex without changing base.
. (n – ) Display a number in the Current base.
.s ( – ) Display contents of data stack.
Memory Access Commands
! (n adr16 – ) Store a 32-bit Number at adr16,
16-bit aligned.
@ (adr16 – n ) Fetch a 32-bit Number from adr16.
c! (n adr – ) Store low byte of n at adr.
c@ (adr – n ) Fetch a byte from adr.
cpeek (adr – [byte] ok?) Fetch the byte at adr.Return the data
and true if the read access was
successful. Return false if an error
occurred.
cpoke (byte adr – ok?) Store the byte to adr.
Return true if the write access was
successful. Return false if an error
occurred.
comp (adr1 adr2 len – n) Compare two byte arrays, n=0 if
arrays are identical, n=1 if first byte
that is different is greater in array#1,
n= -1 otherwise.
dump (adr len – ) Display len bytes of memory from adr.
fill (adr size byte – ) set size bytes of memory to byte.
l! (n adr32 – ) Store a 32-bit number at adr32, 32-bit
aligned.
l@ (adr32 – n) Fetch a 32-bit number from adr32.
lpeek (adr – [long] ok?) Like cpeek, but 32-bit access.
lpoke (long adr – ok?) Like cpoke, but 32-bit access.
move (adr1 adr2 n – ) Copy n bytes from adr1 to adr2.
w! (n adr16 – ) Store a 16-bit number at adr16.
w@ (adr16 – n) Fetch a 16-bit number from adr16.
wpeek (adr – [word] ok?) Like cpeek, but 16-bit access.
wpoke (word adr – ok?) Like cpoke, but 16-bit access.
Memory Mapping Commands
do-map (phys virt size mode – )Map a region of 32-bit physical
address at phys to a region of 32-bit
virtual address at virt, the mode is 0 for
Memory and 0x28 for input/output normally.
Open Firmware turns on MMU translation and
uses virtual address for Memory and I/O
access. The physical addr has to be mapped
before access. The mapping table can be
seen from the property ‘translations’ under
the cpu node ‘/PowerPC,601’ or
‘/PowerPC,604’. eg. fa000000 dup 1000 28
do-map
do-unmap ( virt size – ) Unmap the previous mapped
region.
PCI Registers Access Commands
rb! (n adr – ) Store low byte of n at adr.
rb@ (adr – n) Fetch a byte from adr.
rl! (n adr32 – ) Store a 32-bit number at adr32,
32-bit aligned.
rl@ (adr32 – n ) Fetch a 32-bit number from adr32.
rw! (n adr16 – ) Store a 16-bit number at adr16.
rw@ (adr16 – n ) Fetch a 16-bit number from adr16.
NOTE: For big endian registers use xb!, xb@, xl!, xl@,
rw!, rw@ instead. If the (big endian) register access doesn’t
require special instruction such as eieio, it may use c!, c@,
l!, l!, w!, w@.
Stack Manipulation Commands
bounds (start-adr size – end-adr start-adr)
This is equal to:over + swap
2drop (n1 n2 – )
Remove two items from the stack.
2dup (n1 n2 – n1 n2 n1 n2)
Duplicate two items.
clear (??? – )
Empty the stack.
drop (n – )
Remove one item from the stack.
dup (n – n n)
Duplicate the top stack item.
over (n1 n2 – n1 n2 n1)
Copy the second item to the top.
rot (n1 n2 n3 – n2 n3 n1)
Rotate three stack items.
swap (n1 n2 – n2 n1)
Exchange the top two items.
Arithmetic Commands
- (n1 n2 – n3) Multiply n1 * n2
- (n1 n2 – n3) Add n1 + n2
- (n1 n2 – n3) Subtract n1 - n2
/ (n1 n2 – n3) Divide n1 / n2 (truncated)
<< (n1 n2 – n3) Left shift n1 by n2 bits
(n1 n2 – n3 ) Right shift n1 by n2 bits
and ( n1 n2 – n3) Bitwise logical and
mod (n1 n2 – n3) Remainder of n1 / n2
not (n1 – n2) Bitwise logical inversion
or (n1 n2 – n3) Bitwise logical or
xor (n1 n2 – n3) Bitwise logical exclusive or.
Examining and Creating Device Aliases
devalias Display all current device aliases.
devalias Display the device path name
corresponding to .
devalias Define an representing
the .
Device Tree Browsing Commands
dump-device-tree Dump the whole system device tree.
.properties Display the names and values of the
current device node’s properties.
dev Select the indicated device node,
making it the current node.
dev Search for a node with given name in the
subtree below the current node, and
choose the first such node found.
dev … Choose the device node that is the parent
of the current node.
dev / Choose the root machine node.
show-devs Display all the devices directly
beneath the given device. For example,
show-devs /bandit
device-end Leave no node selected.
ls Display children of the current node.
pwd Display the current device path name.
words Display the names of the current node’s
methods.
select-dev (str,len – ) Select the desired device node in order
to execute the device methods under it.
This requires all nodes of the desired
device path have open method.
unselect-dev Unselect the previous selected device
node.
If-then-else Commands
else ( – ) Execute the following code if ‘if’
failed.
if (flag – ) Execute the following code if flag is true.
then ( – ) Terminate if … then … else.
Begin (conditional) Loop Commands
again ( – ) End a begin … again infinite loop.
begin ( – ) Begin a begin … while … repeat,
begin … until, or begin … again loop.
repeat ( – ) End a begin … while … repeat loop.
until (flag – ) Continue executing a begin … until loop
until flag is true.
while (flag – ) Executing a begin … while … repeat
loop while flag is true.
Do (Counted) Loop Commands
+loop (n – ) End a do … +loop construct; add n to
loop index and return to do (if n < 0,
index goes from start to end inclusive).
do (end start – ) Begin a do … loop. Index goes from
start to end-1 inclusive. Example:
10 0 do i . loop
i ( – n) Loop index.
j ( – n) Loop index for next enclosing loop.
leave ( – ) Exit from do … loop.
loop ( – ) End of do … loop.
Comparison Commands
< (n1 n2 – flag) True if n1 < n2.
<= (n1 n2 – flag) True if n1 <= n2.
<> (n1 n2 – flag) True if n1 <> n2.
= (n1 n2 – flag) True if n1 = n2.
(n1 n2 -- flag) True if n1 > n2.= (n1 n2 – flag) True if n1 >= n2.
Controlling Text Input Commands & Display Text Output Commands
ascii ( – n)
Get numerical value of first ASCIIcharacter of next word.
key ( – char)
Read a character from the assigned input device’s keyboard.
key? ( – flag)
True if a key has been typed on the input device’s keyboard.
cr ( – )
Go to the next line on the display.
File Loading Commands
boot [specifiers]
Boot file from specified source.
dl
Load a Forth file over a serial line.
init-program
Initialize to execute a binary file.
load [specifiers]
Load data from specified device.
NOTE: Use boot (or load) one of these four ways:
(1) boot
(2) boot
(3) boot
(4) boot
NOTE: When using the floppy drive (name-alias is fd), the disk must
be high density 1.4 MB formatted for the MacOS or DOS environments.
(1) For a MacOS floppy, is fd:
(2) For a DOS floppy, is fd:,
Defining Words
: ( – ) Start creating a new command word.
; ( – ) Finish creating the new word.
Manipulating Text Strings
" "( – adr len ) Collect an input string.
Redirecting I/O
input (device-str – )
Select the indicated device for console input, device may be a device name-alias.
io (device-str – )
Select device for subsequent input and output. Eg. ttyb:9600
output (device-str – )
Select the indicated device for console output. Eg. screen output
Emergency Keyboard Commands
NOTE: Hold down keys during Open Firmware power on sequence.
Command-Option-O-F Abort auto booting if auto-boot? is true.
Command-Option-P-R Reset NVRAM contents to default values.
PowerPC Register Commands
%r0 through %r31 ( – value)Return saved copy of the given register.
%srr0 & %srr ( – value) Return saved copy of Save/Restore reg.
%sprg0 through %sprg3( – value) Access saved copies of SPRG registers.
%cr ( – value) Return saved copy of Condition Register.
%ctr ( – value) Return saved copy of Counter Register.
%lr ( – value) Return saved copy of Link Register.
%xer ( – value) Return saved copy of XER register.
msr@ ( – value) Return current value of Machine State Register.
msr! (value --) Set new value of Machine State Register.
sprg3@ ( – value) Get current interrupt vector pointer.
sprg3! ( value --) Set our interrupt vector pointer.
.registers Display the PowerPC CPU’s saved program state.
Miscellaneous Operation Commands
eject [fd]
Eject the floppy disk from the drive.
get-msecs ( – ms )
Return the approximate current time in milliseconds.
ms ( n – )
Delay for n milliseconds. Resolution is 1 millisecond.
reset-all
Reset the entire system (similar to a power cycle).
NVRAMRC Editor Commands
nvalias
Store the command “devalias ” in NVRAMRC. (The alias persists until the nvunalias or set-defaults commands are executed or NVRAM is
reset.)
nvedit
Enter the NVRAMRC editor. If data remains in the temporary buffer from a previous
nvedit session, resume editing the previous contents. If not, read the contents of NVRAMRC into the temporary buffer and begin editing it.
nvquit
Discard the contents of the temporary buffer without writing it to NVRAMRC.
nvrecover
Recover the contents of NVRAMRC if they have been lost
nvrun
Evaluate the temporary buffer.
nvstore
Copy the contents of the temporary buffer to NVRAMRC; discard the contents of the
temporary buffer.
nvunalias
Delete the corresponding alias from NVRAMRC.
^c (Control-C) Quit nvedit and get back to the ok prompt.
1 Like
I should reference a few facts I have learned:
SCSI PCI Raid card in the Apple Network Server ANS
I couldn’t get probe-scsi1 or probe-scsi2 to do anything but give an error.
So I disconnected the RAID Card and removed it, and the ANS seems to then allow probe-scsi1, probe-scsi2 and probe-scsi0
probe-scsi2 seems to find the CD ROM and internal HD.
I assumed on the ANS 300 prototype that the internal HDD Bay is like the 3rd drive bay on the 700 and is the default boot drive.
The other thing I have learned, is that the PCI Raid card installed in slot one will act as a hardware raid for the internal SCSI bus, but that card in slot 2 or higher will act as an External SCSI raid.
Weirdly my card has the control and two UW68 SCSI cables connected and was in slot 2. I am wondering if this was incorrect… Why would you connect the internal Board SCSI Bus connectors and install in slot two as an external raid…
The 2 and 4th PCI slots are painful to install cards in, as these dev units has rivets right in the way of the cards
1 Like
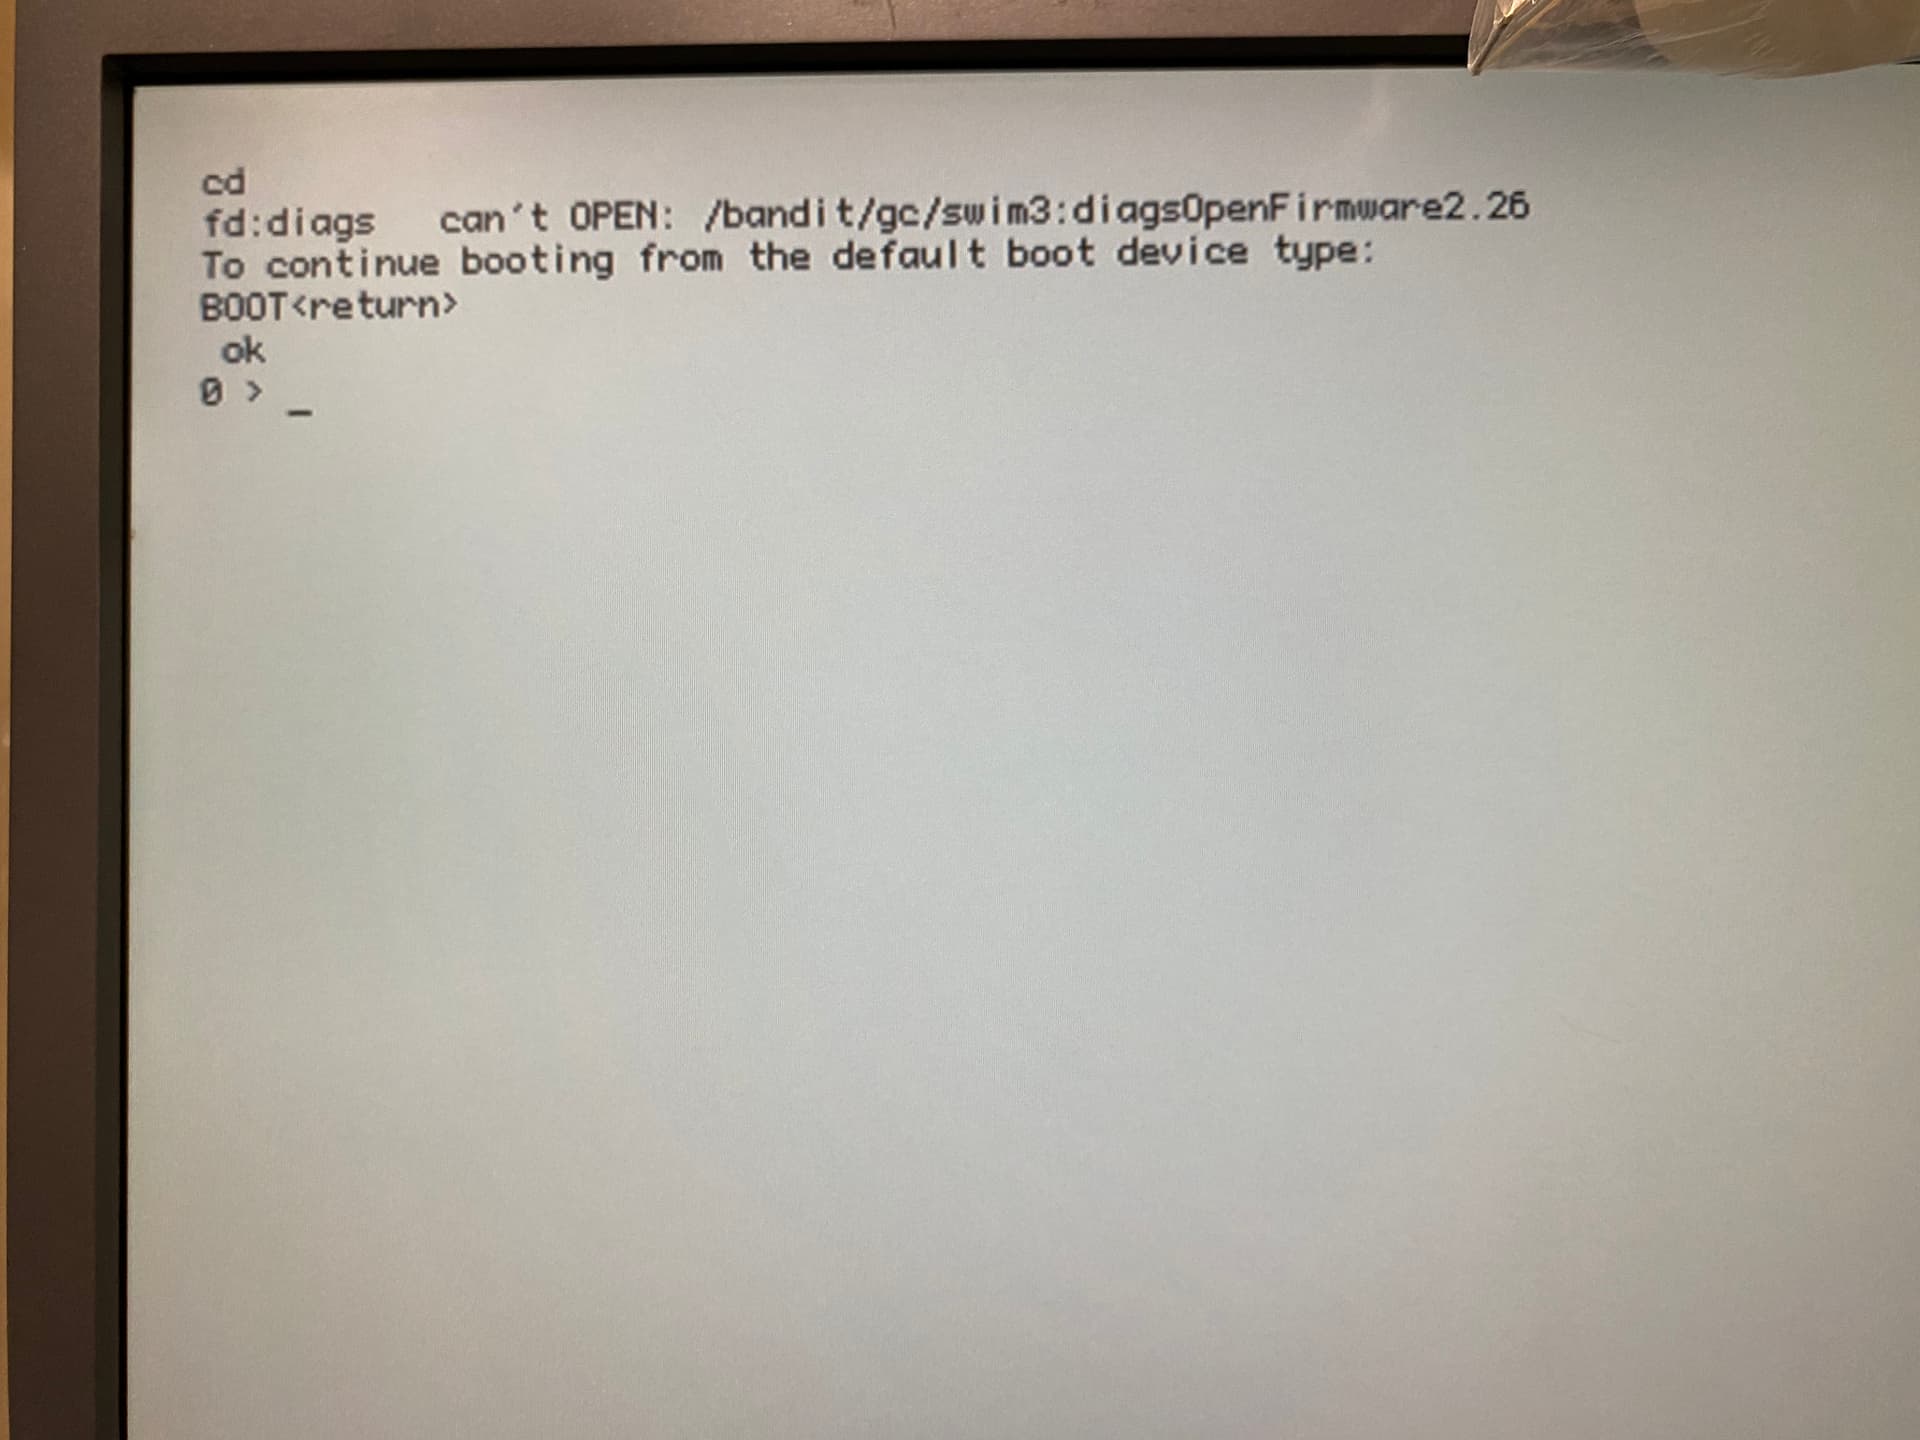
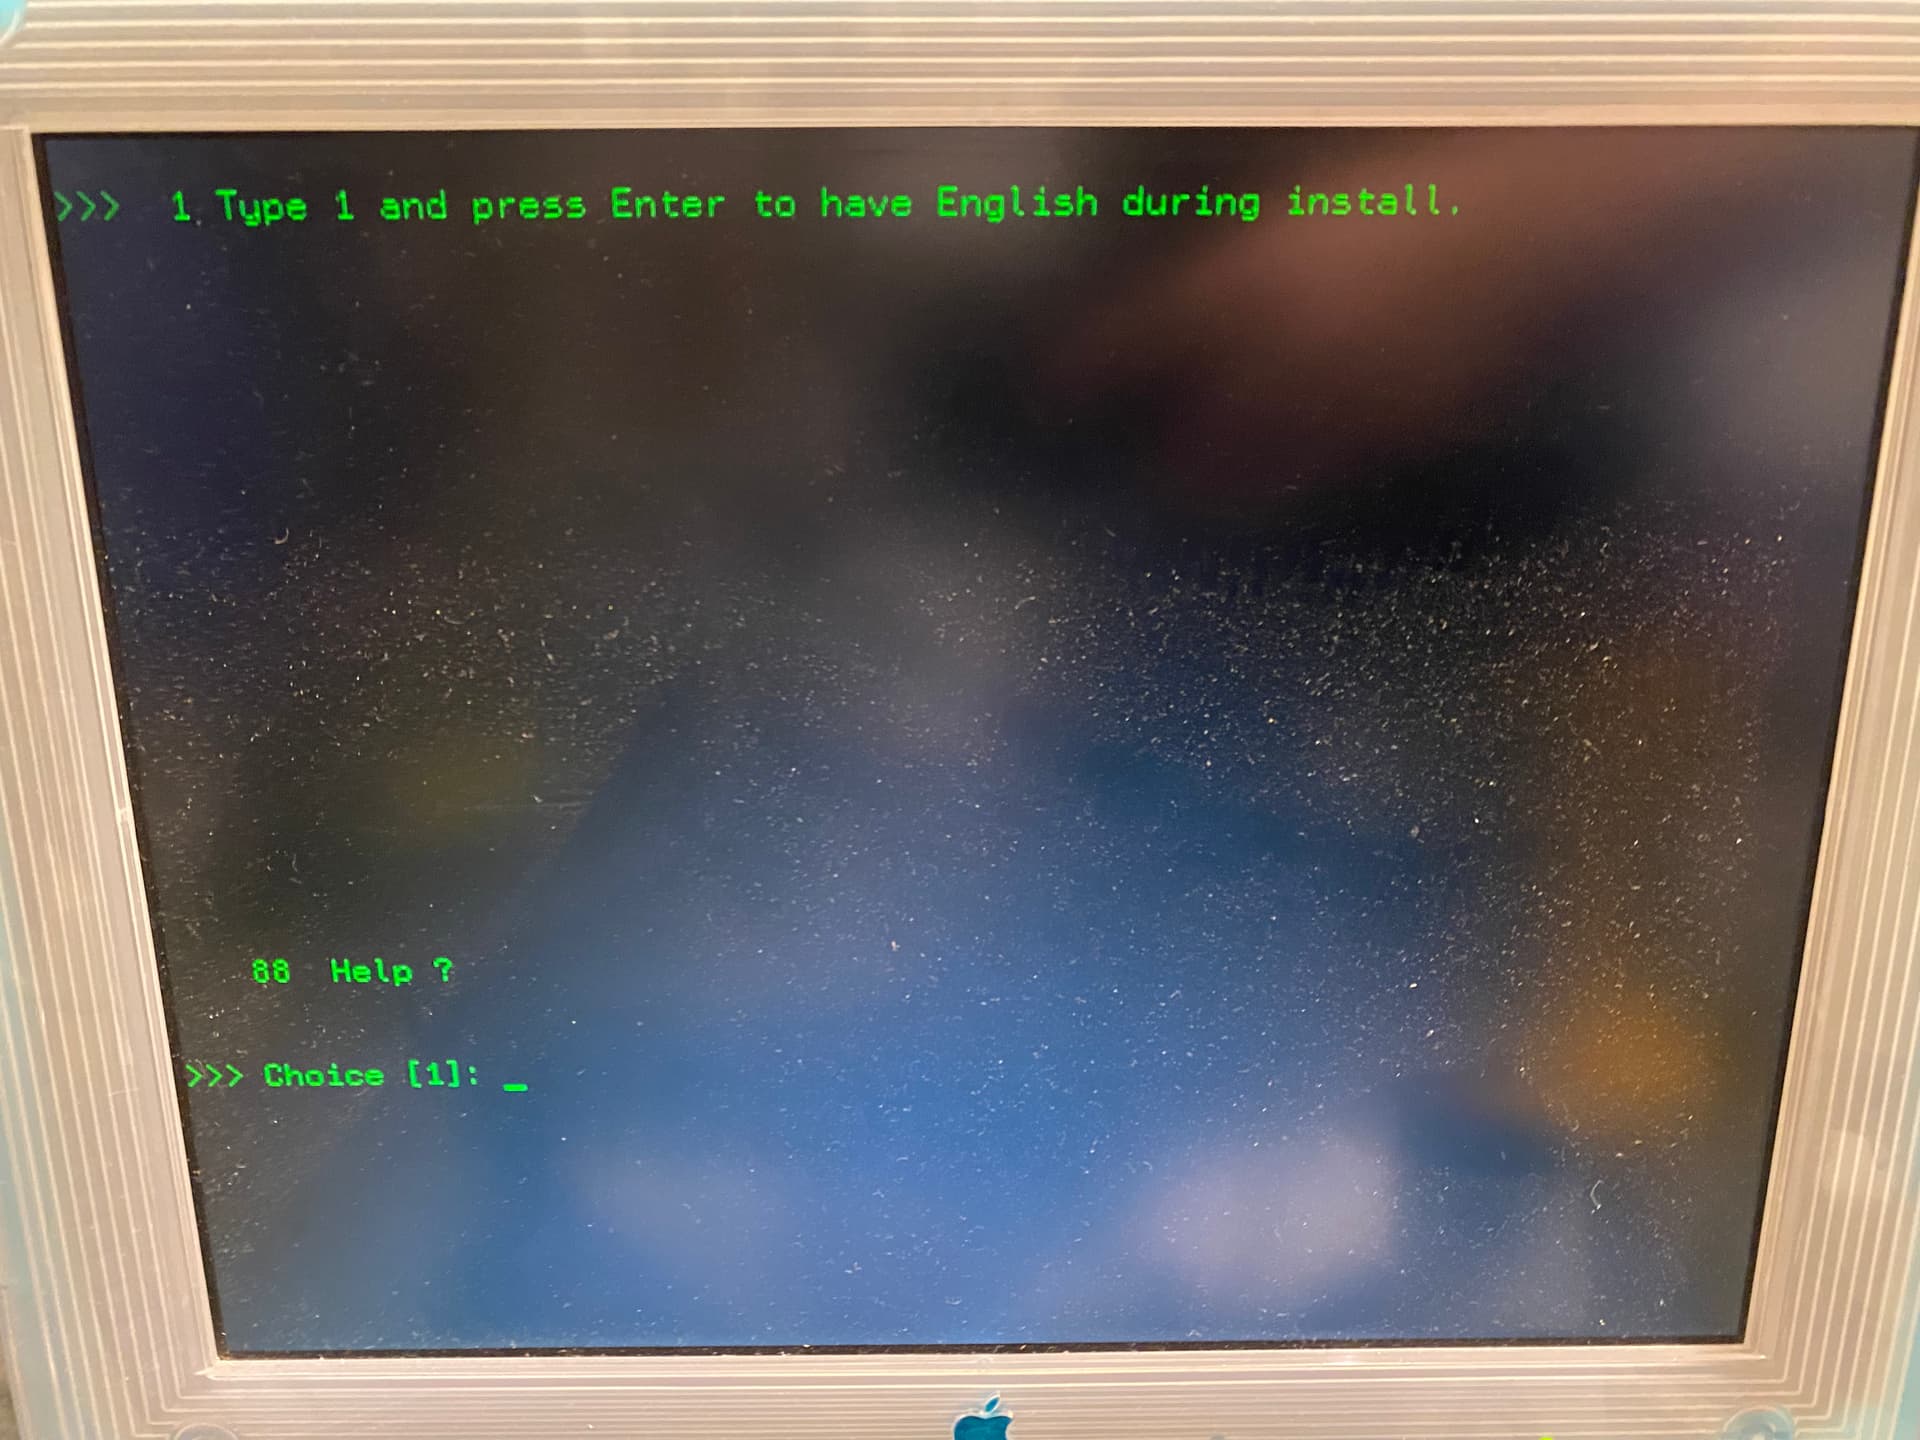
The floppy that wouldn’t boot, seemingly giving an error about the ROM version. It wasn’t. It was a bad floppy!

Booted to the diagnostics disk. Make sure you set the ANS to service mode (key) or otherwise type Boot fd in open firmware.
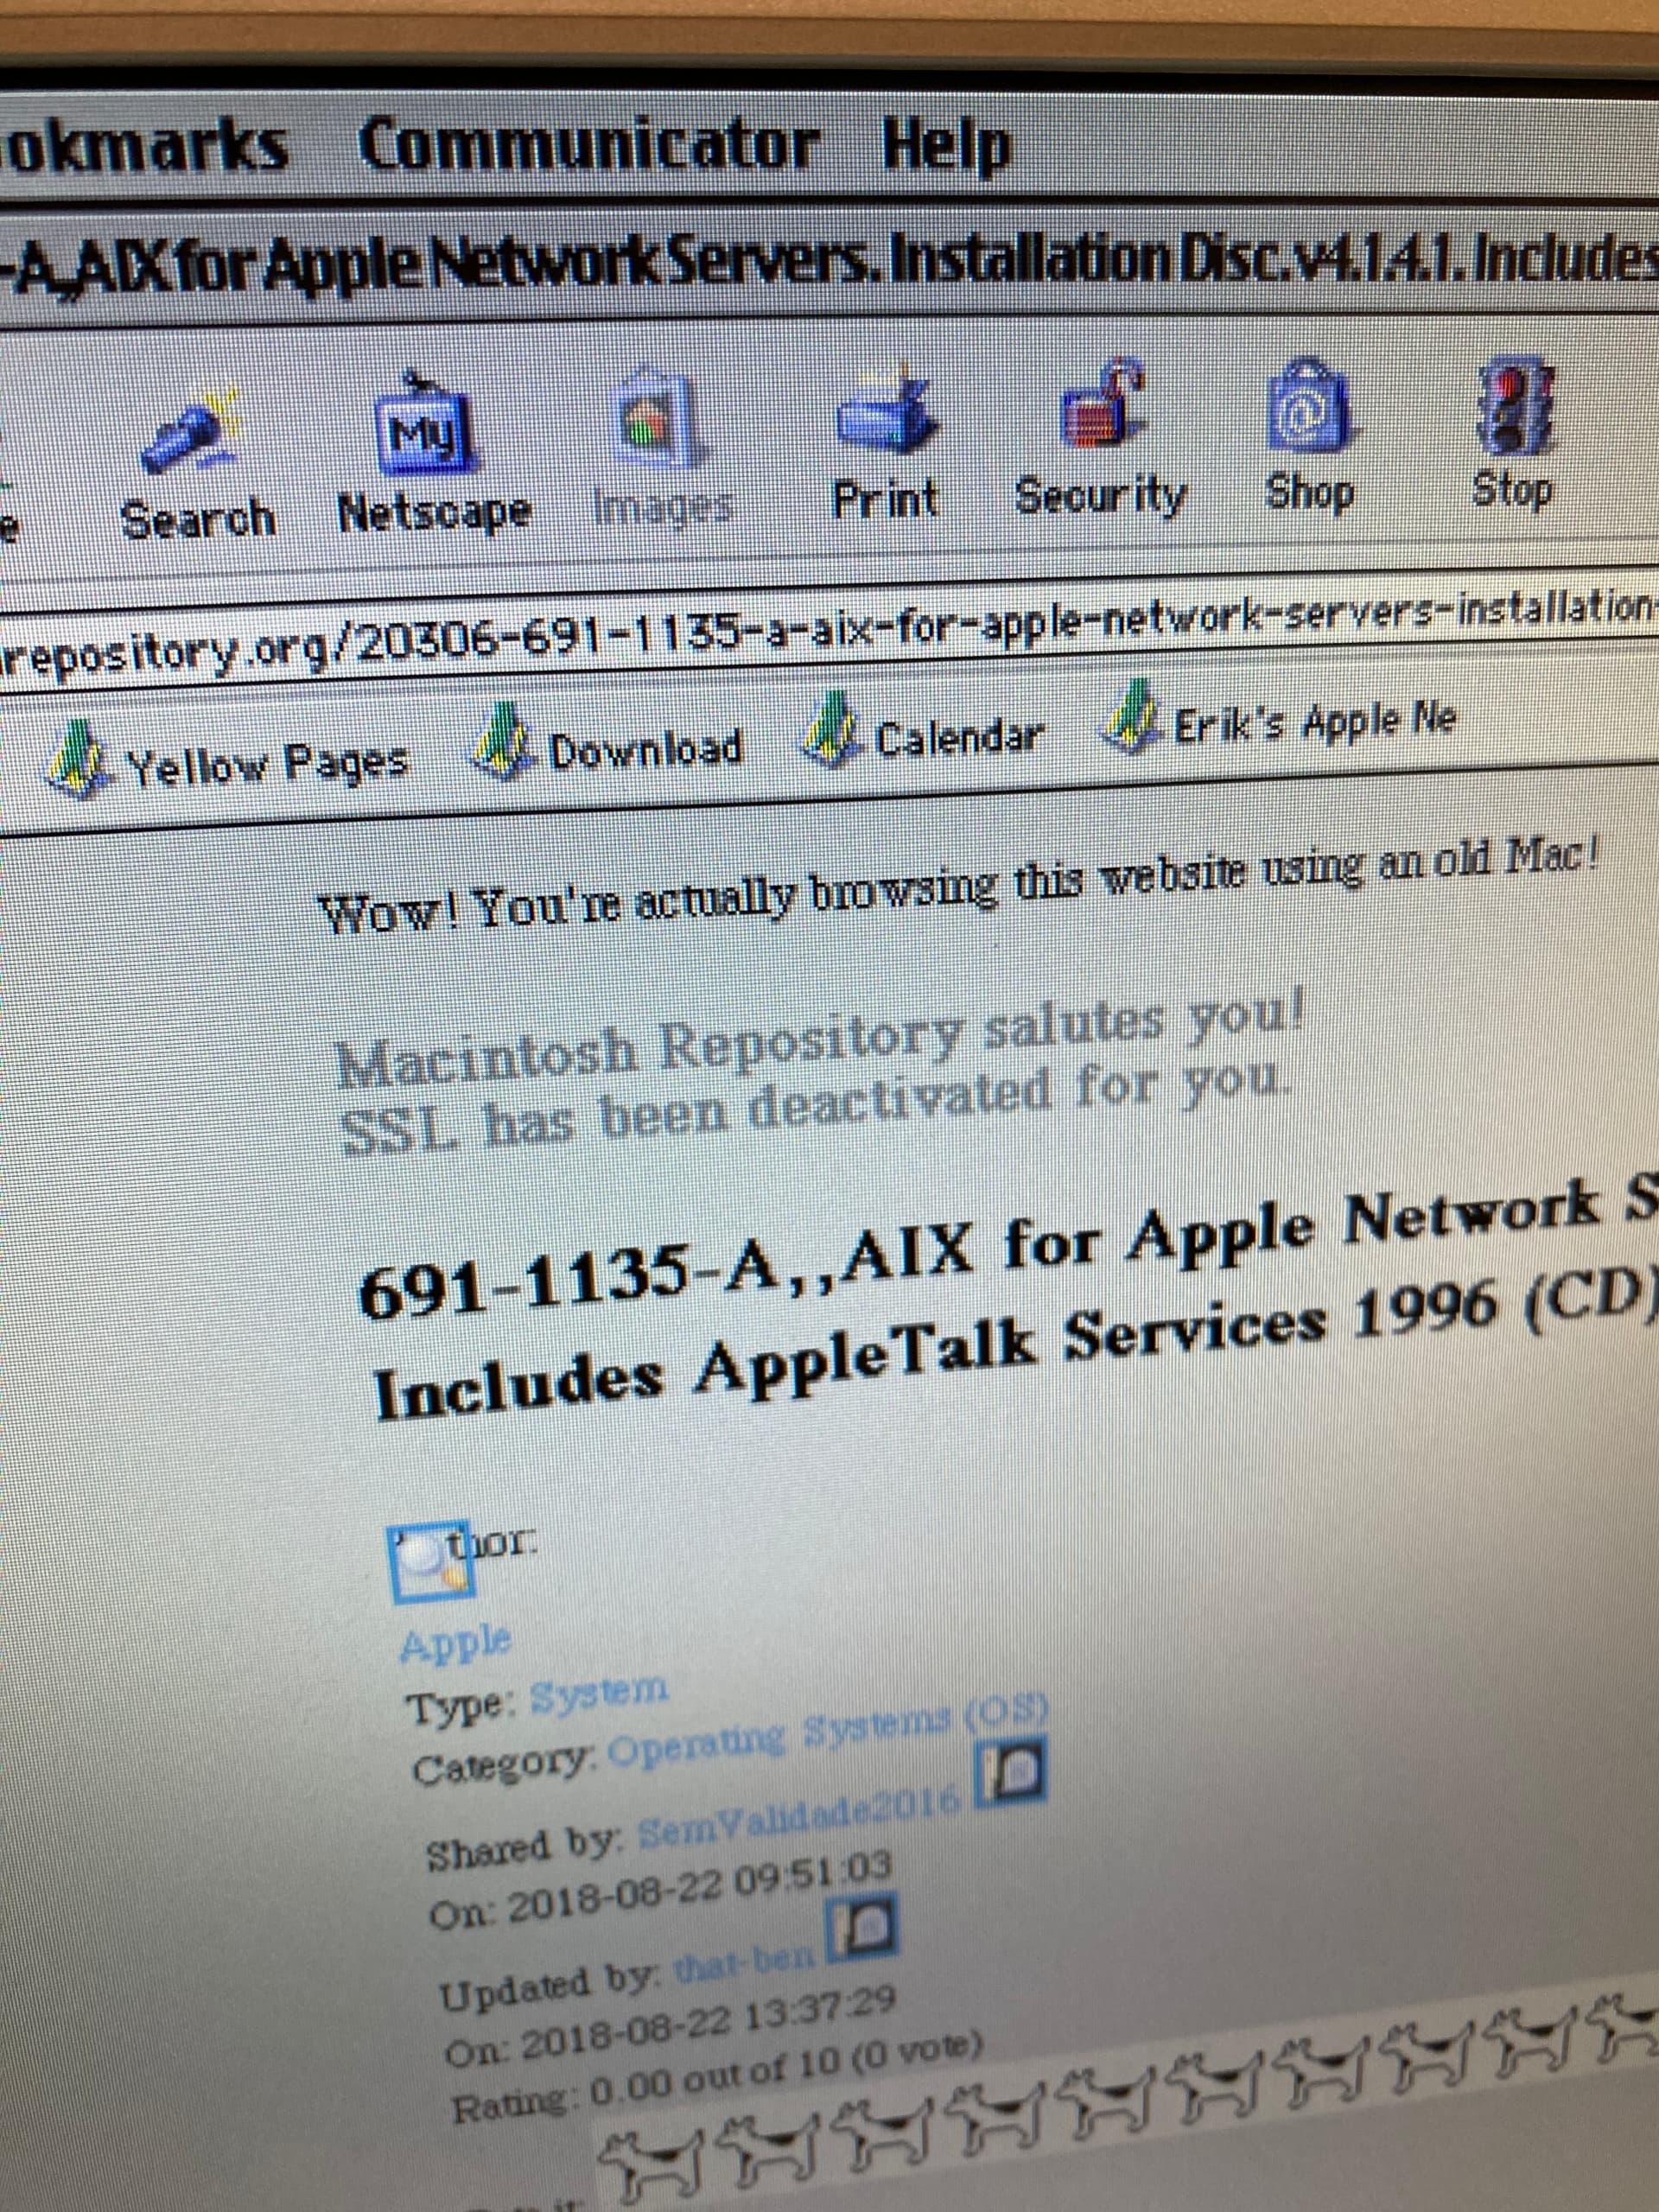
SSL is auto disables on Macintosh Repository- (formerly mac Garden?) but you can’t actually do anything and the formatting is boned.
A step closer. It could read the CD but couldn’t find anything to boot!
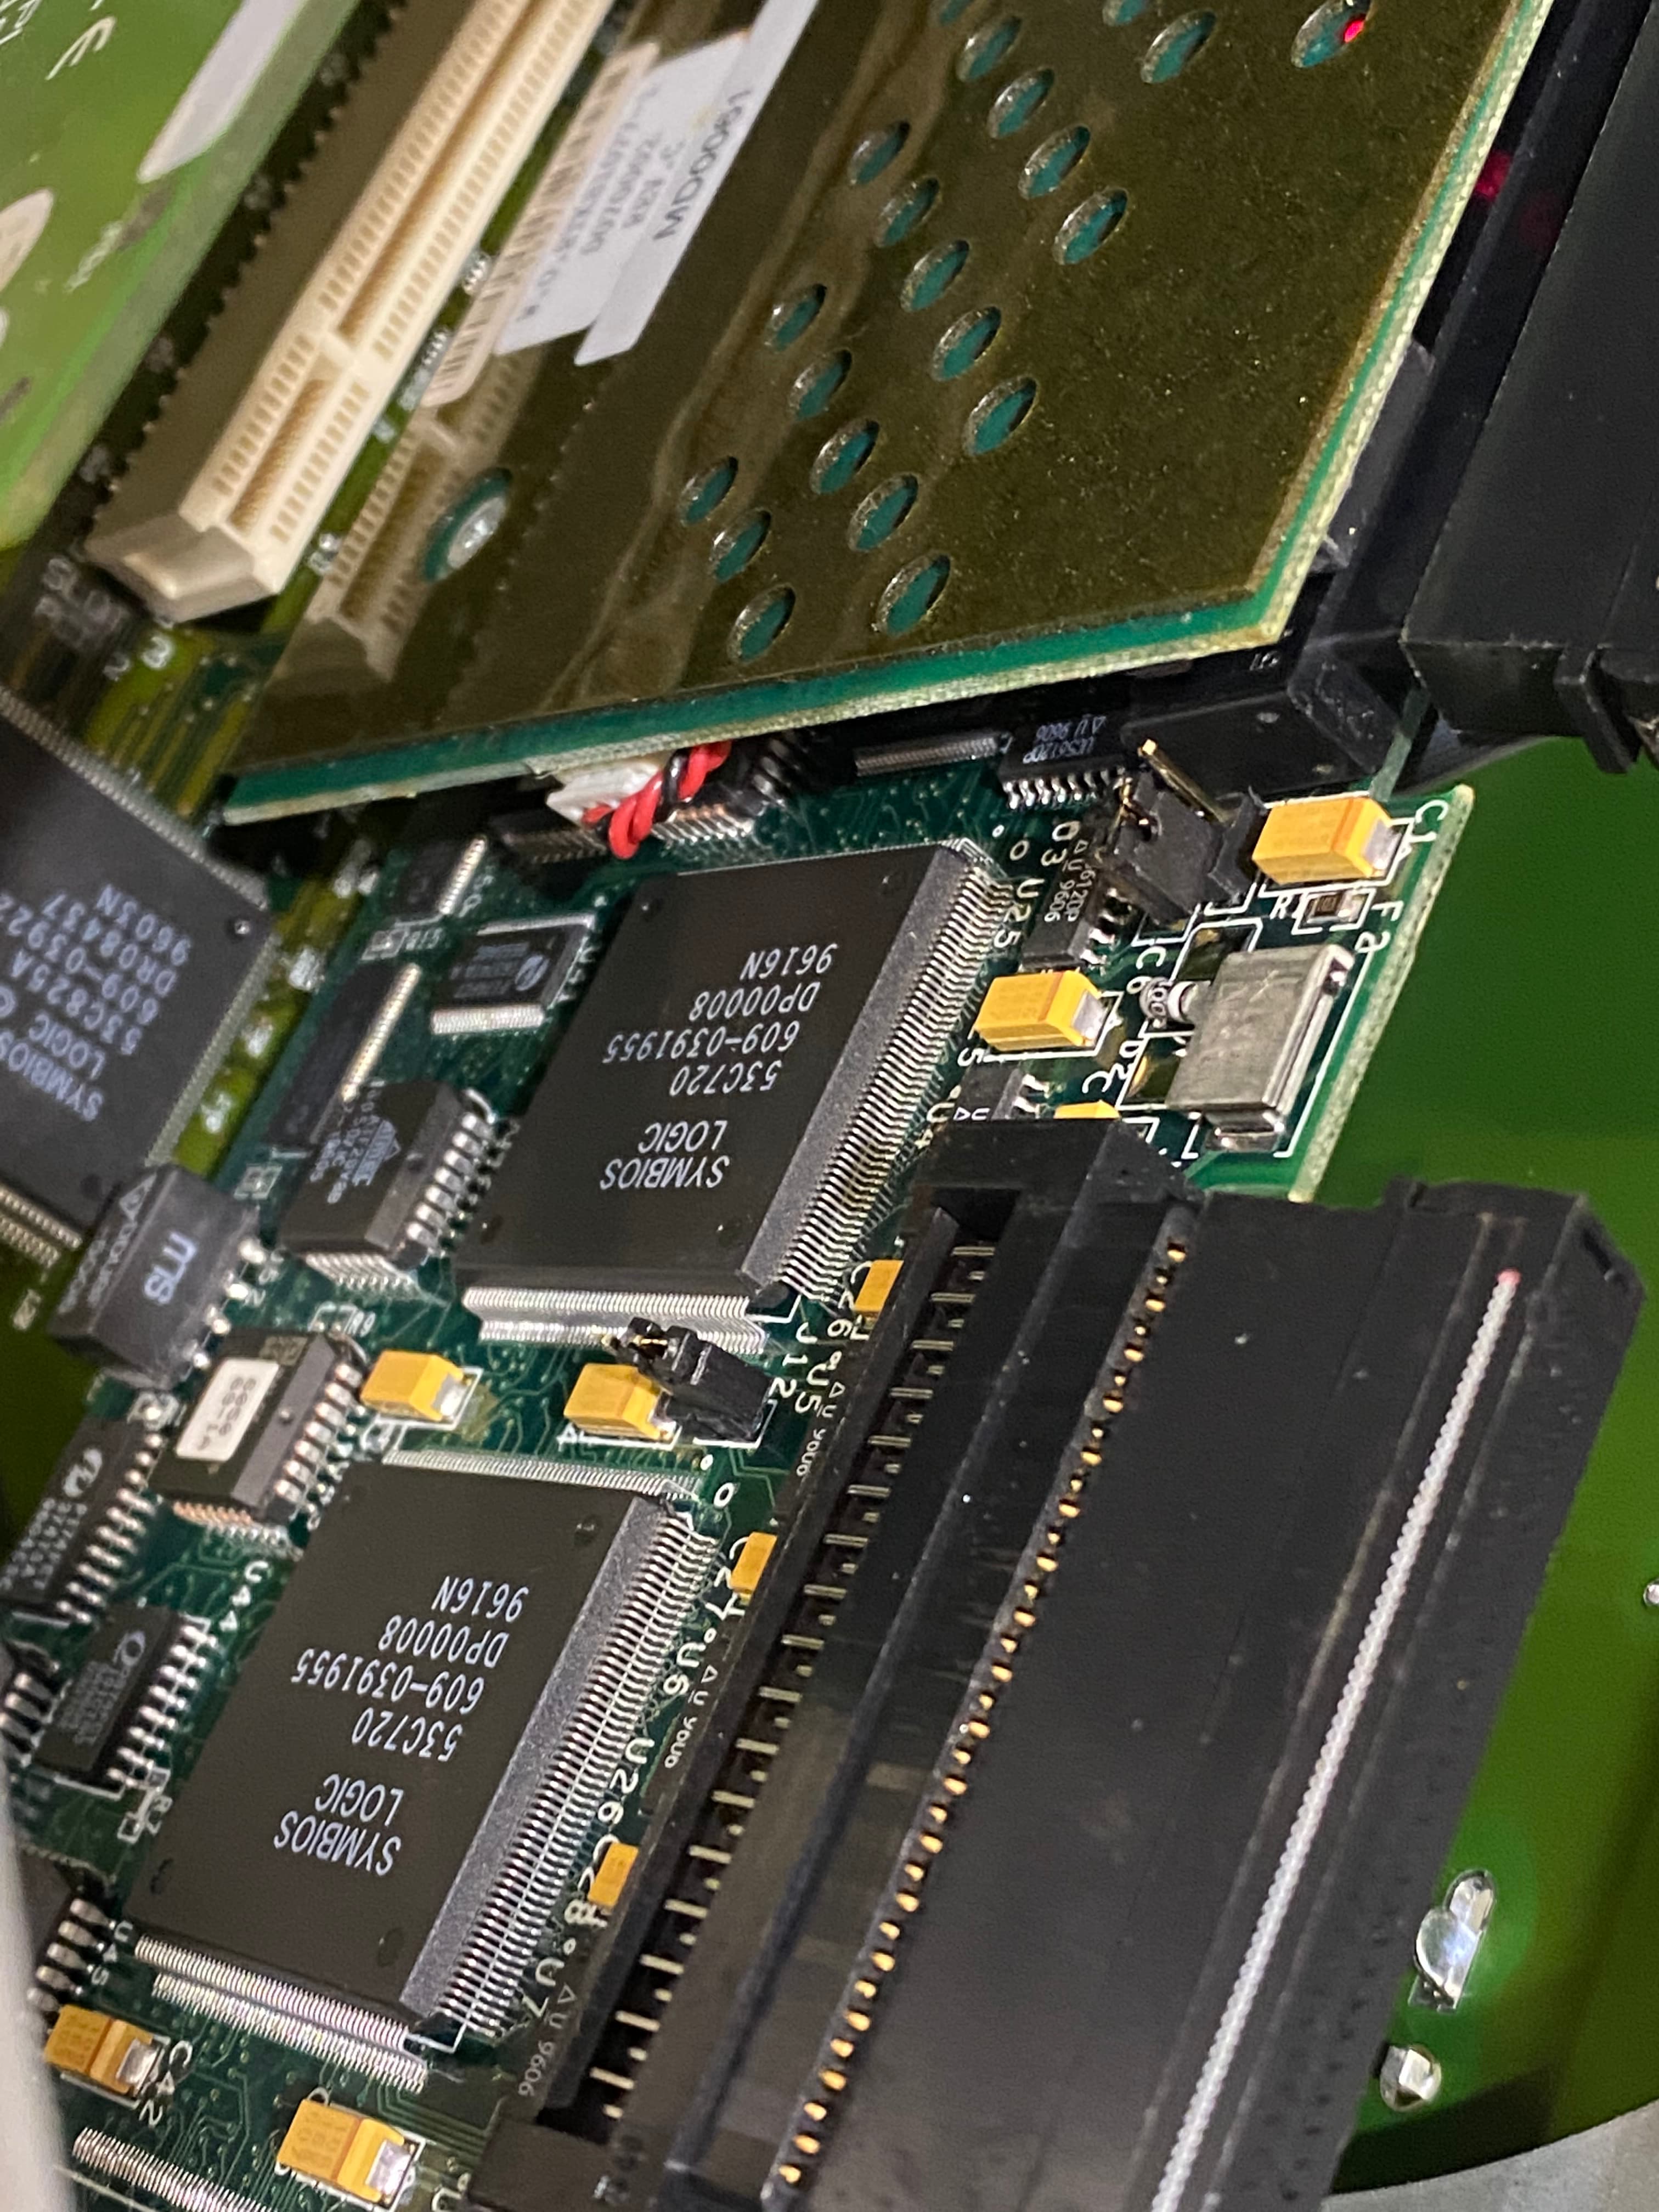
The hardware raid card for my ANS, configured in slot 2 (should only affect external SCSI) makes all the 0,1,2 scsi busses unavailable and I worked out pulling the cables and setting the jumpers off let me see the internal disks without having to remove the card (difficult!)
Well I really wasn’t sure I would get to the end of this challenge.
I had to go into the office to see my chiropractor and afterward thought, I’ll install my burner and Jaz 2gb into my G3 Beige Tower and try and make a diagnostics floppy at minimum.
I made the floppy and no dice, it wouldn’t boot and seemed to give an error that it couldn’t find the diagnostic for the version of OF.
Being a beta, I was like dang.
I thought I’d write another diag disk just in case, and I tried to boot.
What I’ve now learned is, to boot into diagnostics or the AIX CD, you turn the key to the service mode- hard left.
Anyway, I noticed I was getting a random issue about reading this time, and then after a few restarts… bingo… it booted to diagnostics.
Diagnostics proved useless, so being later now and having a SCSi CD burner and toast on the G3, I began the long arduous task of downloading AIX 4.14 from Macintosh Repository (formerly Macintosh garden?) and that proved painful…
290kb a second for a CD iso in toast. Can’t login in to MG on an old Mac, even though it kindly disables SSL and you can browse, downloading is impossible.
So I finally try and log in, password won’t work. Password reset won’t work.
Reset password- IP is blocked for an hour
Login via hotspot on my phone and download… boy does 300k a second suck. It reminds me on being at UNI on a T3 in 1999 on the weekending grabbing ISOs, but boy was that fast compared to the 5k 56kb dialup at home…
So finally this toast downloads.
Copy it to a USB.
Copy it off a USB stick onto the G3.
Zzzzzz I remember USB 1 being awesome compared to floppies but boy did it blow compared to HDs, SCSI or even optical media.
Finally get this toast on the machine and can’t mount it using toast 4 because seemingly it was imaged in toast 4,000.
Get a special app on OS 9 to mount the toast, burn the disk.
It burns and verifies in 30 minutes…. Ouch, I remember now why the 00’s was marginally better than the 90s.
Try to boot. Nothing.
Realise the disk doesn’t even mount on the Mac.
Get toast 5.2.3 for the Mac, it mounts but has trouble.
Burn a disk as Mac OS standard after I get the last disk error.
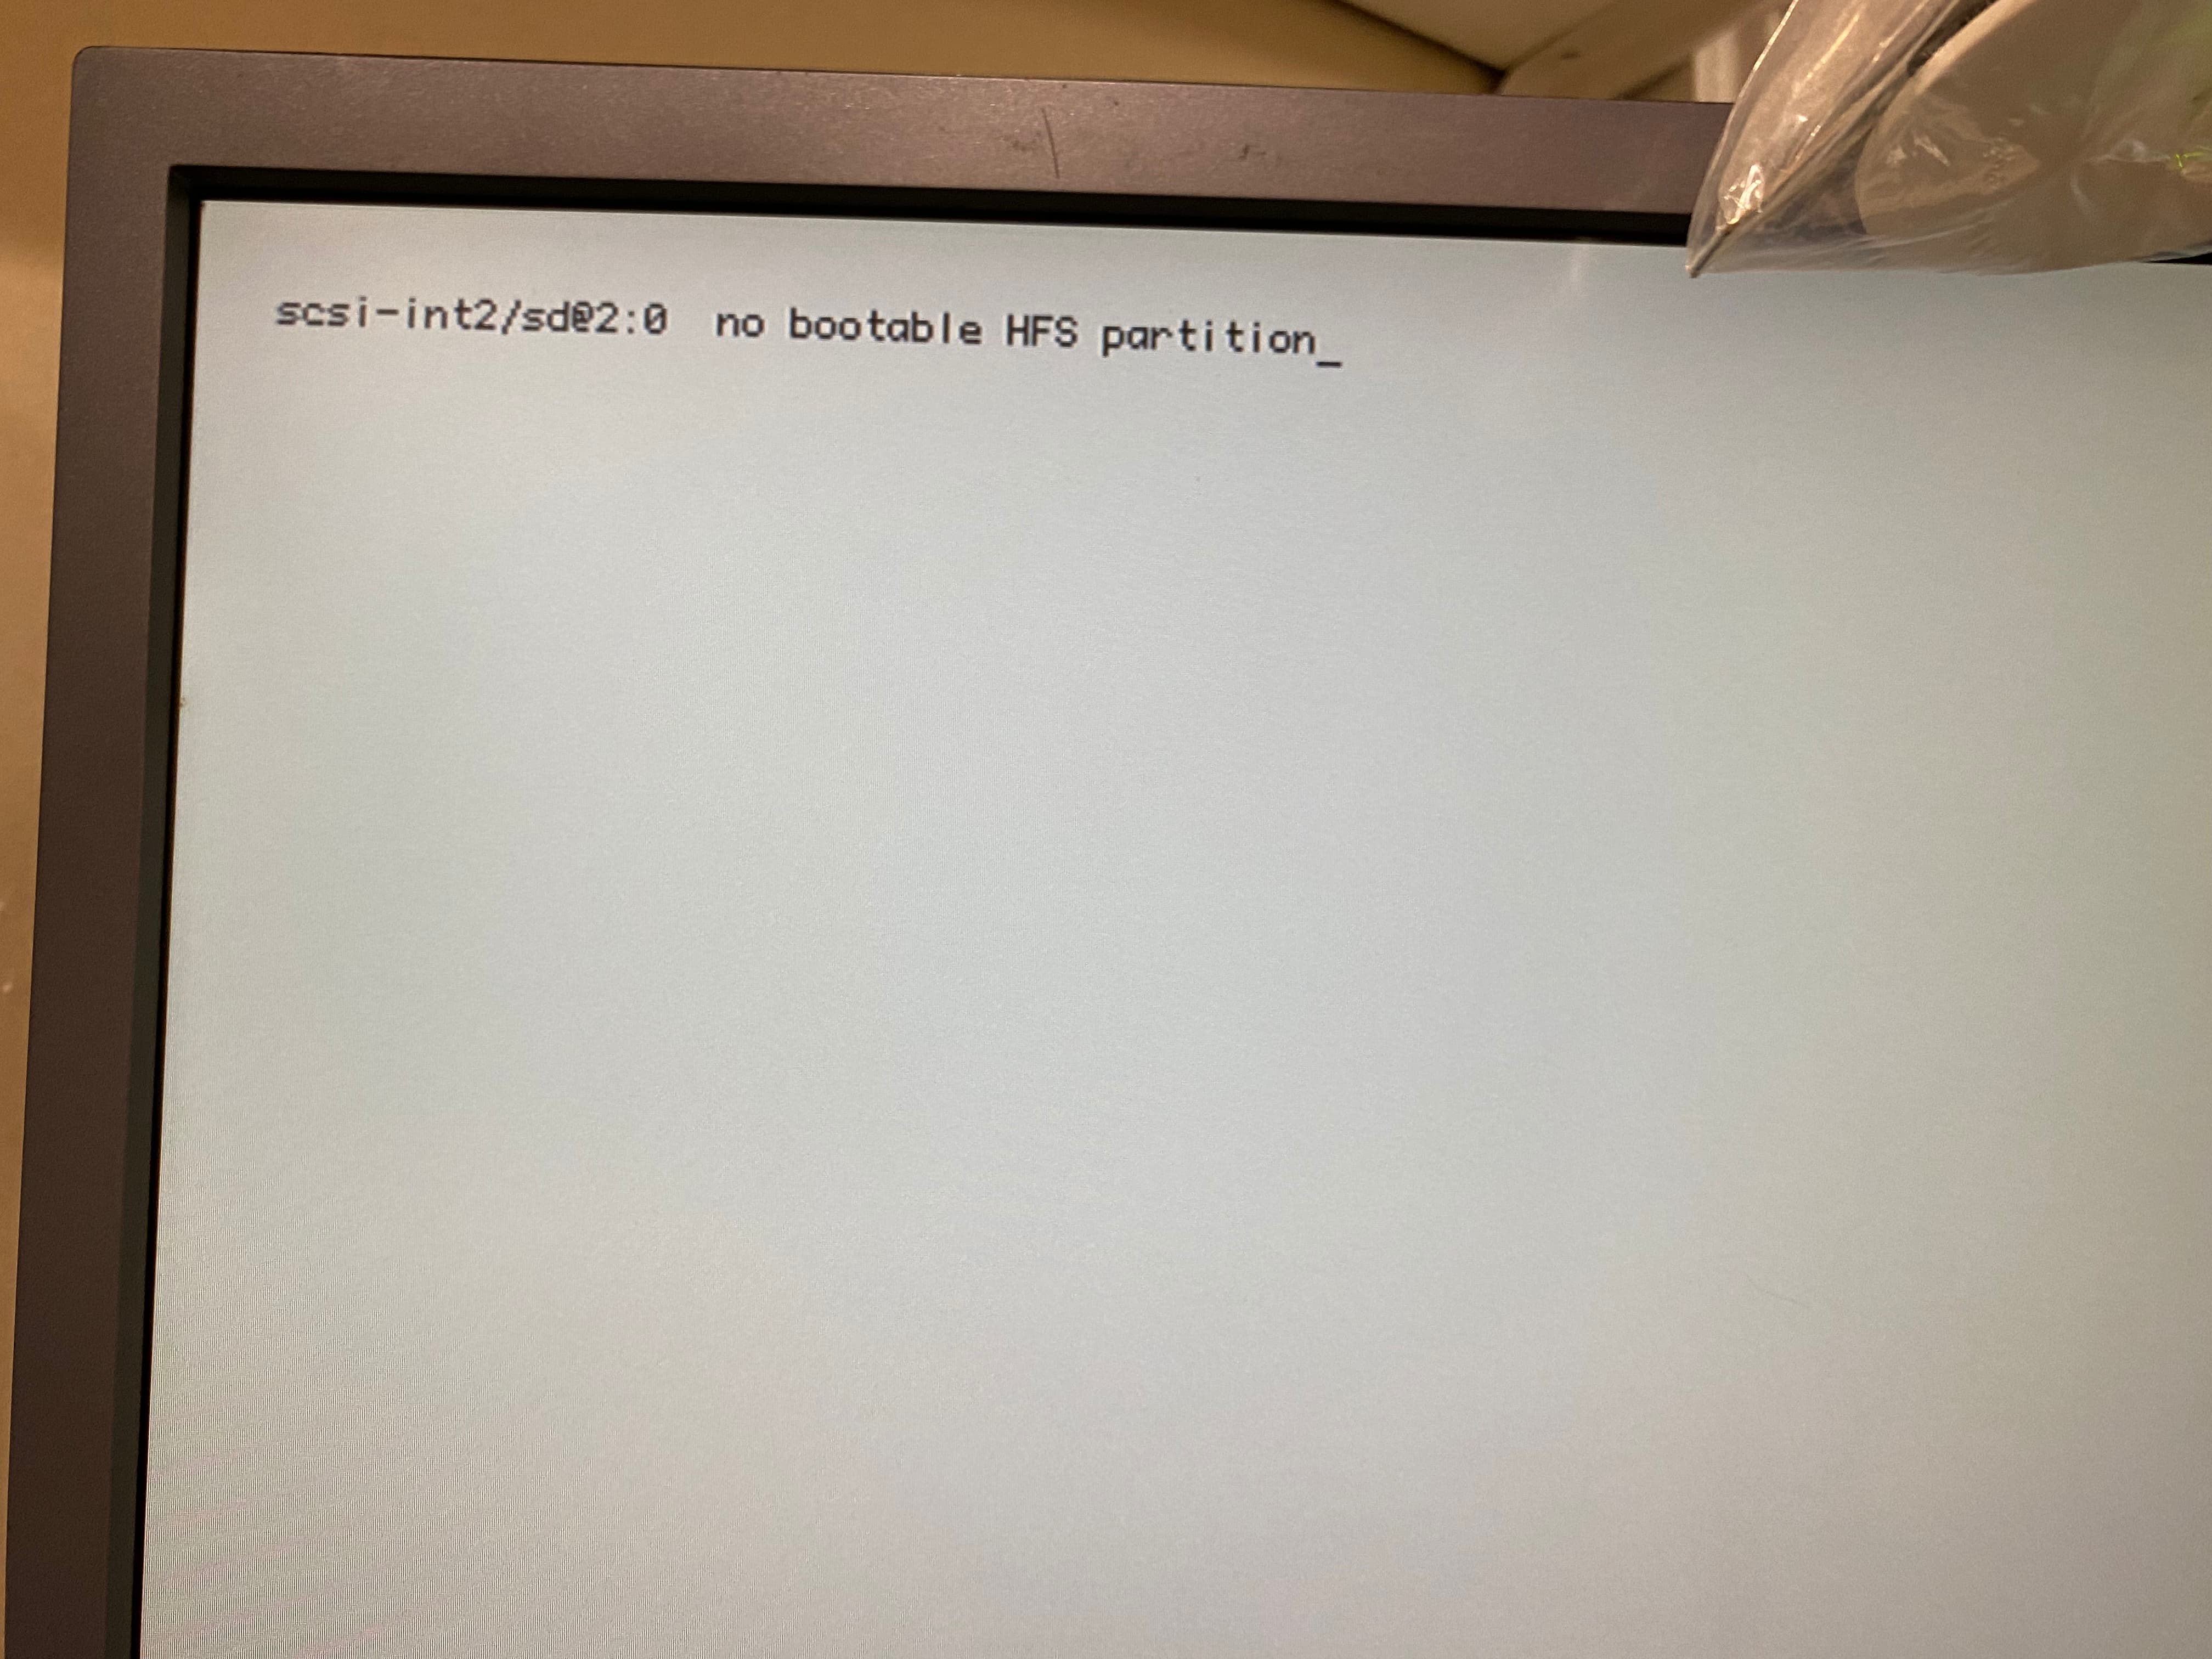
The disk starts to boot and says not HFS volumes.
Arg!
By this time I’m spent, my colleague @Jon was watching whilst he fixed his stereo…
I packed it in the car to take back to my museum and mess about some more…
Note - An Iomega Jaz 2gb seemingly locks up the Apple Network Server and my hope for it to be used as an AIX boot disk for testing was dashed when I got no video with it connected.
I was hopeful I could install the AIX image onto a Mac formatted Jaz and at least boot the machine to prove it possible - that the Beta rom on a prototype machine hadn’t been terminated.
I’d been dodging the fact the logic board still didn’t work, using one out of my 500. I thought I’d try and see if it worked in the frame. It didn’t. The new logic board I got was bad.
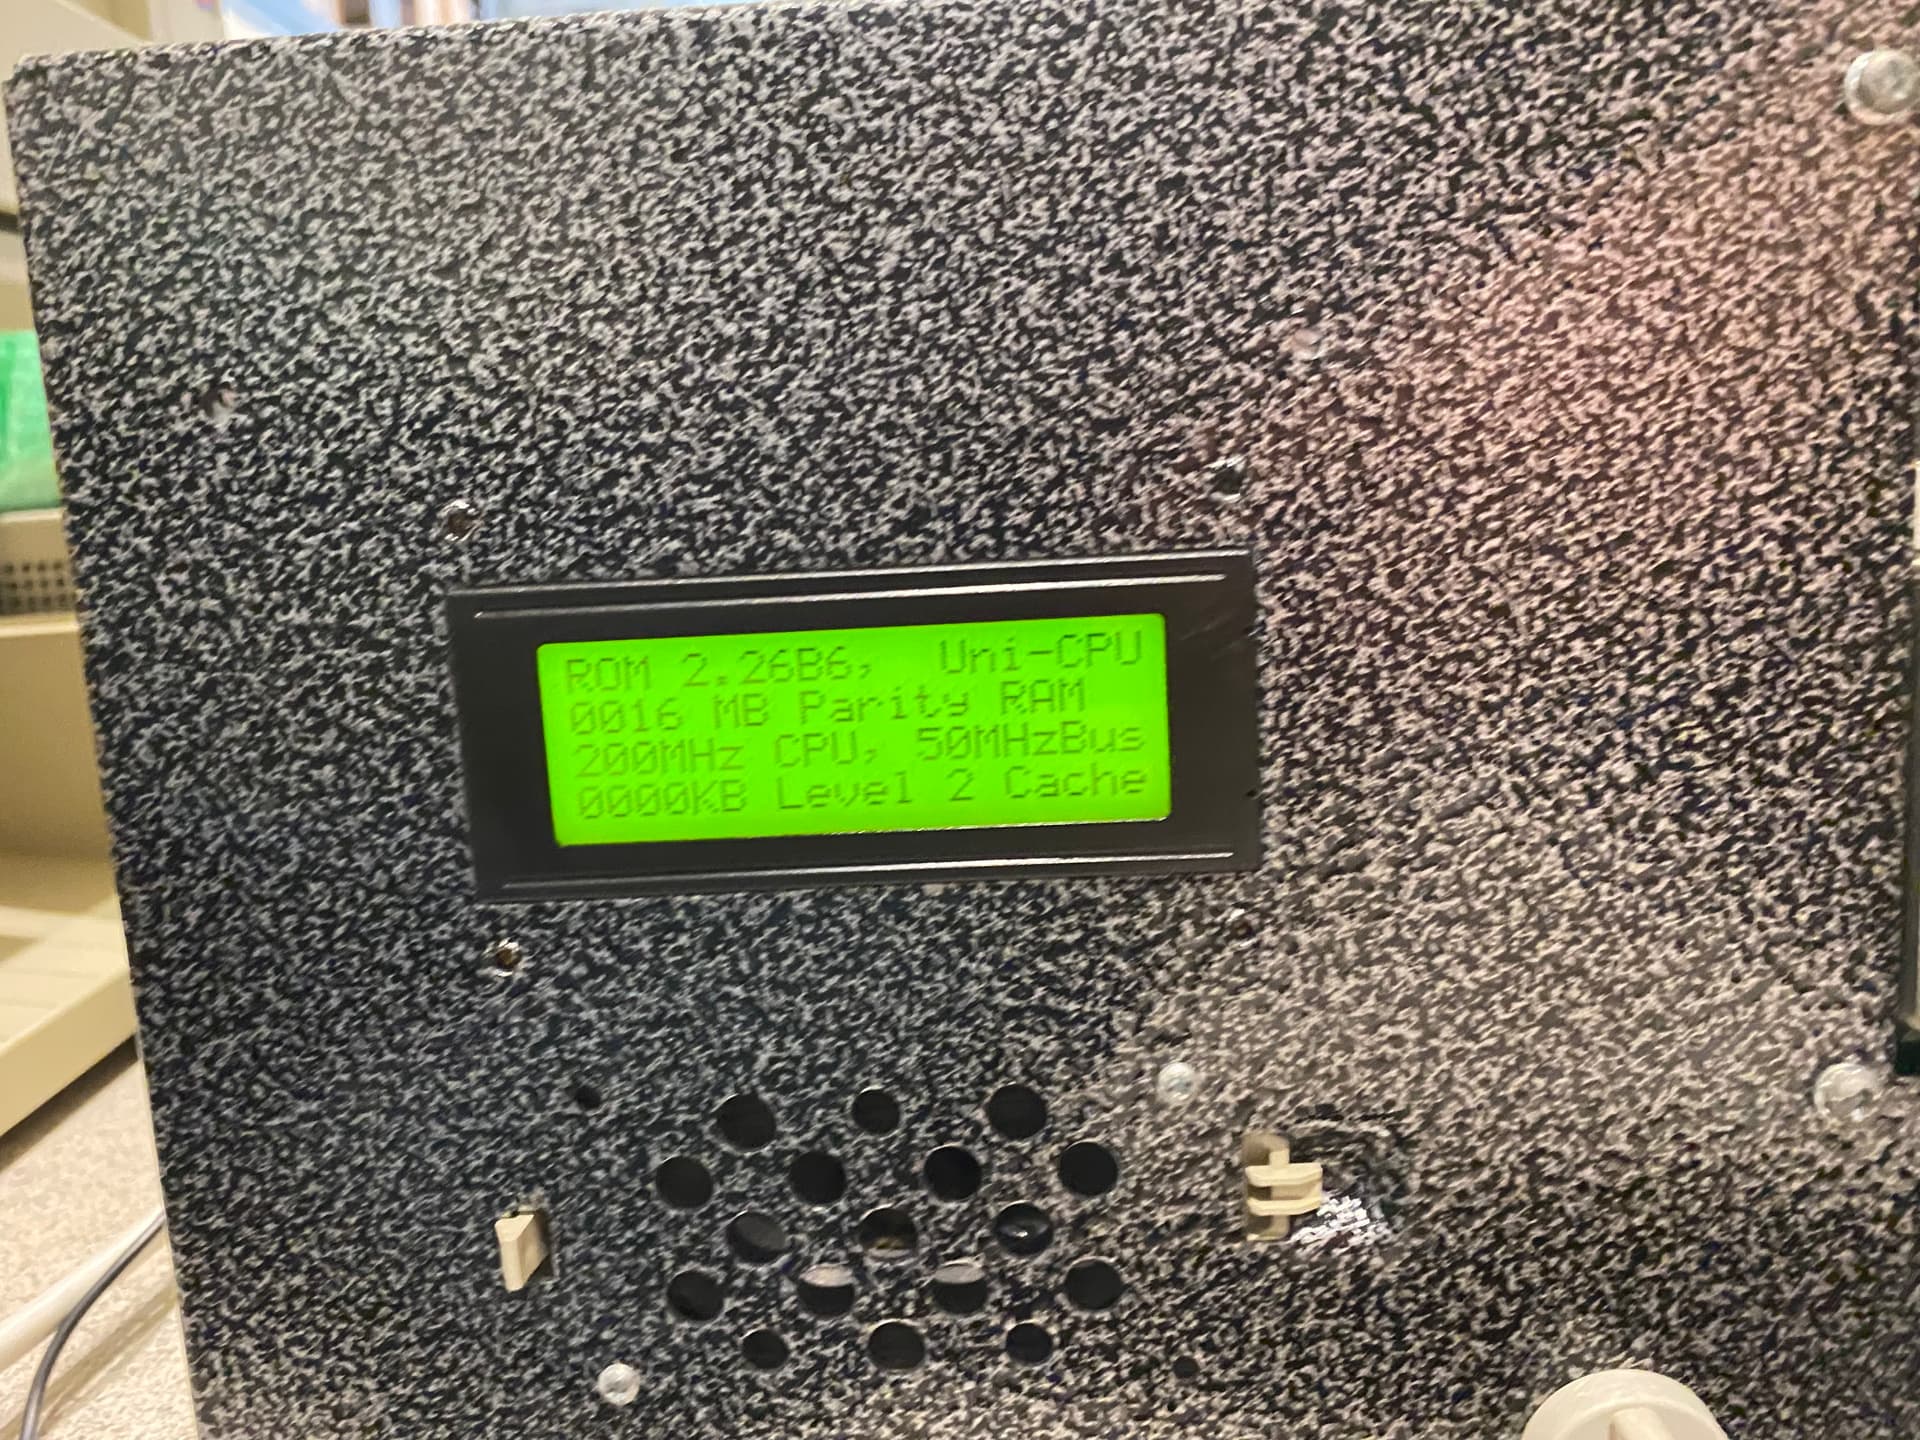
Inadvertently I started up the 2nd new logic board and got a blank display with two lines like before… oh no… are they all bad? Have these been modified?? No, it turns out, the processor wasn’t installed and no processor leads to the same condition as the DOA part.
Huzzah. The ANS turns on with a second new logic board.
I wasn’t sure it would, the bad smelled heavily of leaking SMD caps. This will need to be dealt with ASAP.
It didn’t power on initially, and took a little to power on, so the caps must be going bad!

With no new options and being away from my office and burner, I thought let’s try some other hard disks in the machine I know boot.
It didn’t work. The same issue. Good hard disks don’t boot!
Does this mean what I think?
Does this mean the boot options are the issue?!
I check out my 500 ANS. No CD in the drive. Oh well, thought that would be super lucky as I got the machine off an ex apple employee.
I then fire up my 700 I inherited from my former employer. OMFG. The AIX CD is in the drive! Huzzah!!
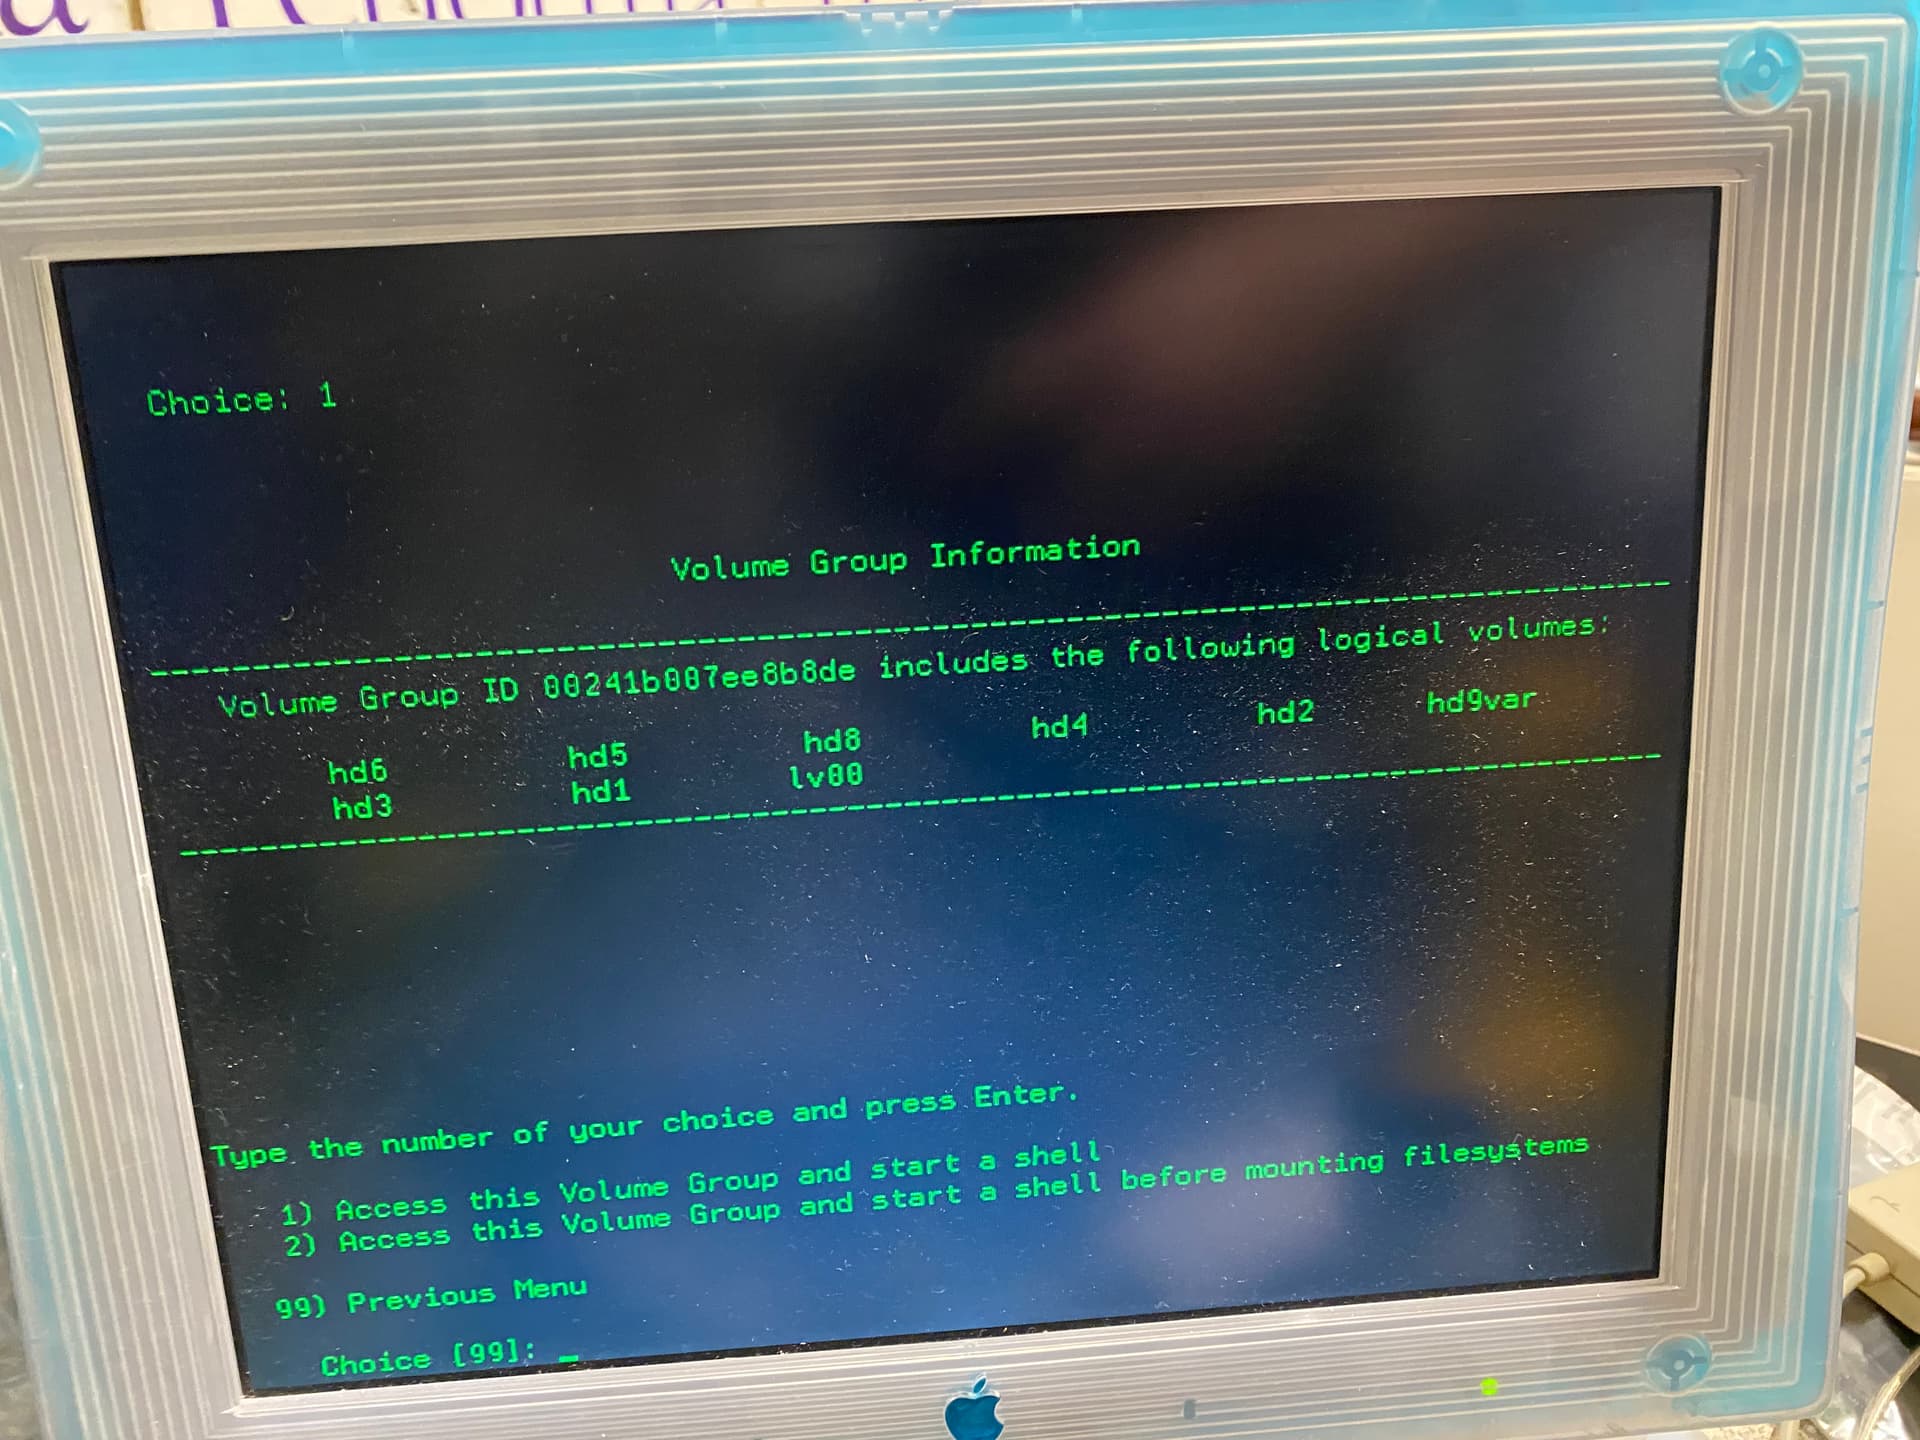
I boot the machine and see the hard disk. It isn’t blank.
I can taste we are getting close
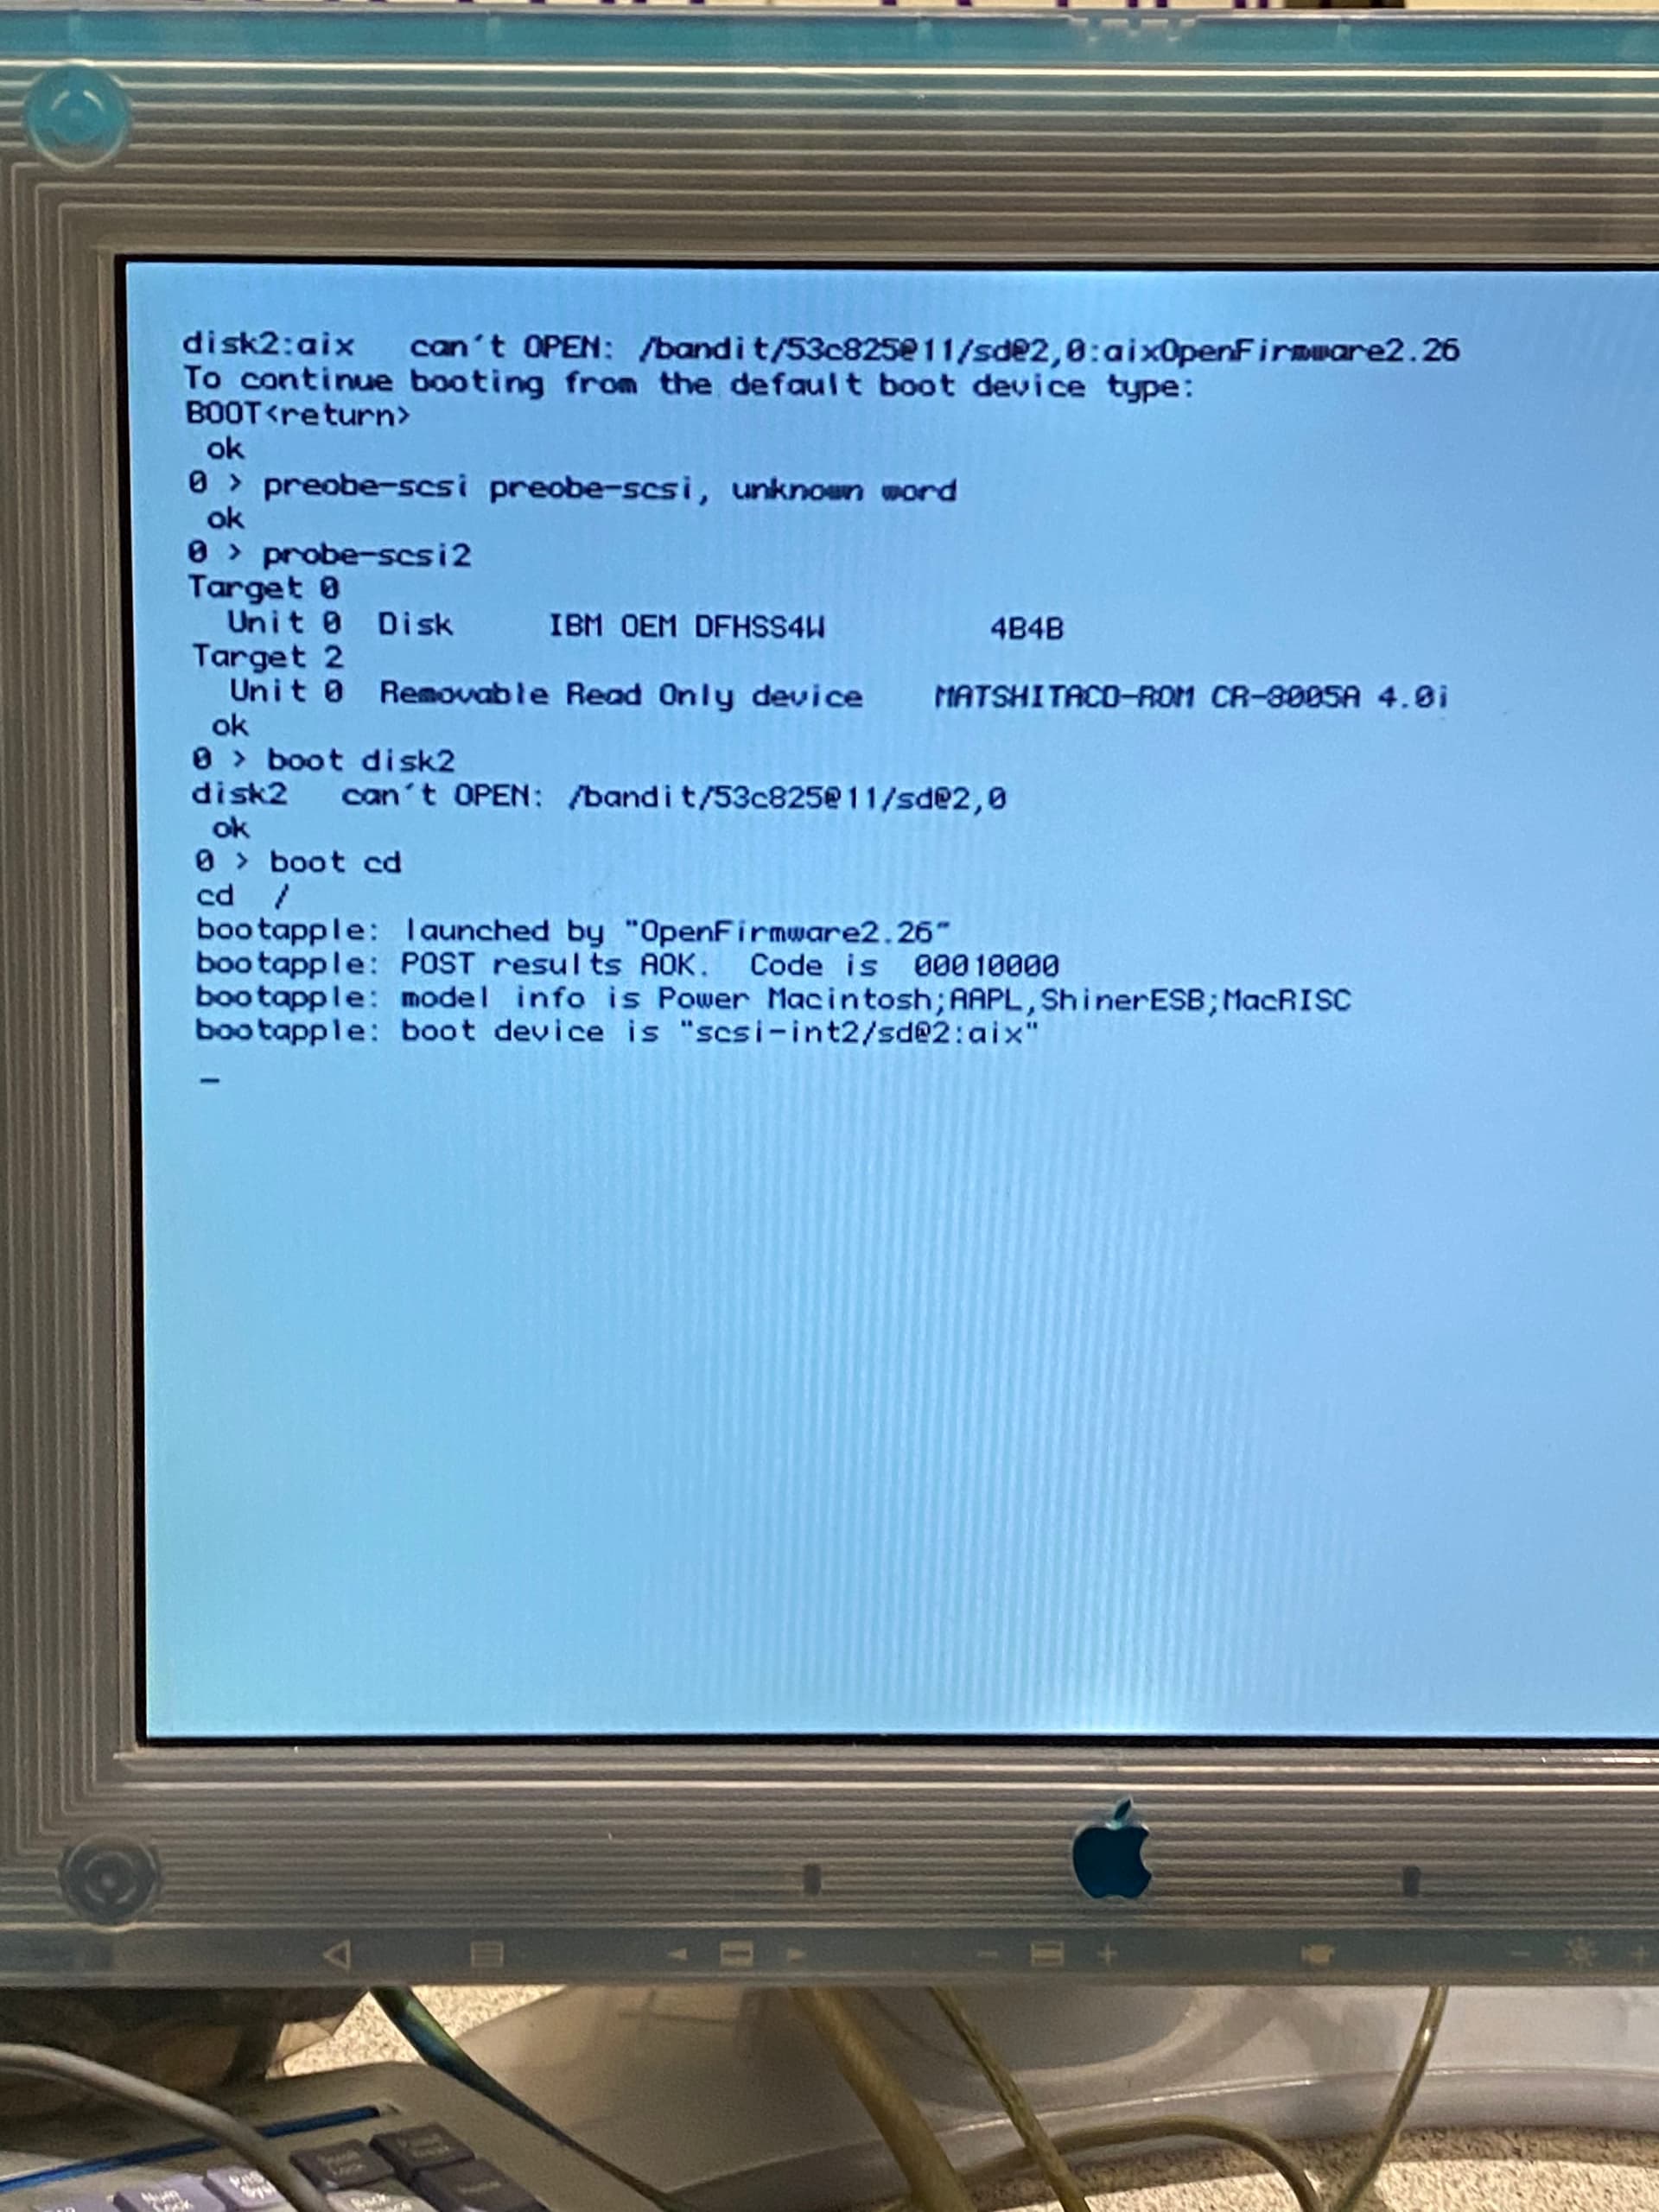
I finally crack the nut.
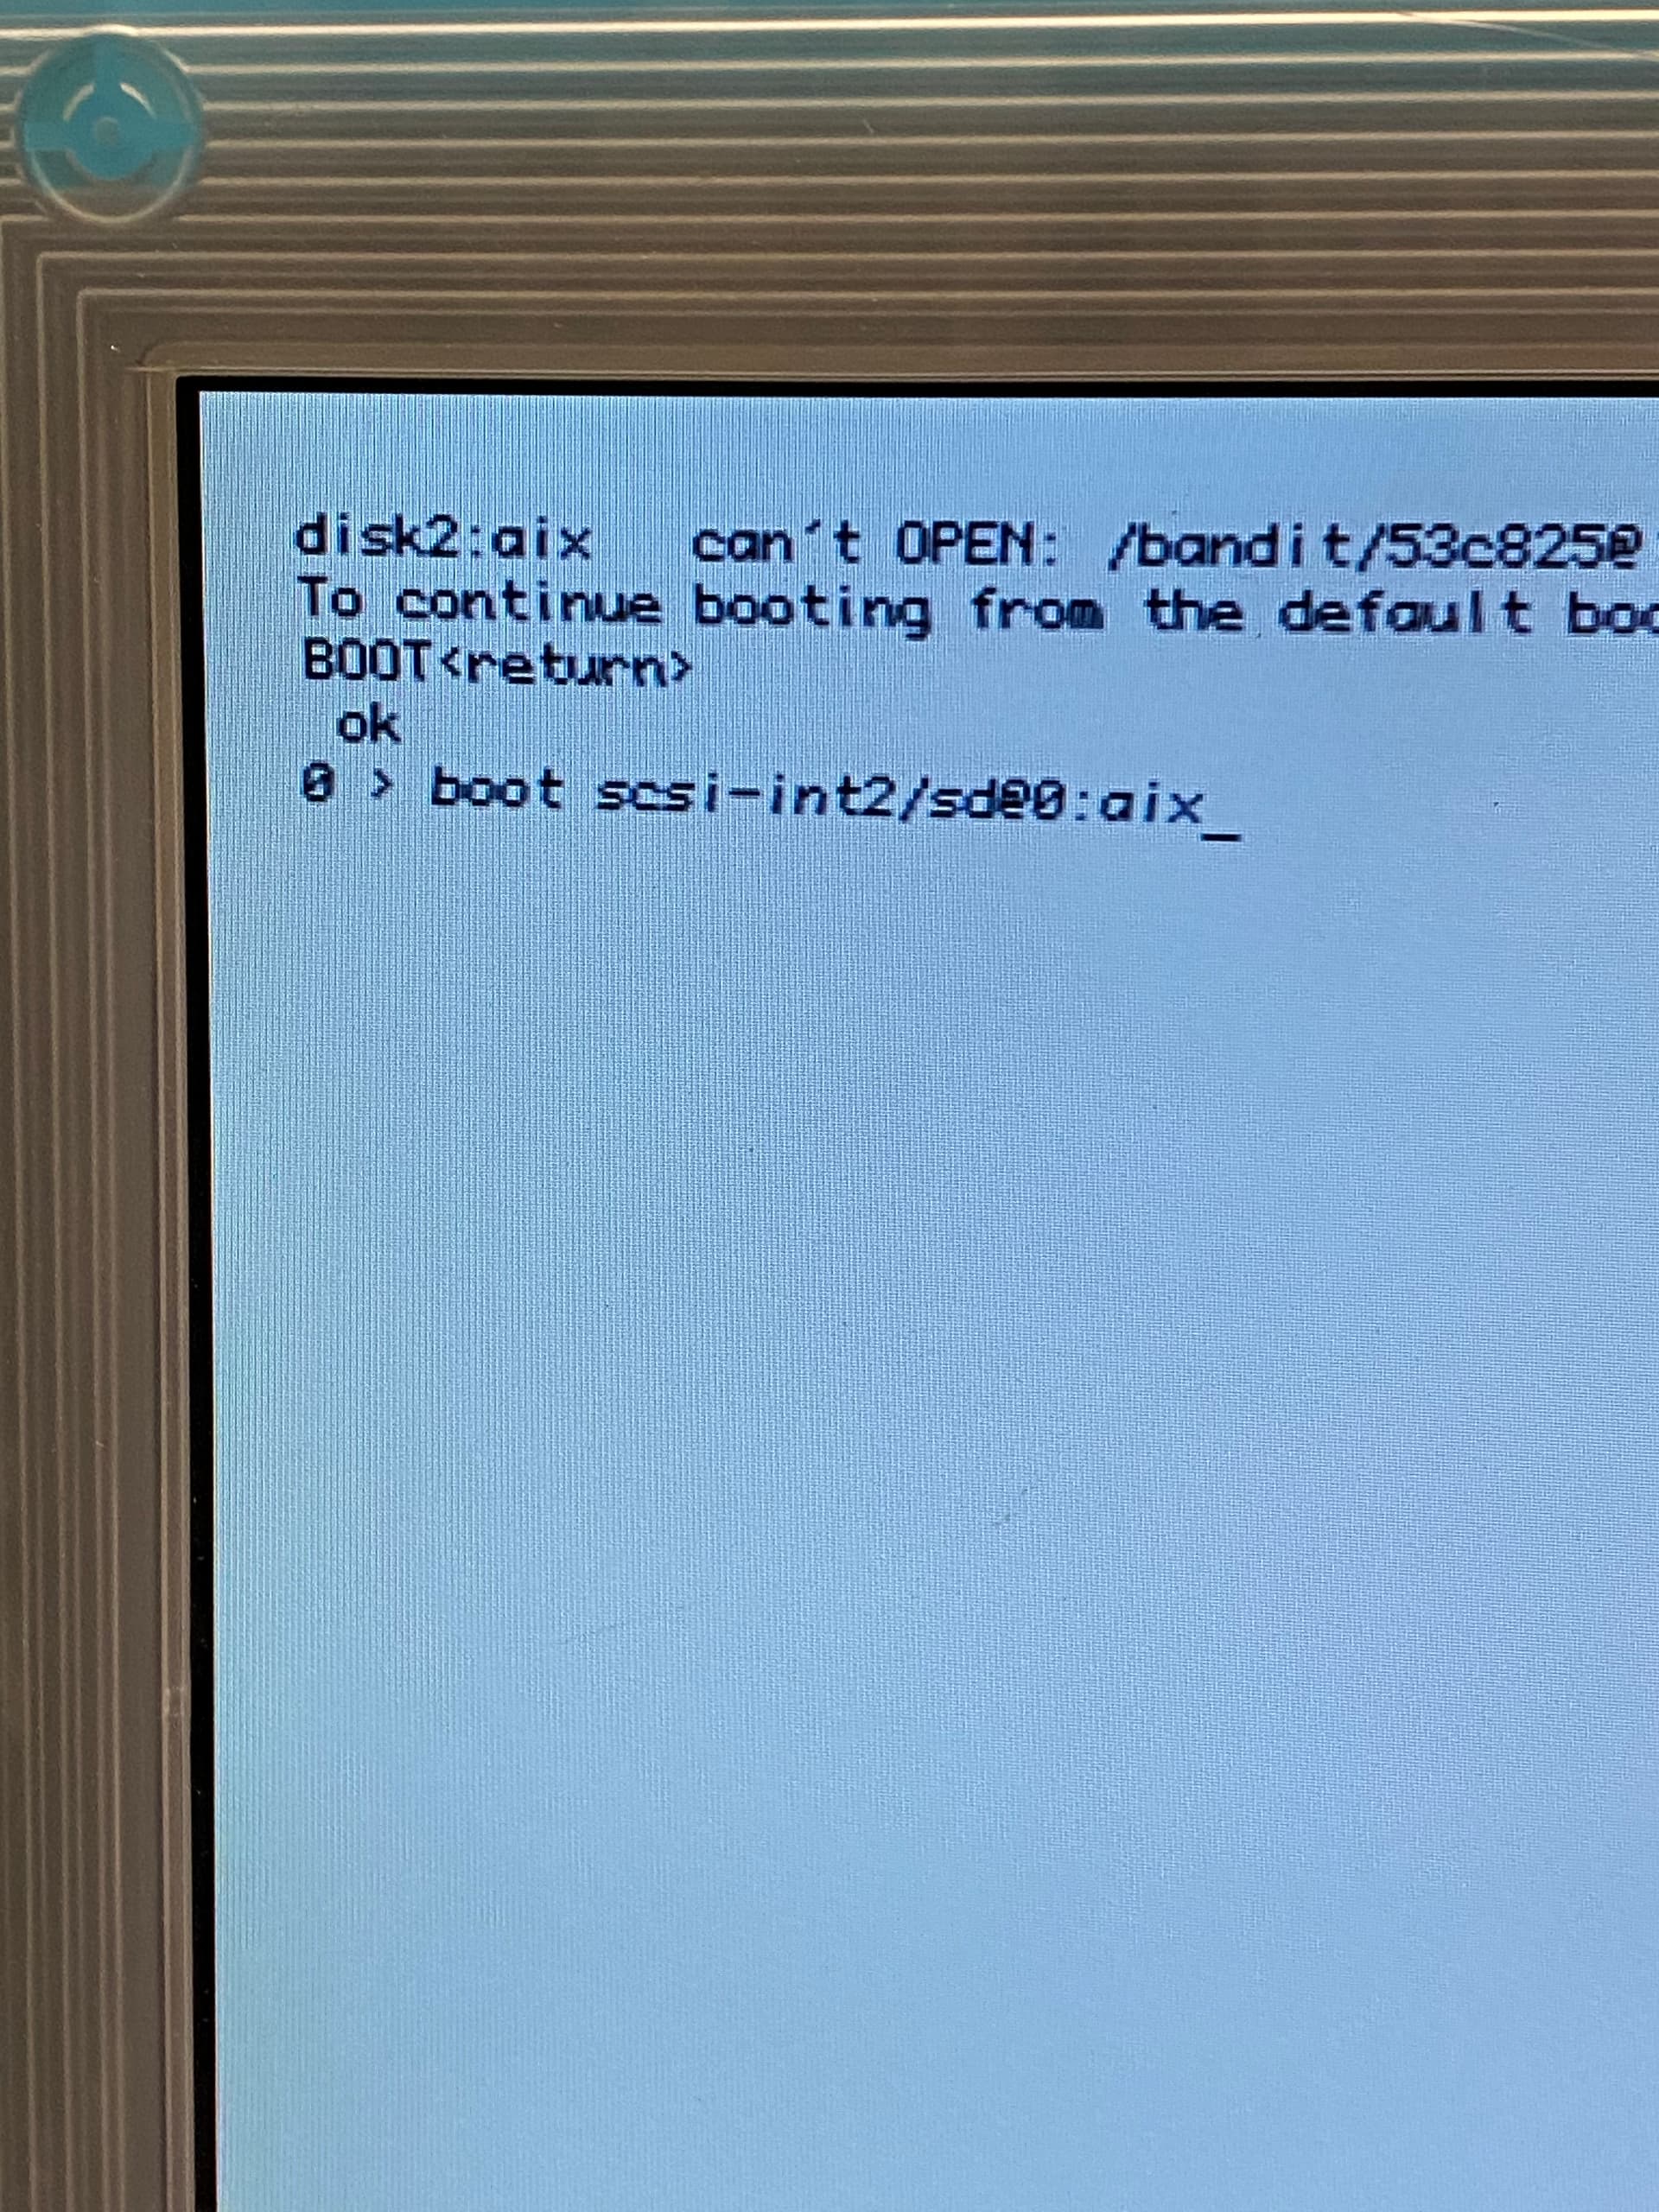
I can see that when the machine goes to boot off the CD the arguments change to the SCSI ID with this weird internal scsi card command.
I trot out the same command substituting the scsi ID for 0 for the drive. I’d already tried setting the SCSI I’d to 2 on the drive to try and marry the default boot but nudda. This beta prototype seems to want to boot a weird scsi ID by default. There is bugger all in the manuals.
The command works!
Boot scsi-int2/sd@0,0:aix
This finally instructs open firmware to boot from the right scsi ID, logic device and the right card (there is technically three SCSI interfaces on the machine)
Yass!!
2 Likes

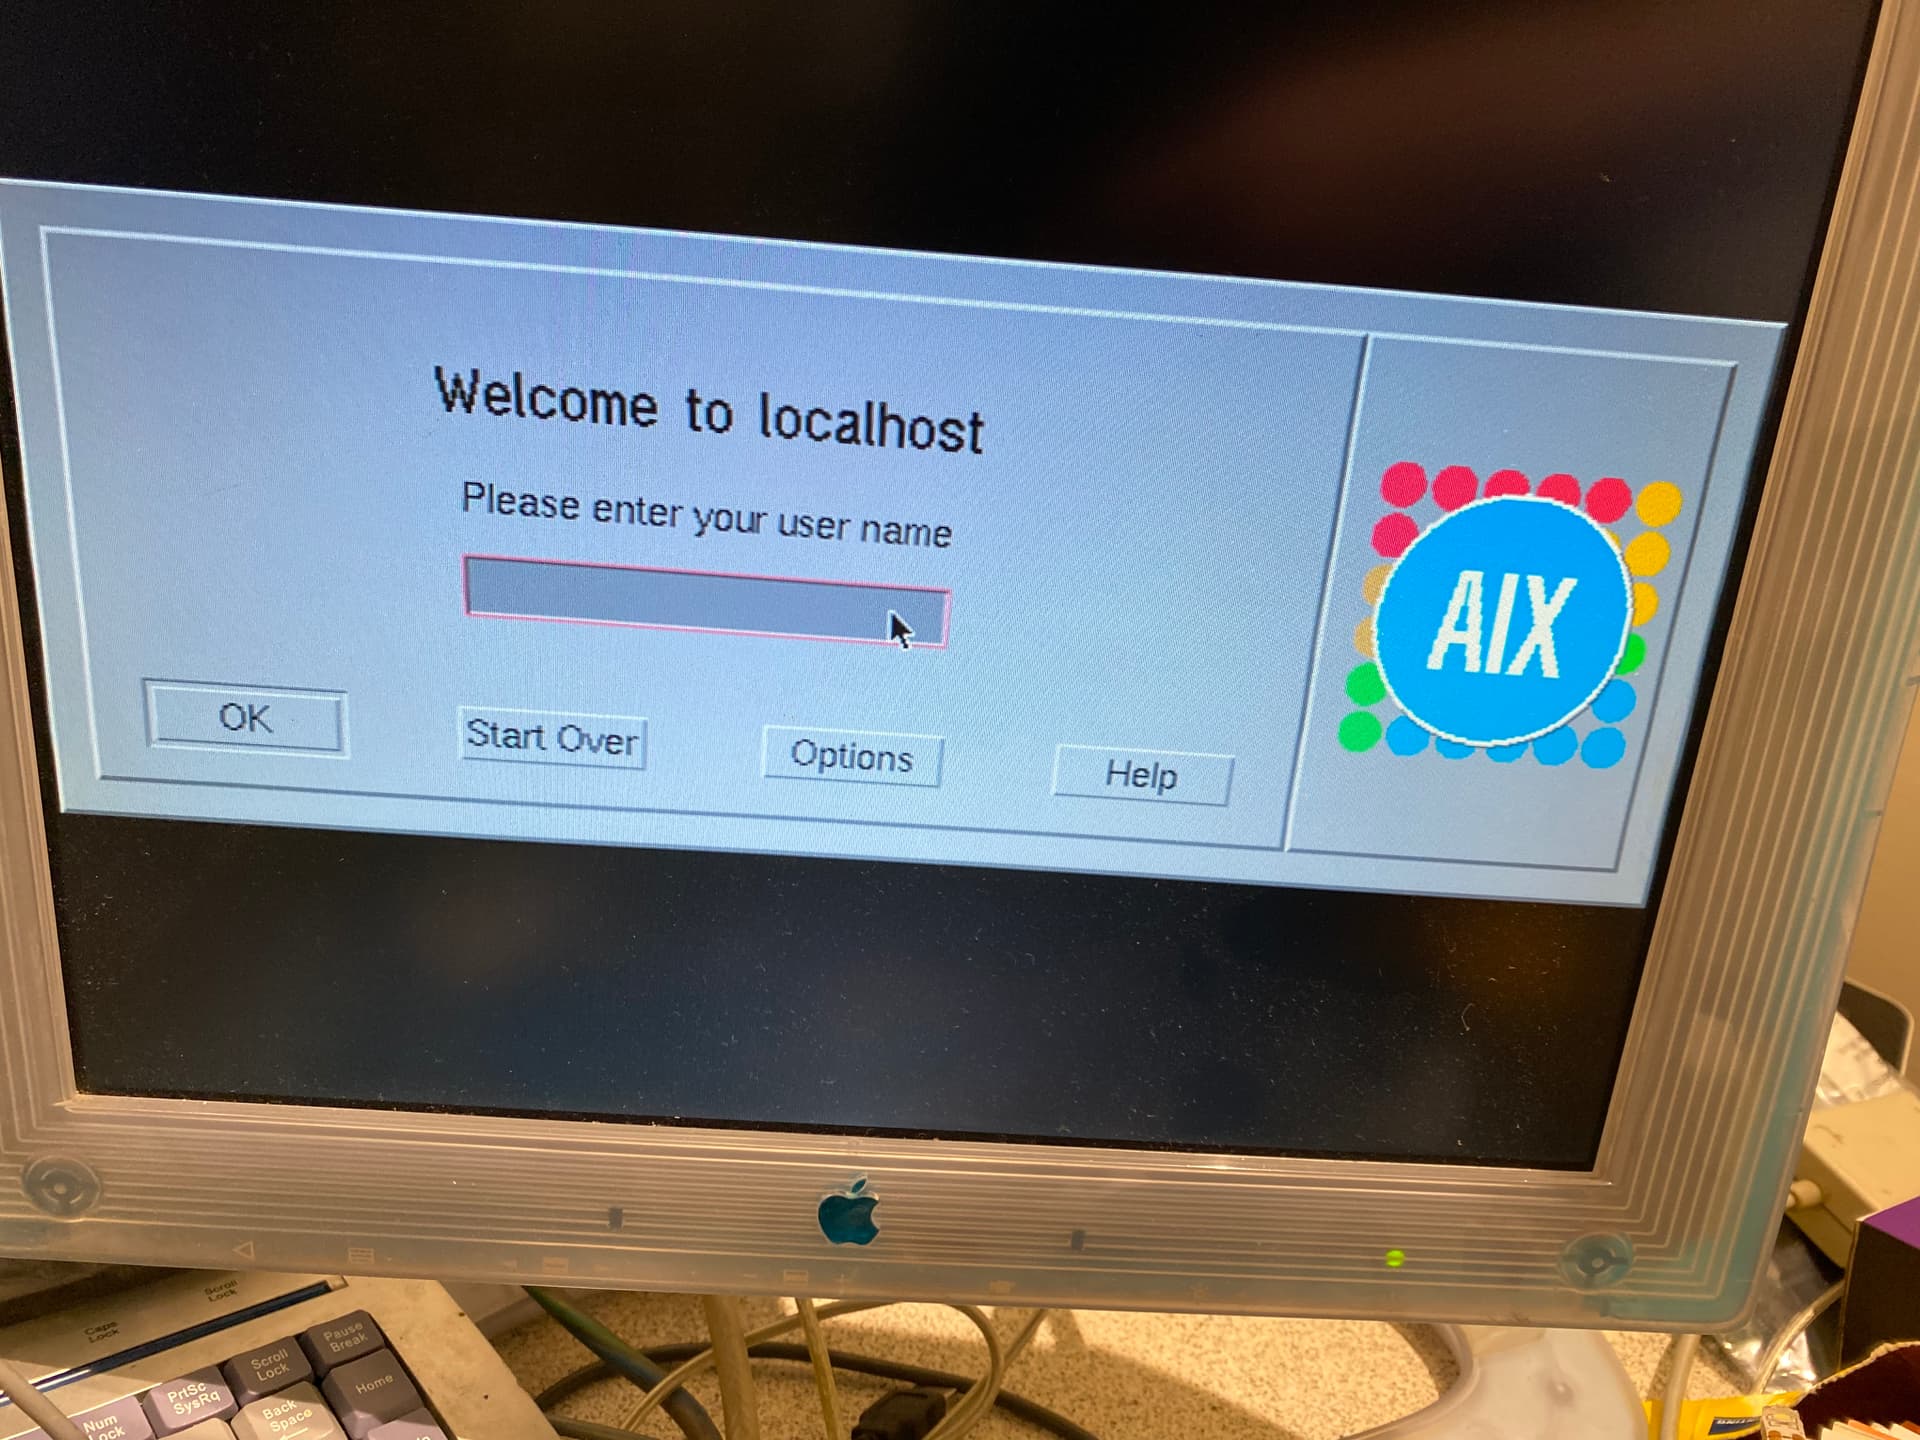
A password prompt was my worst fear.
How does one reset a password on an ancient machine?
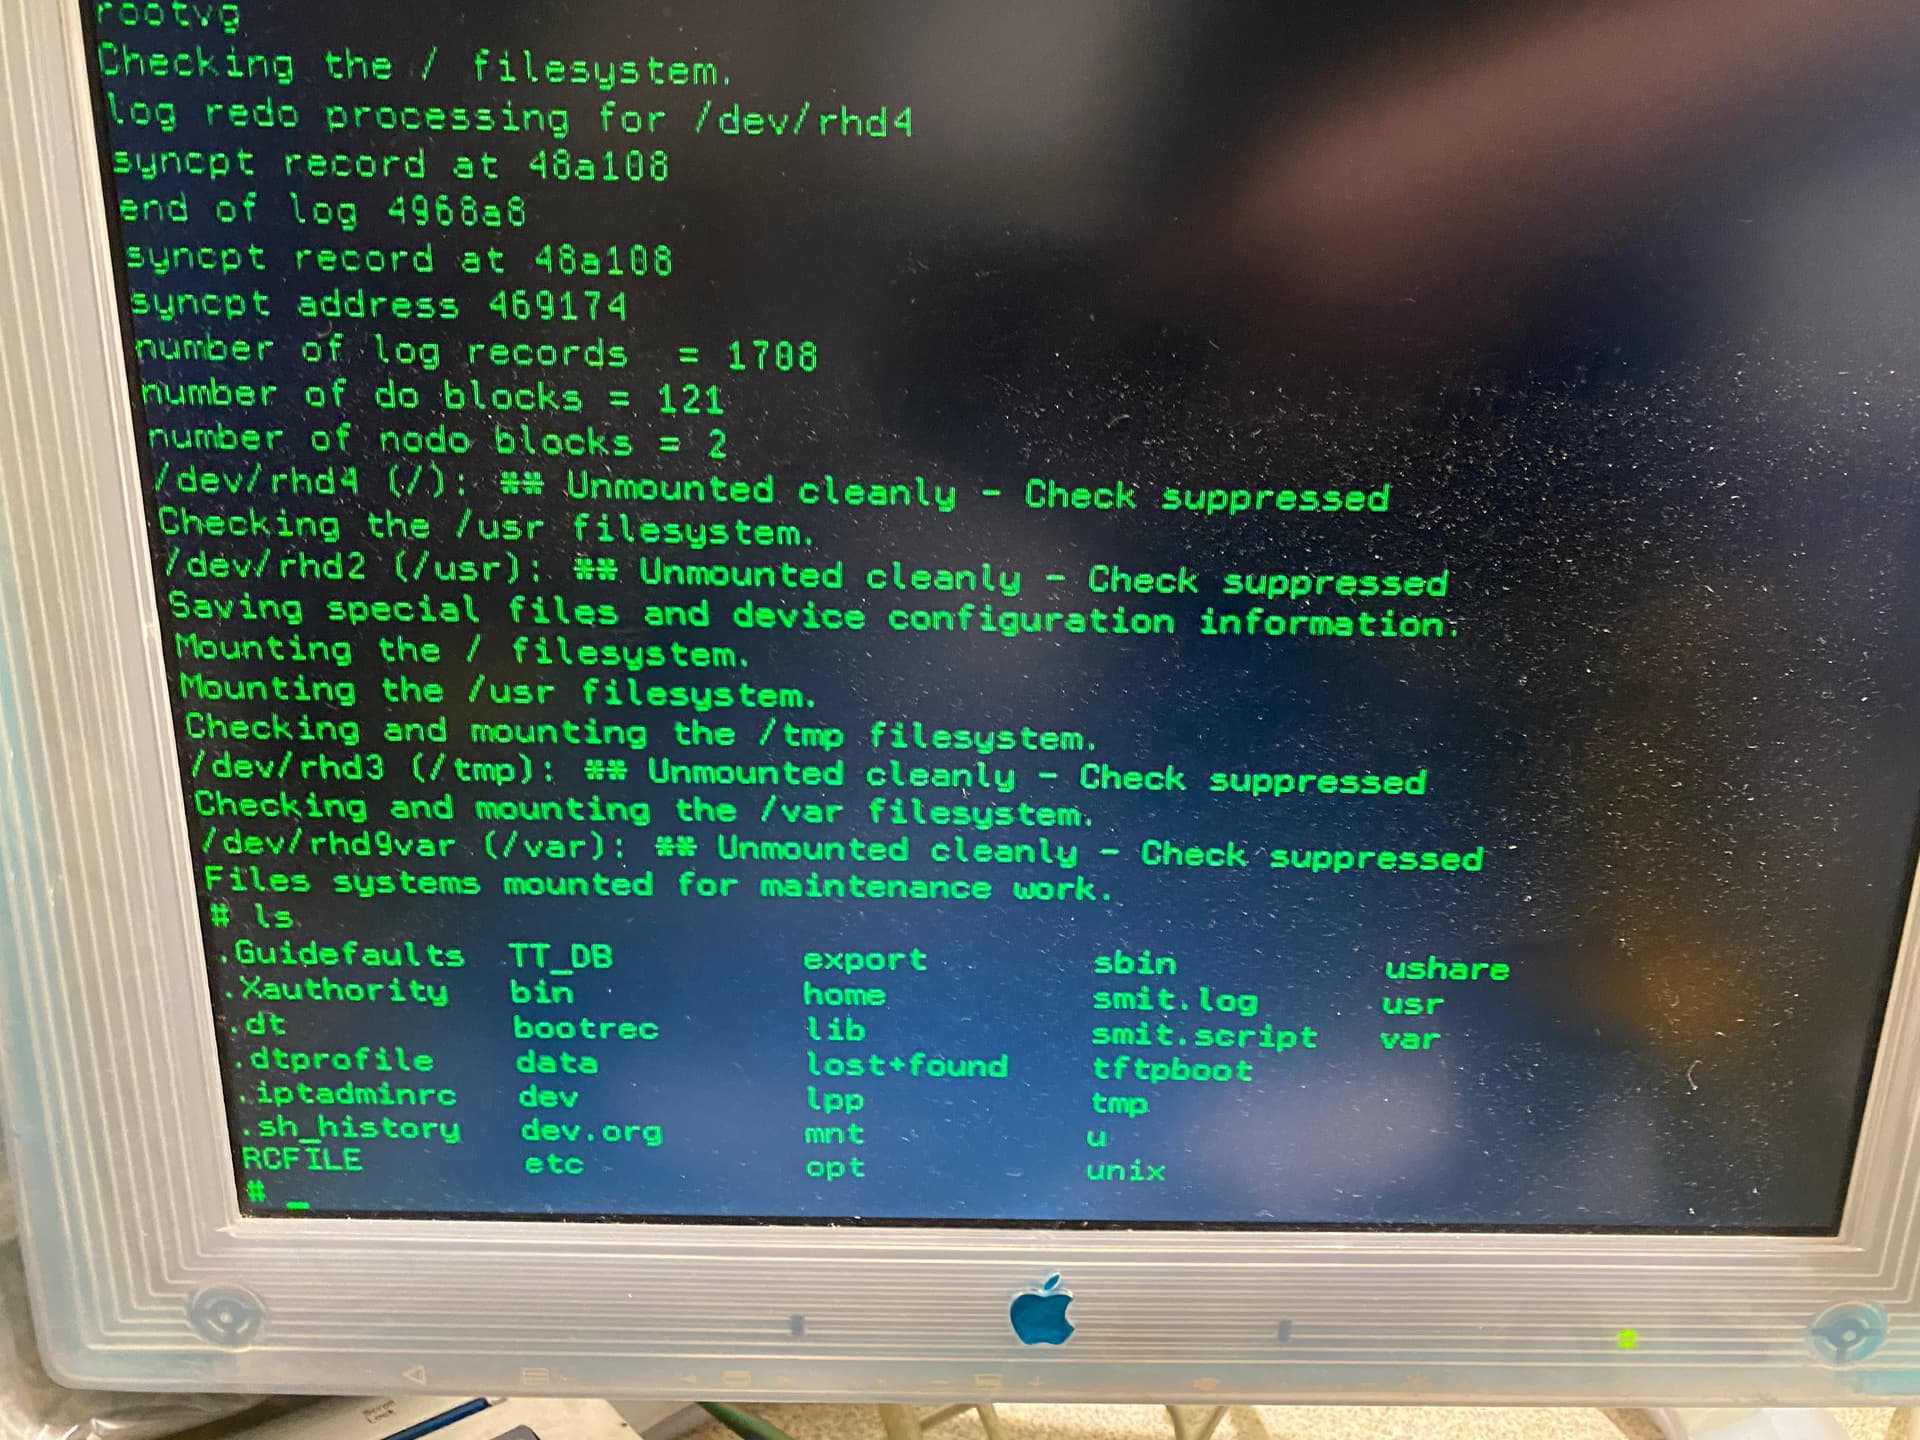
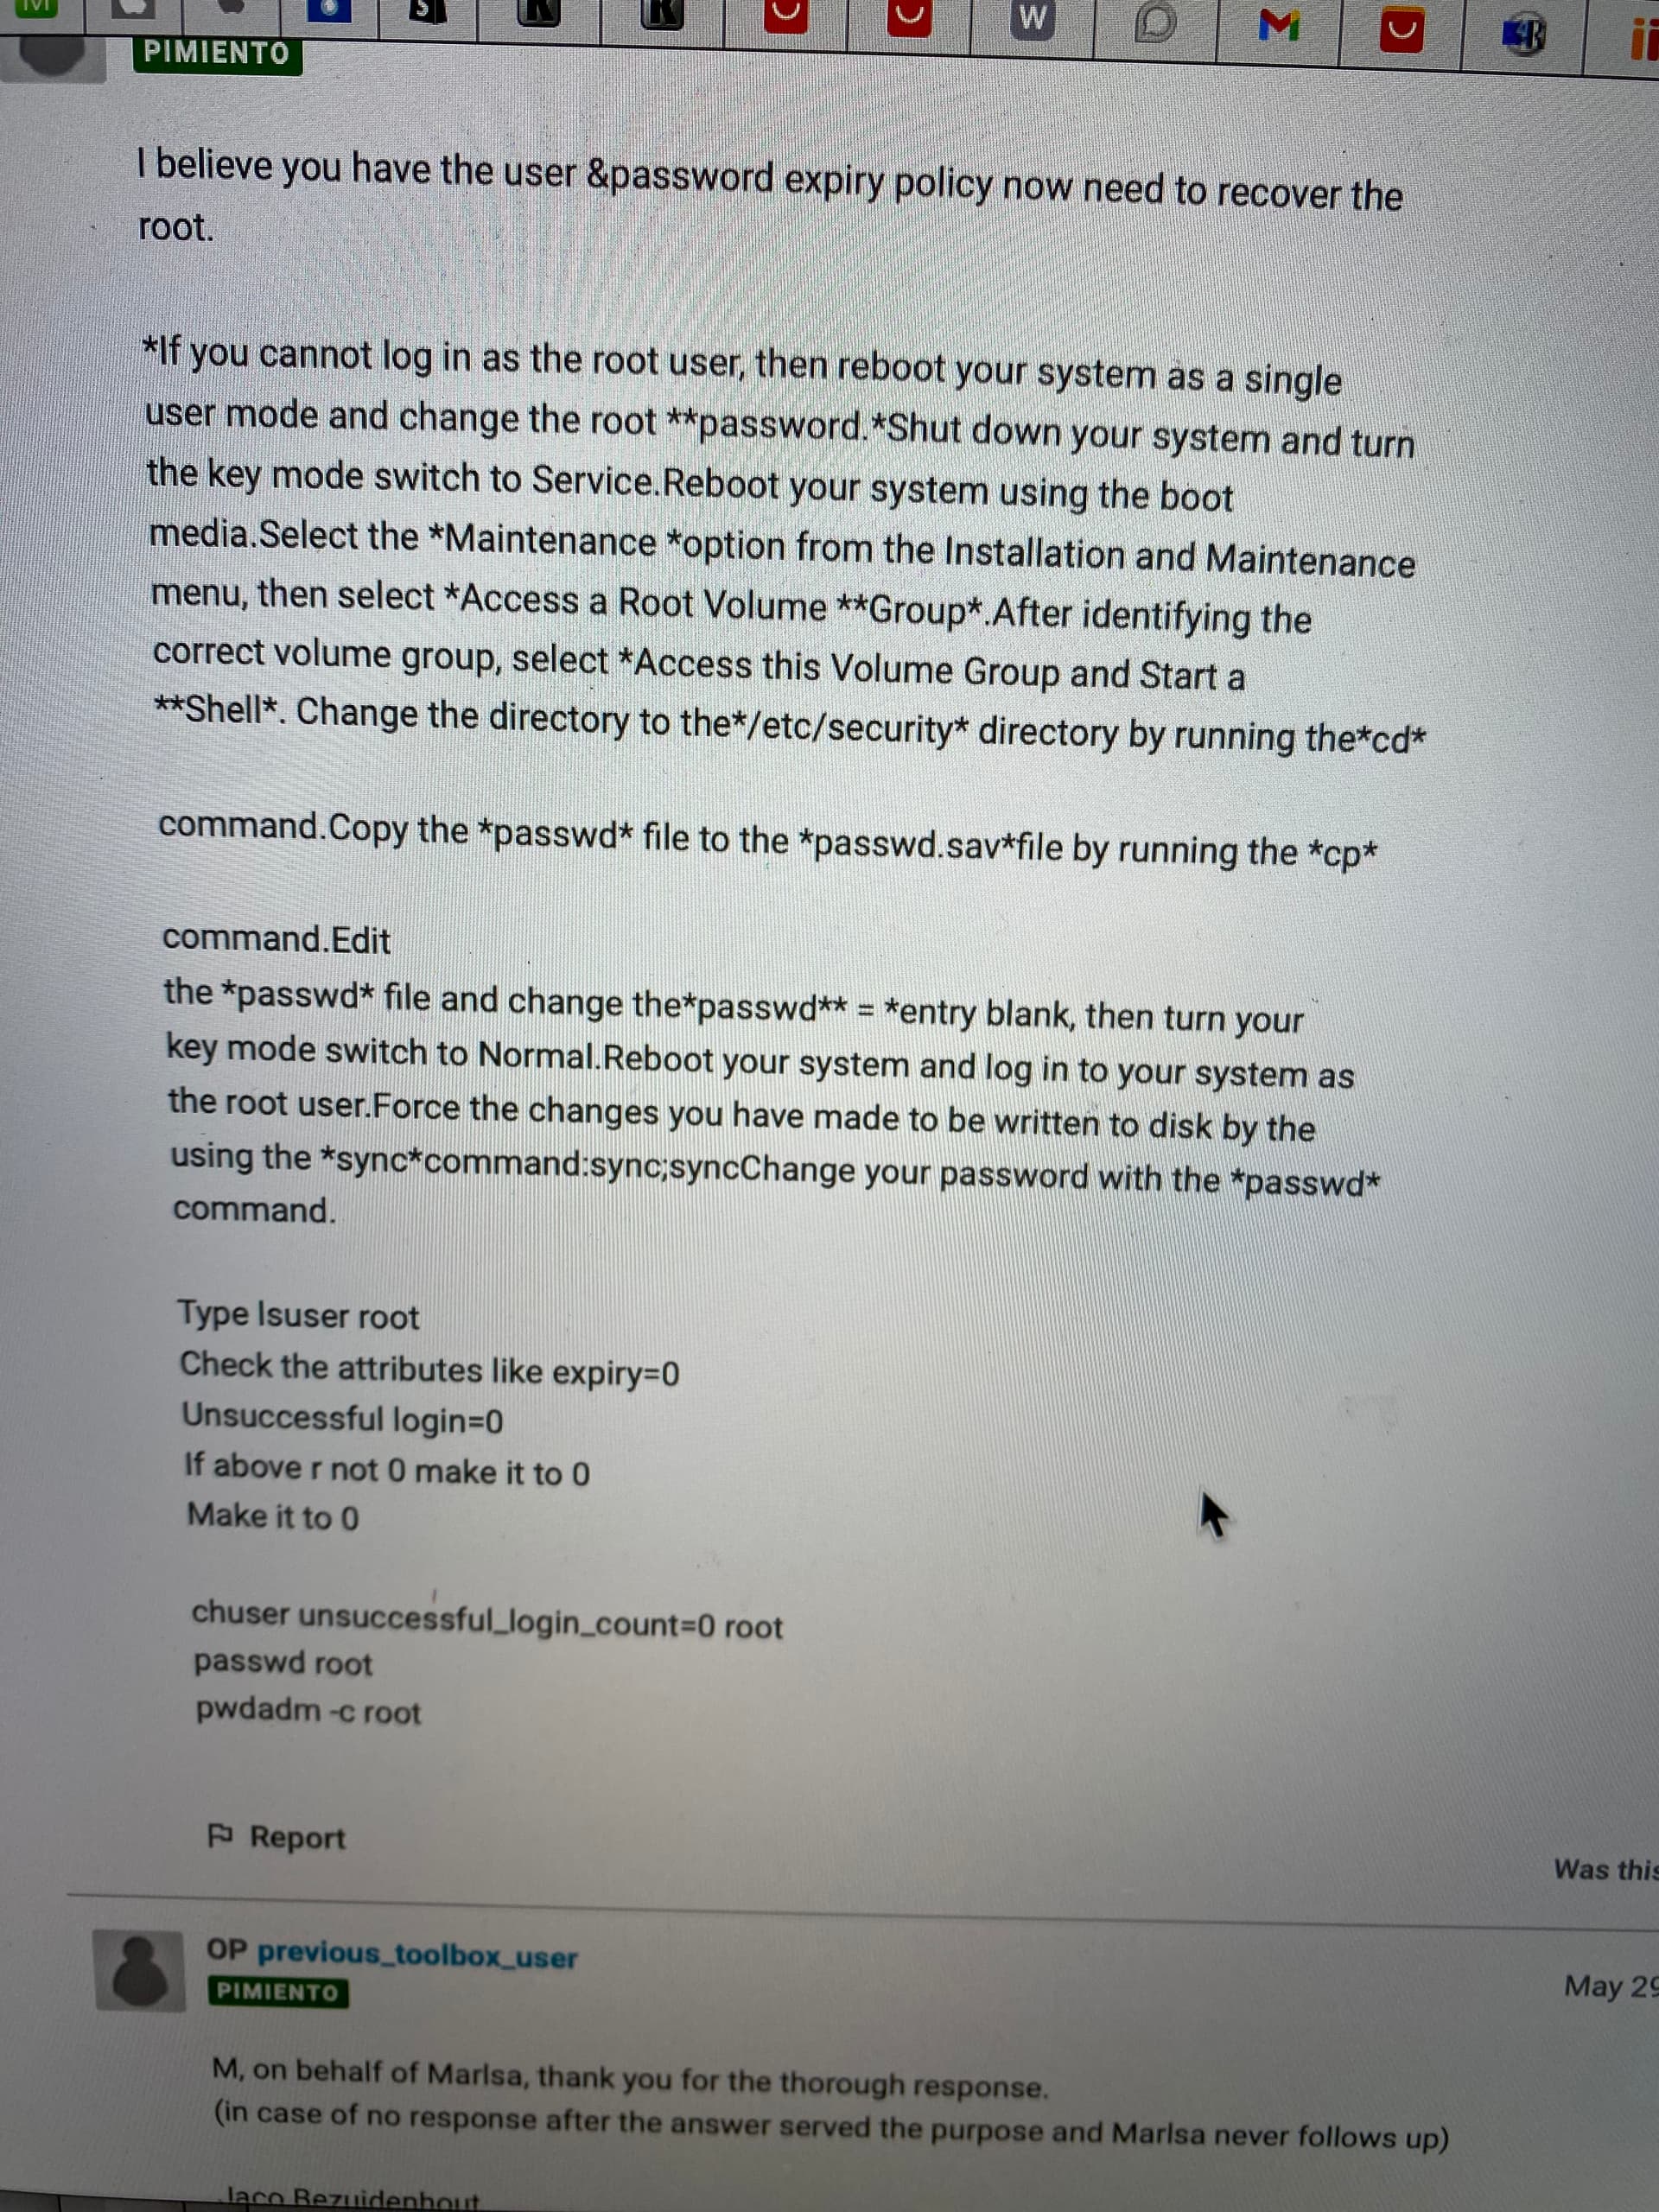
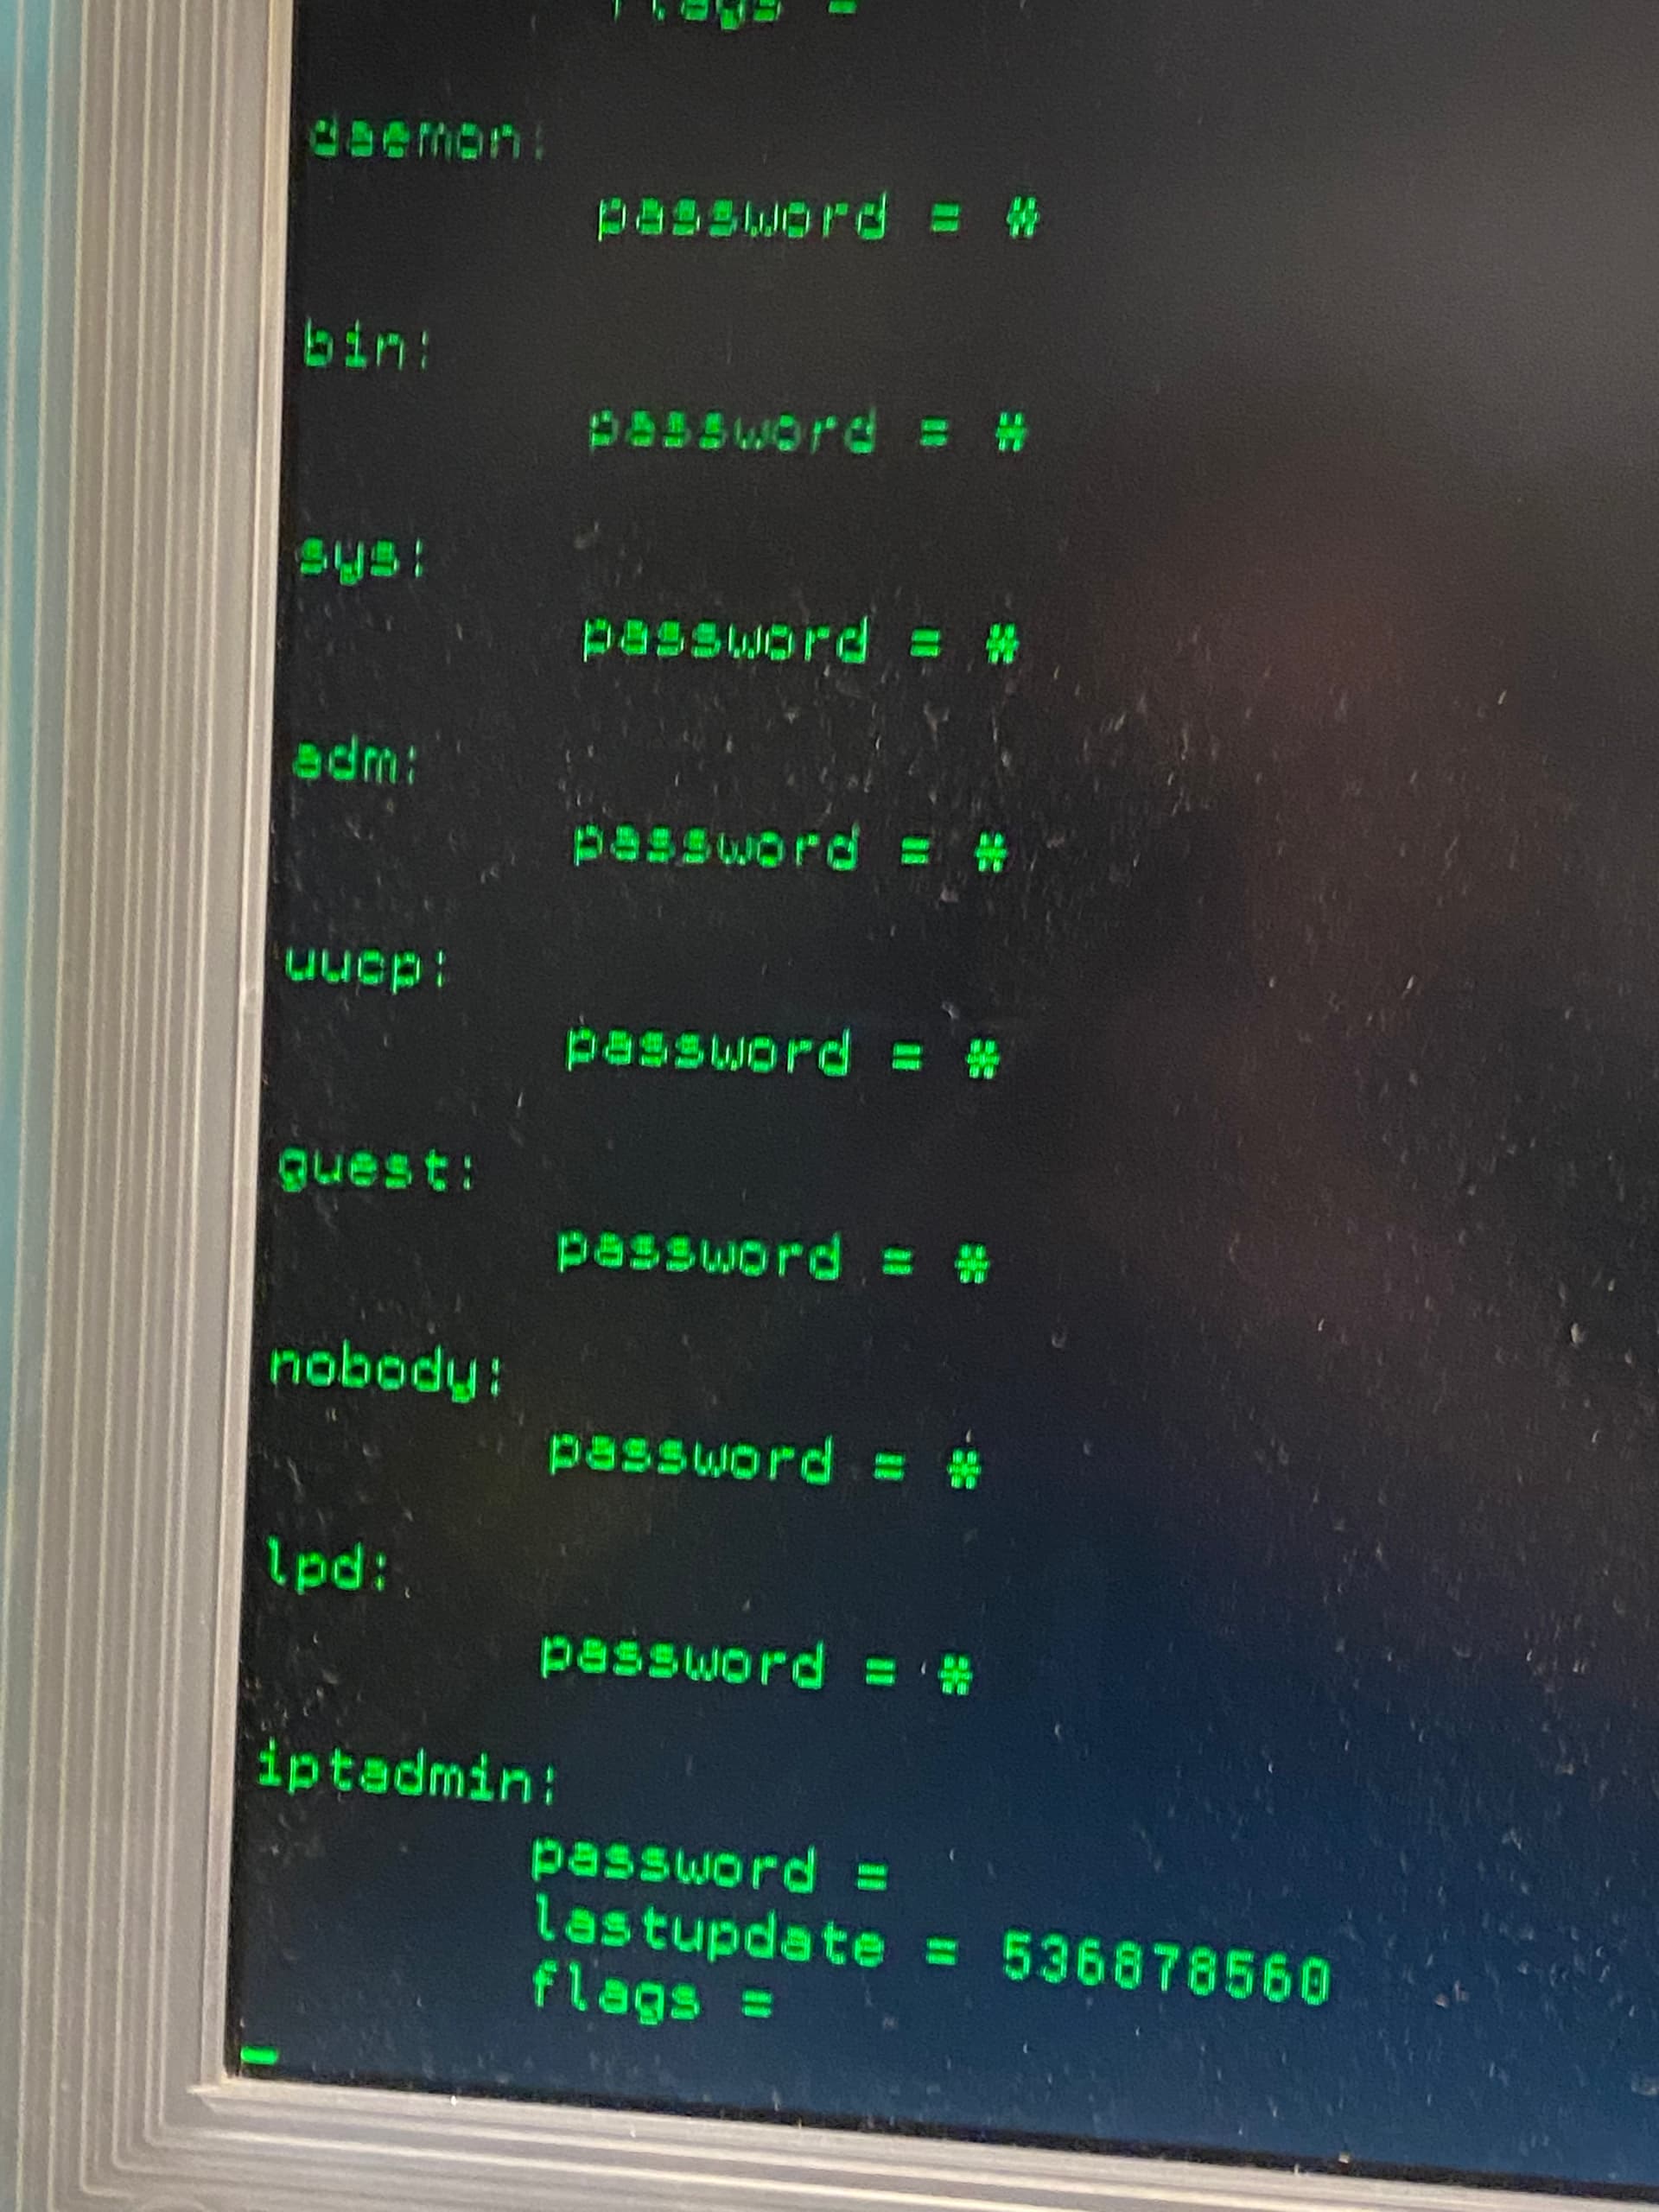
Well thankfully after finding instructions for a much later AIX from IBM I find the passwd file in /etc/security
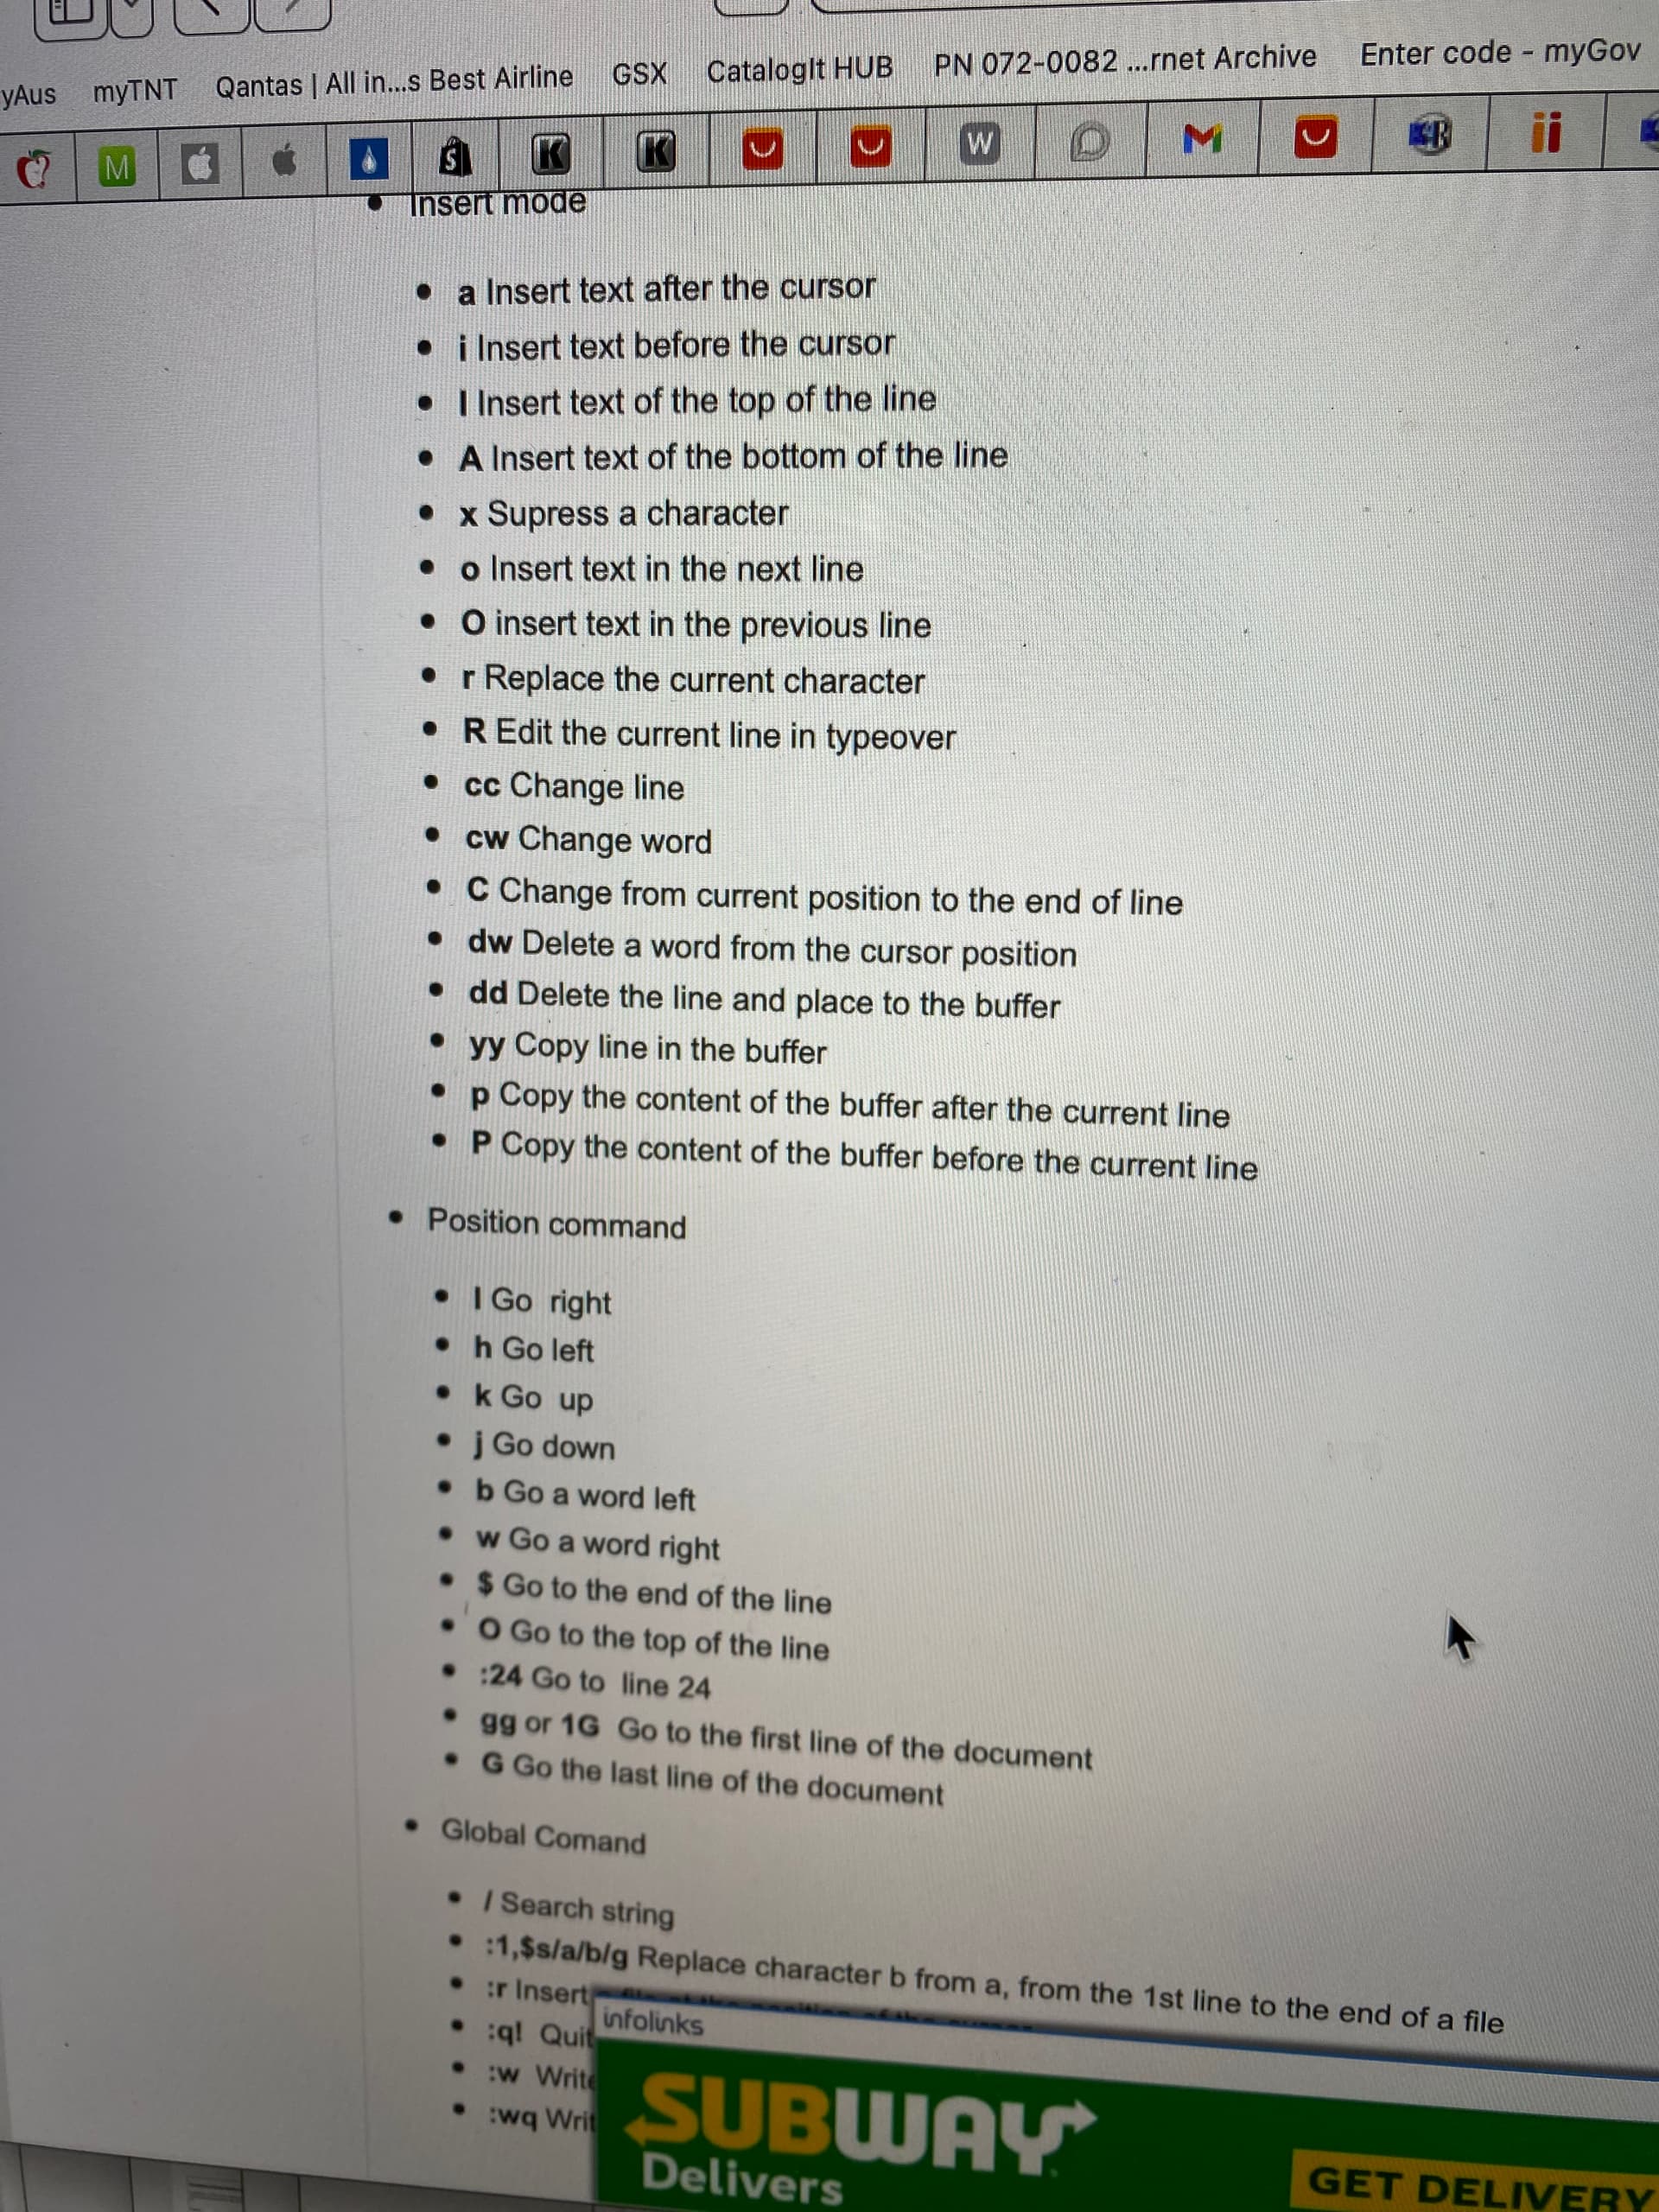
Now I struggle with the EDIT command.
I find VI command, it’s as useful as flyscreen on a submarine. Argh.
I literally have to find a googled result on using VI as the man pages for edit were useless and backward.
I remove the password and :wq to save it.
I reboot….

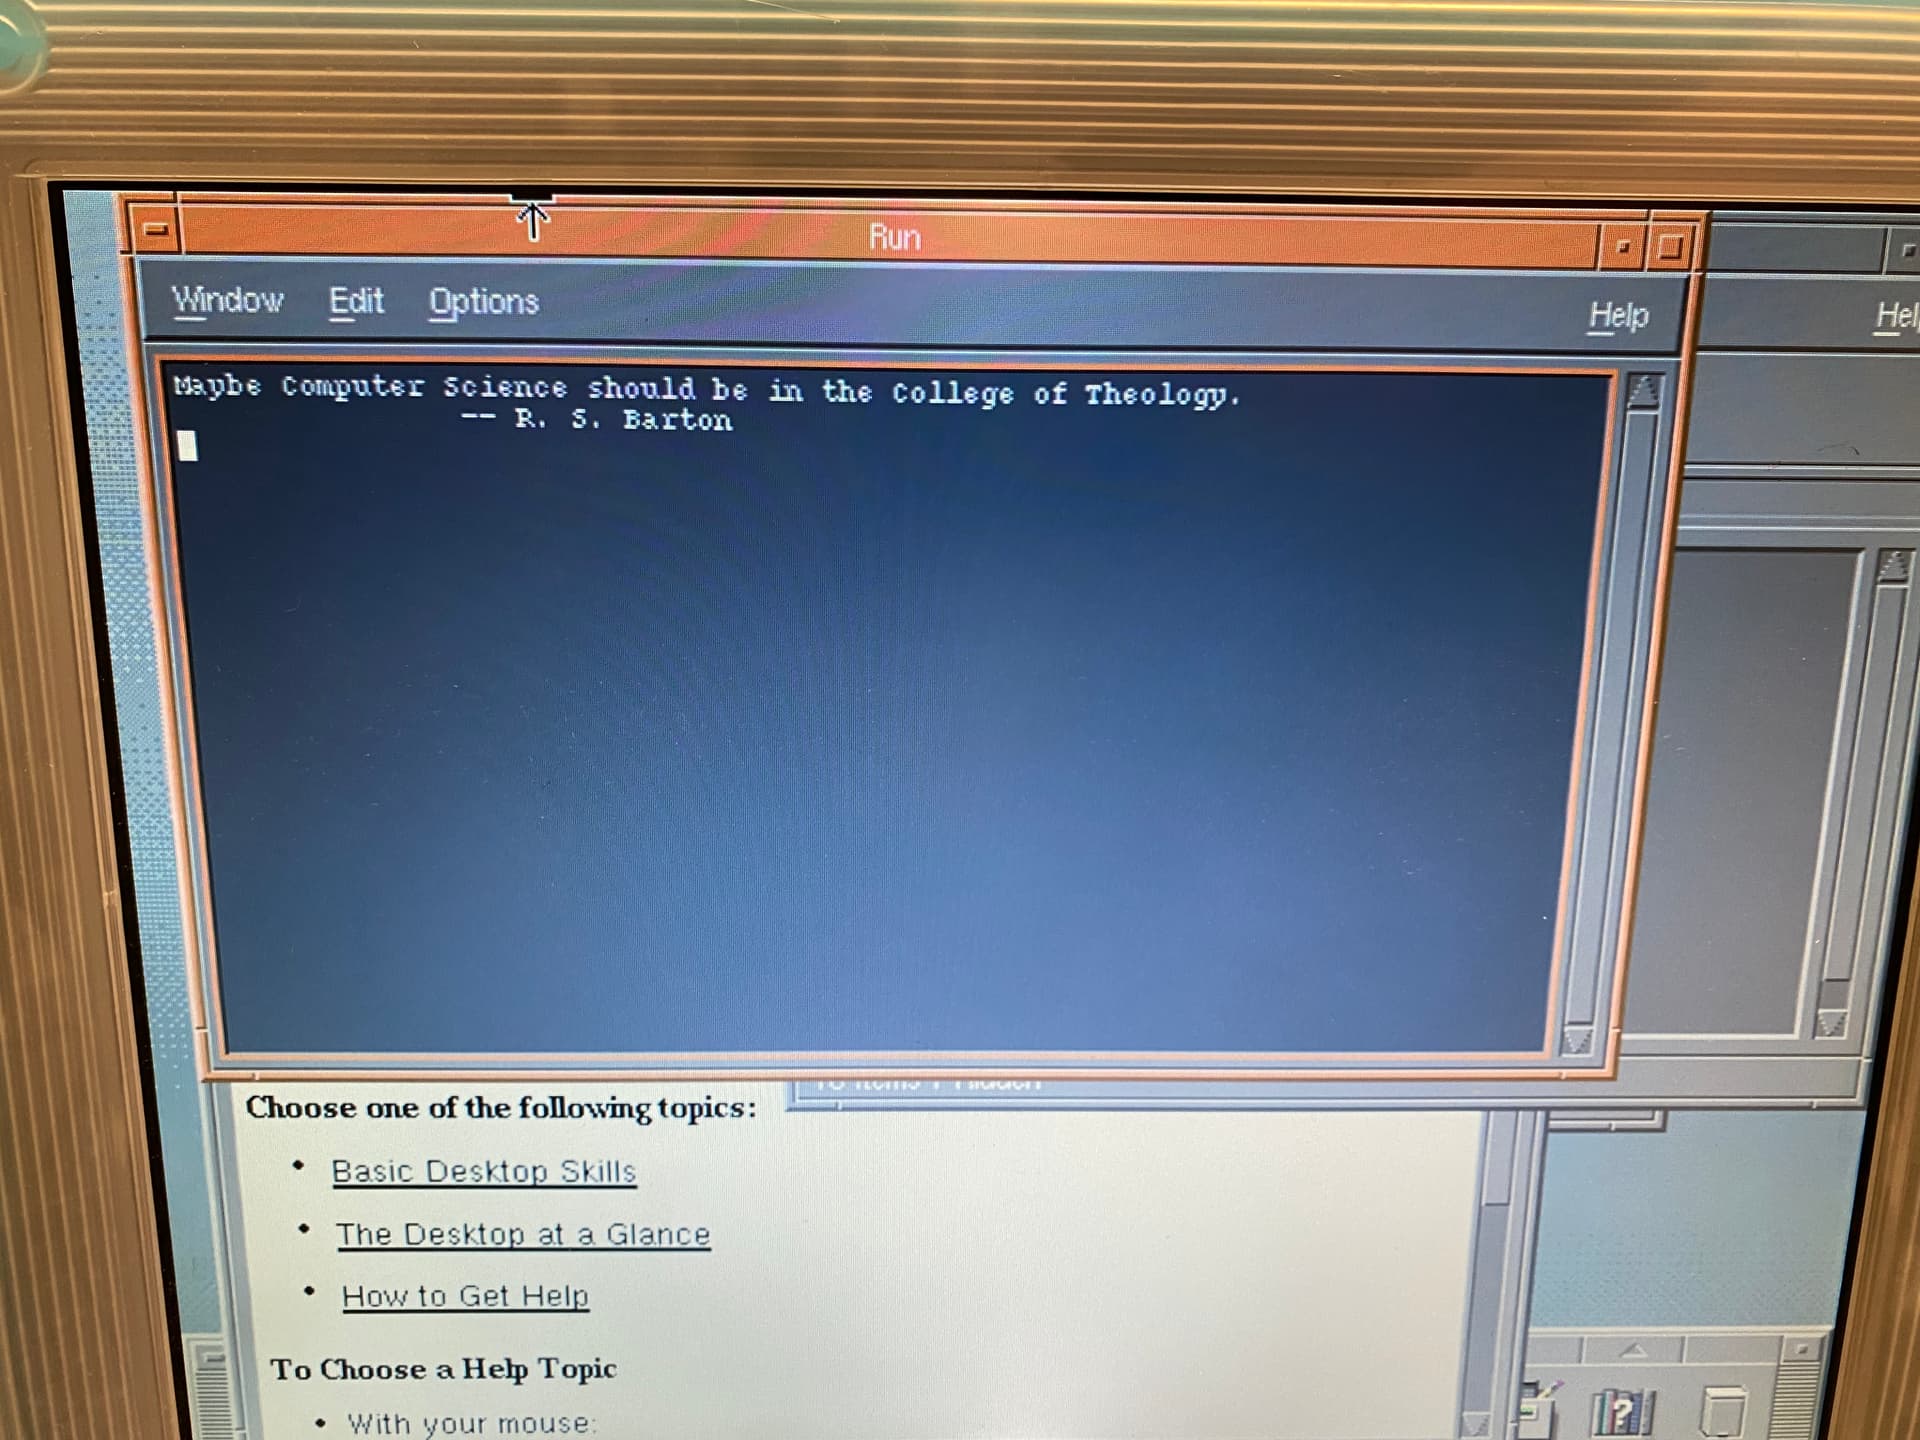

And just like that, like a 1337 hax0r from a bad 90s film, I’m in ne0!
The machine doesn’t seem to have anything on it but default software - and not even AppleTalk at that perhaps.
I play a game called MOO. That was 4 minutes of my life I won’t get back.
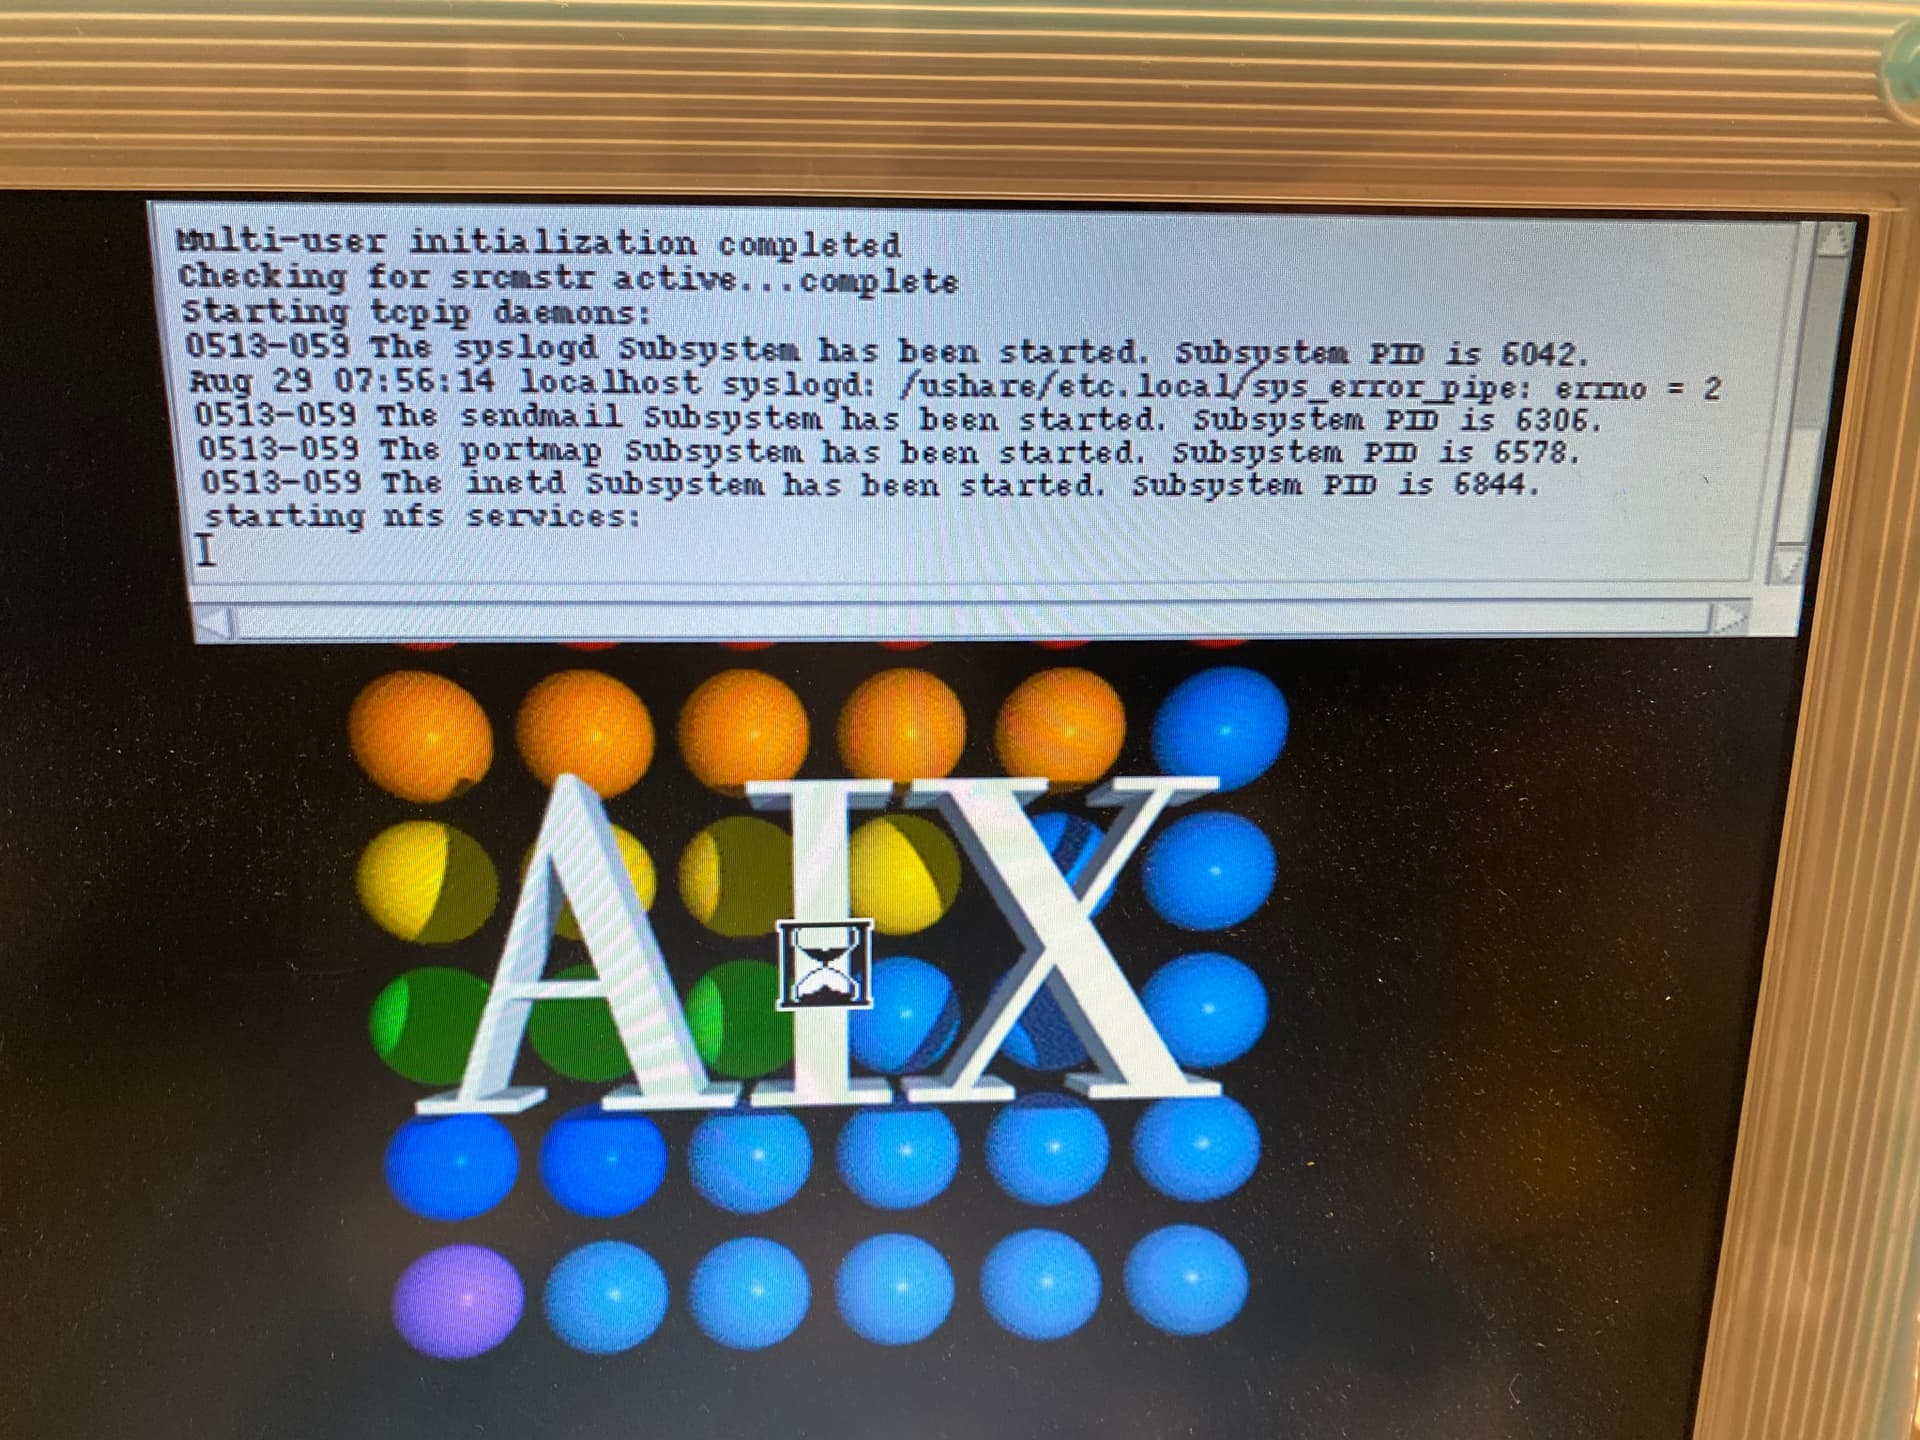
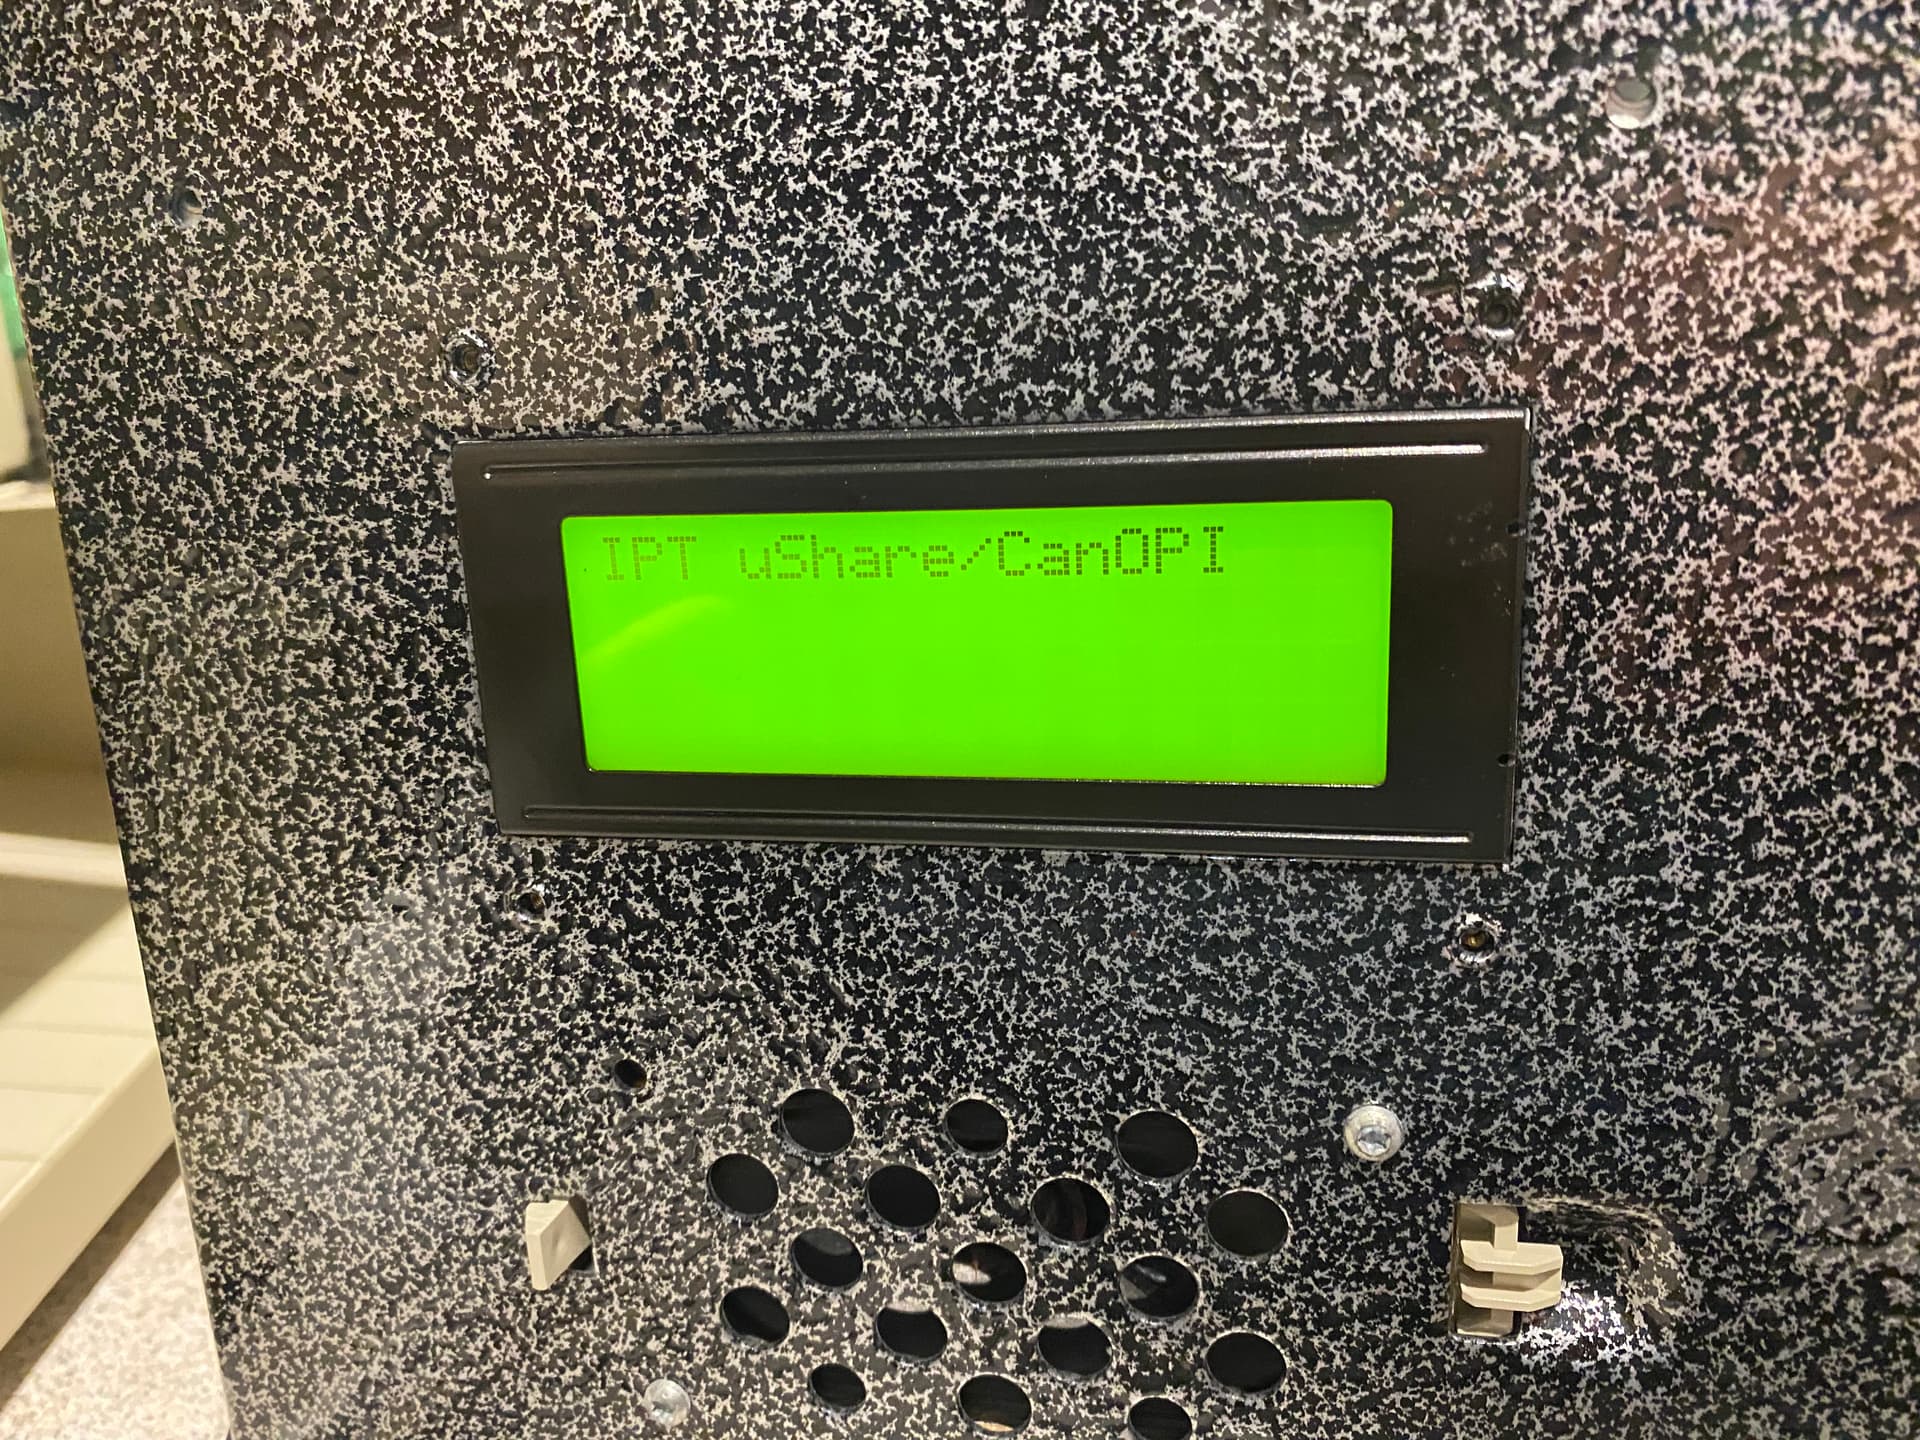
But hey! It’s done! It’s booting!!!
Now the eternal question after I’ve fixed this all and got it back from the dead….
WILL IT PLAY DOOM!
2 Likes
I found this Text document on a FTP server on running Linux on the ANS.
I thought I would share it here, as it was very helpful.
new ANS info at: http://www.xs4all.nl/~eddieb/linuxppc/ANS
Installation on an Apple Network Server 500 or 700
First you need a bootable image. Here are the choices in the appropriate directories:
- r4.1 - contains installer disk, kernel and boot disk kernel for linuxppc revision 4.1. This stuff is tested and should work well.
- r5 - installers and kernels for r5. This is UNTESTED. I built this stuff, but I have not yet had time to install. I should get to this next week. YMMV…
- ydl - contains installer, kernel and boot disk kernel for Yellow Dog Linux. this is another distribution simlar to r5 (glibc 2.1 based). This stuff is tested and should work well.
Basic Instructions:
-
get 2 blank floppies. format them as HFS on some Mac.
-
put the ins.*.coff file on on disk and the vmlinux.coff on the other
From Open Firmware
boot fd:ins.*.coff
replace the * with whichever distribution you have picked.
- download the install material(or buy a CD):
ftp SHOULD work, but it is NOT well tested…
- R4.1 - ftp://ftp.linuxppc.org/linuxppc/linuxppc-R4/RedHat/
- R5 - ftp://ftp.linuxppc.org/linuxppc/linuxppc-pre-R5/software/RedHat/
- YDL - ftp://ftp.yellowdoglinux.com/pub/yellowdog/champion-1.1/ppc/RedHat/
3a) follow the battery rituals at: http://www.demonsys.com/ans/ to clear the Open Firmware settings.
-
The ins.*.coff disk should boot an ANS 700(or 500???) into the installer of choice.
-
do the fairly standard RedHat install…
generic instructions in pdf form can be found at: Fixstars Corporation
I recommend the following hard drive partitioning:
| Device | Name or Location | Size | Comments |
|---|---|---|---|
| /dev/sda2 | /boot | 40 MB | this is need for internal booting |
| /dev/sda3 | swap | 128 MB | swap partition |
| /dev/sda4 | / | 1 GB or greater | root partition |
whatever other partitions you need…
- after installation has completed, reboot using the floppy with vmlinux.coff
From Open Firmware
boot fd:vmlinux.coff root=/dev/sdaX
where X is your root partition. In the above example, booting would be done from Open Firmware by specifying root=/dev/sda4. This will boot you into your system using a boot floppy. This should have total functionality even though booting is a bit slow.
Instructions for switching from floppy boot to internal boot: (these instructions are courtesy of Jean Robertson)
These steps should be done after booting from a floppy disk image otherwise quik will not work - SRE
- put an ext2 filesystem on the 40MB /boot partition. If you followed the example above and made the small partition in the second one, you would issue the command:
mke2fs /dev/sda2
Create a temporary mount point by simply making a directory:
mkdir /boot2
Mount the partition in a temporary place:
mount /dev/sda2 /boot2
Copy the contents of the RedHat installation /boot directory to the (newly created) /boot2 directory:
cd /boot cp -a * /boot2
Erase the contents of the /boot directory:
cd /boot rm *
Unmount the /boot2 directory:
umount /boot2
Now mount the partition under its proper name:
mount /dev/sda2 /boot
-
Copy any additional boot images needed to /boot. Also copy /etc/quik.conf. The installation will have put a bunch of other files in the /boot directory as well. Just leave them alone.
-
Edit the quik.conf file to include things like: the boot image, the root device, etc.
My /boot/quik.conf looks like this:
timeout is in tenths of seconds timeout=300 image=/vmlinux label=linux root=/dev/sda4 image=/vmlinux.old label=linux.old root=/dev/sda4 image=/vmlinux label=linux.ext root=/dev/sdc3
Some notes:
- In the above example, the default boot (the first “image” entry) has set the root partition as the fourth partition on the first hard drive; with follows our examples from above. The second boot option has set an older kernel with the same root partition. The third option has set the newer kernel with third hard drive, third partion as root.
- the “image=” lines do not say “/boot/vmlinux”. This is because when the ANS boots up, no filesystems have yet been mounted. All it knows is what it sees at the moment. For humans, once booted up into a state that we can use, we will find the files under the “/boot” directory. So, as far as it knows, there is only one directory. The leading slash in front of “vmlinux” is important. It won’t work without it.
- The 300 timeout makes quik wait 30 seconds before booting. this way at boot time I can choose which image and which root want at boot up.
- unmount the filesystem.
umount /boot
- run e2fsck on the filesystem
e2fsck /dev/sda2
- re-mount the filesystem.
mount /dev/sda2 /boot
- run quik with
/sbin/quik -v -C /boot/quik.conf
-
IMPORTANT NOTE: never, never, never, ever re-run quik without a reason. It will make your partition un-bootable. Valid reasons are: a new kernel image, a change in the quik.conf file.
-
Edit the /etc/fstab file:
Insert the tiny filesystem in the list of filesystems to be mounted and make sure that it is never checked by e2fsck. The line in the /etc/fstab file should read:
/dev/sda2 /boot ext2 defaults 1 0
The sixth field in the entry, the “0”, says to never run e2fsck on the filesystem. Why? Because all the files on the filesystem have to stay in the same place for the bootloader. e2fsck might move files around. Nasty.
My fstab is the following:
/dev/sda2 /boot ext2 defaults 1 0 /dev/sda4 / ext2 defaults 1 1 /dev/sda3 swap swap defaults 0 0 /dev/fd0 /mnt/floppy ext2 noauto 0 0 /dev/cdrom /mnt/cdrom iso9660 noauto,ro 0 0 none /proc proc defaults 0 0
If you created additional filesystems when you did the RedHat install above, verify that they have been entered in the /etc/fstab file.
- Now on to the Open Firmware variables:
- Set Open Firmware to boot from the internal disk:
The default value for “boot-device” is “disk2:aix”. I changed it to “disk2:0”. I presume that this means “boot anything that you find in block 0 of disk2”. “disk2” being defined (“aliased” in Open-Firmware-speak) as the internal disk with the SCSI ID 2. I left the “boot-file” empty. - Let Open Firmware boot without interruption:
Set “auto-boot?” back to “true” so that it does not stop at the Open Firmware screen.(optional SRE)
If ever you want to get back to Open Firmware after setting “auto-boot? true”, boot the machine with the four
command-option-o-f
keys held down.
-
switch the key on the from of the ANS from the “service” state to the “unlock” state (move it from the wrench icon to the unlocked padlock icon).
-
shut it down and re-boot. You should see mention of a “second stage booter” and then a “boot:” prompt.
If you wait 30 seconds (as per the quik.conf file above) it should boot all by itself.
If you hit “return” because you are impatient, it should boot the first image.
If you choose from the list by typing whatever the “label=” reference is, then it will boot with the chosen root filesystem.
8-20-99 SRE
Scott R. Every
1 Like
@DigitalRampage - Thank you for entering the Retro challenge October 2022!
Thanks for your entry, it was fantastic and detailed and we are so glad it worked out! Unfortunately as you judge this competition currently, your bias means you can’t win, but best of luck for our next challenge which is forthcoming and hopefully judged by a bigger panel so your entry counts! Thanks for your work!
Yourself and the ACMS team! =P