RetroChallenge 2023/10 - Applix1616 restoration/documentation

Found that I had an old USB to TTL Serial adapter that I got ages ago with a Freetronics KitTen Arduino compatible board, and used this to flash the GoTek with the FlashFloppy firmware.

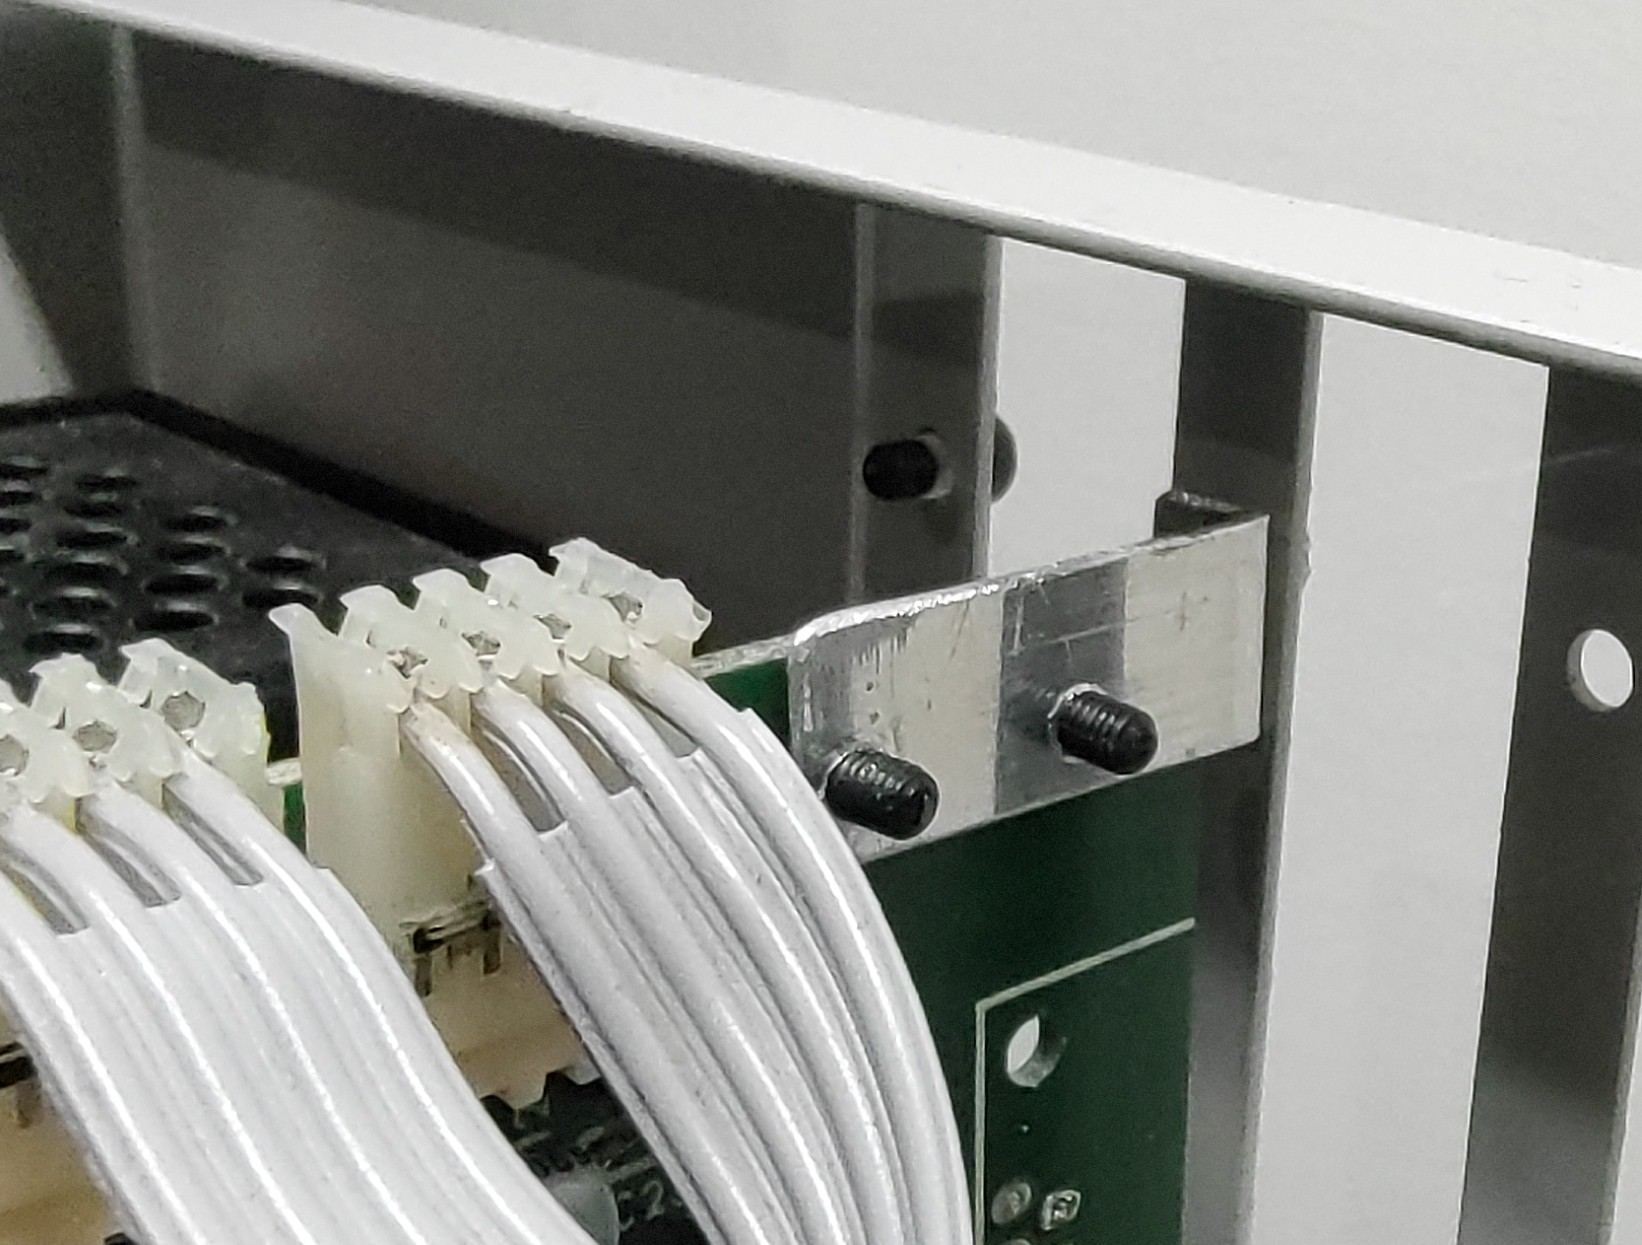
I soldered headers into my GoTek, since it made things just a bit easier. Specifically, the unit I have is a SFRK30.AT4.35, so I pretty much followed the instructions on the FlashFloppy wiki. Needed to install the stm32flash package on my Linux box (Debian) and it just worked.

Flashing the FlashFloppy firmware onto the GoTek.

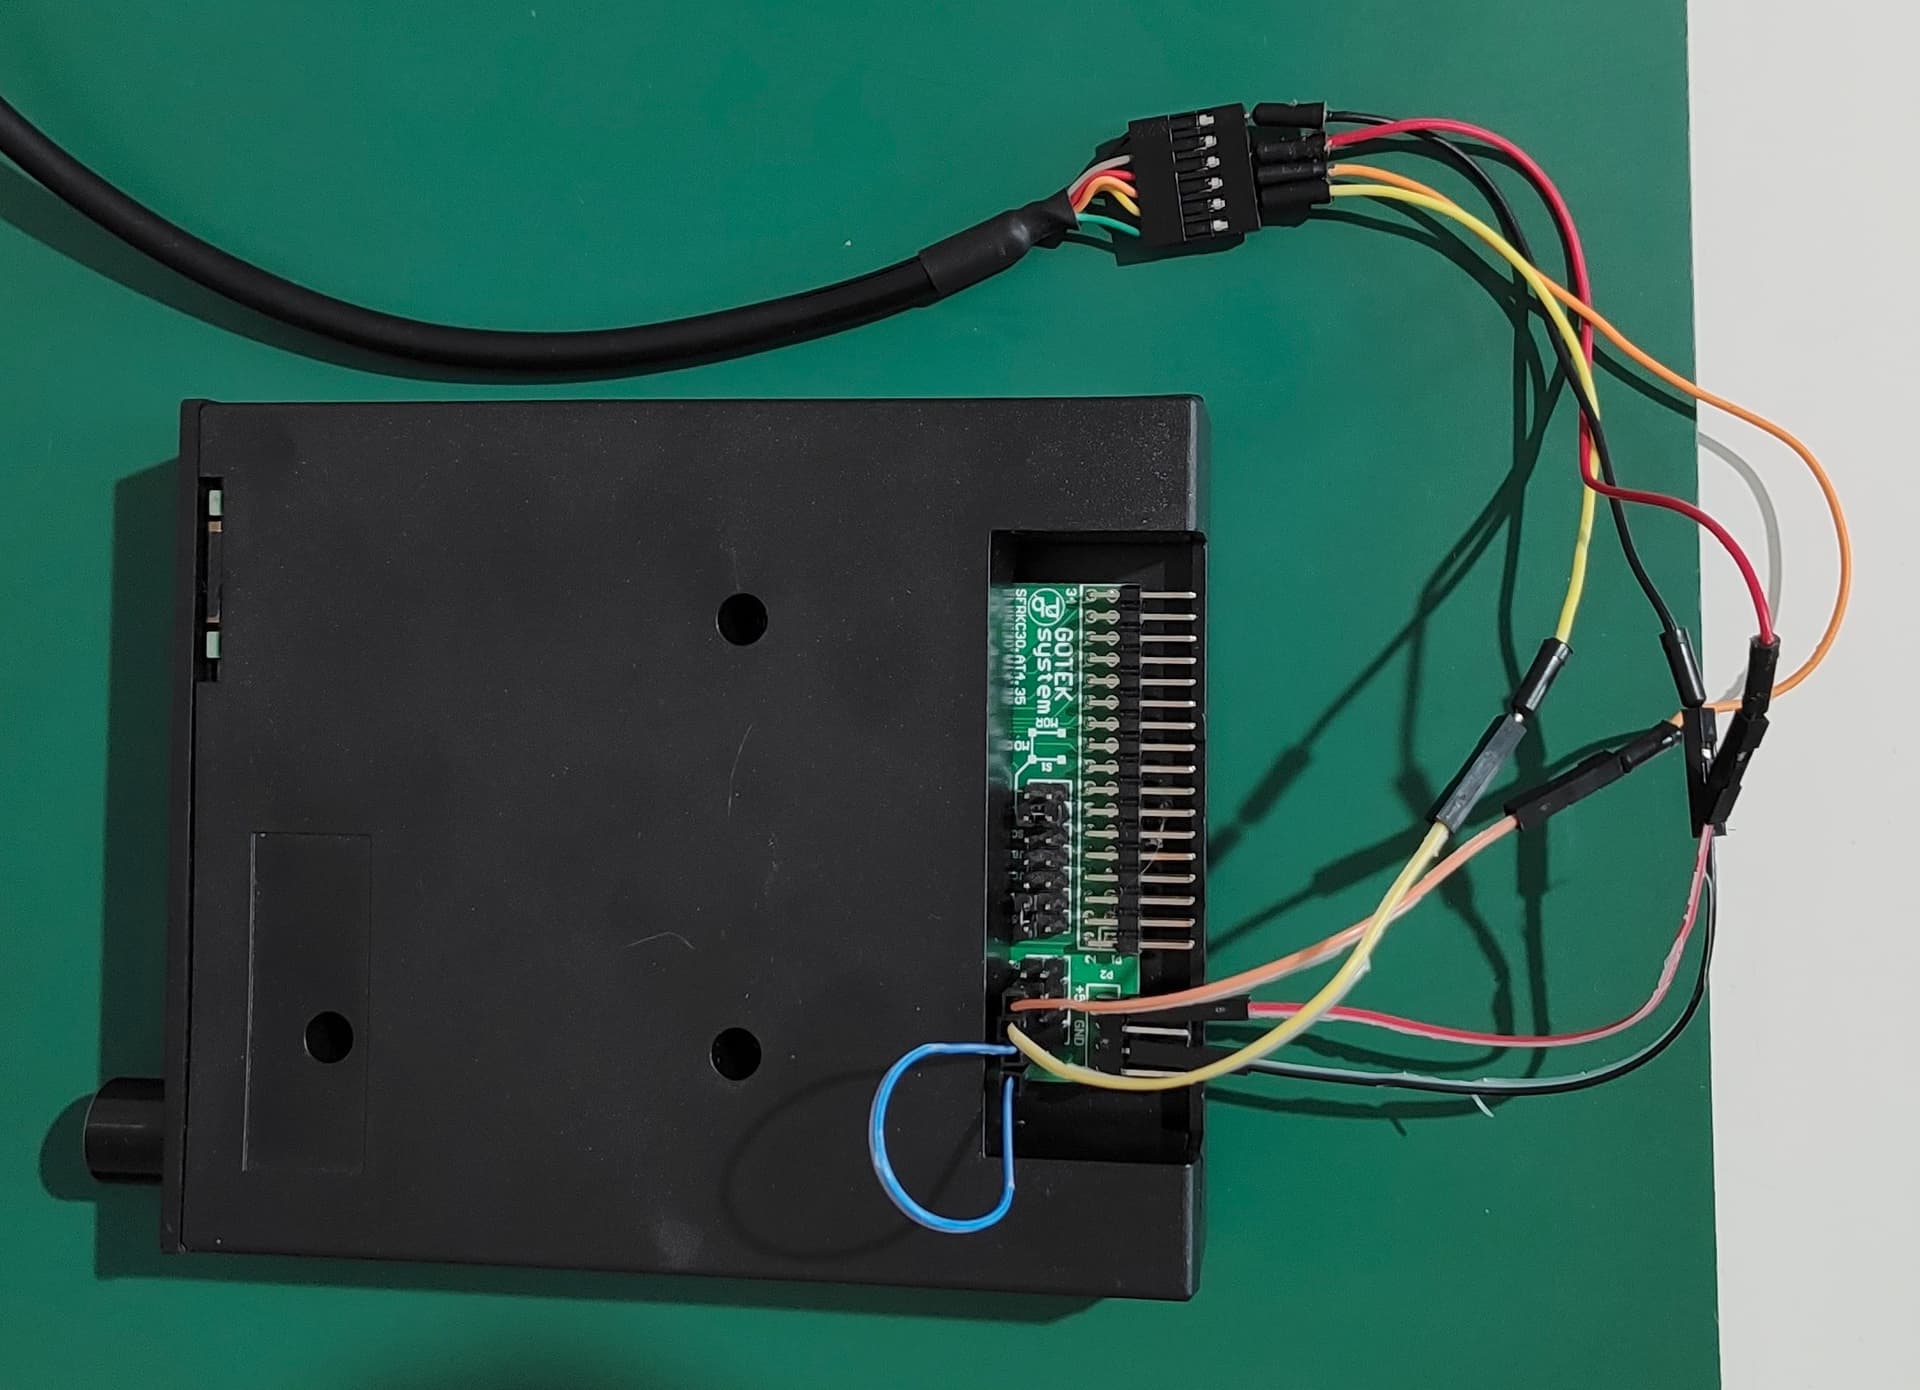
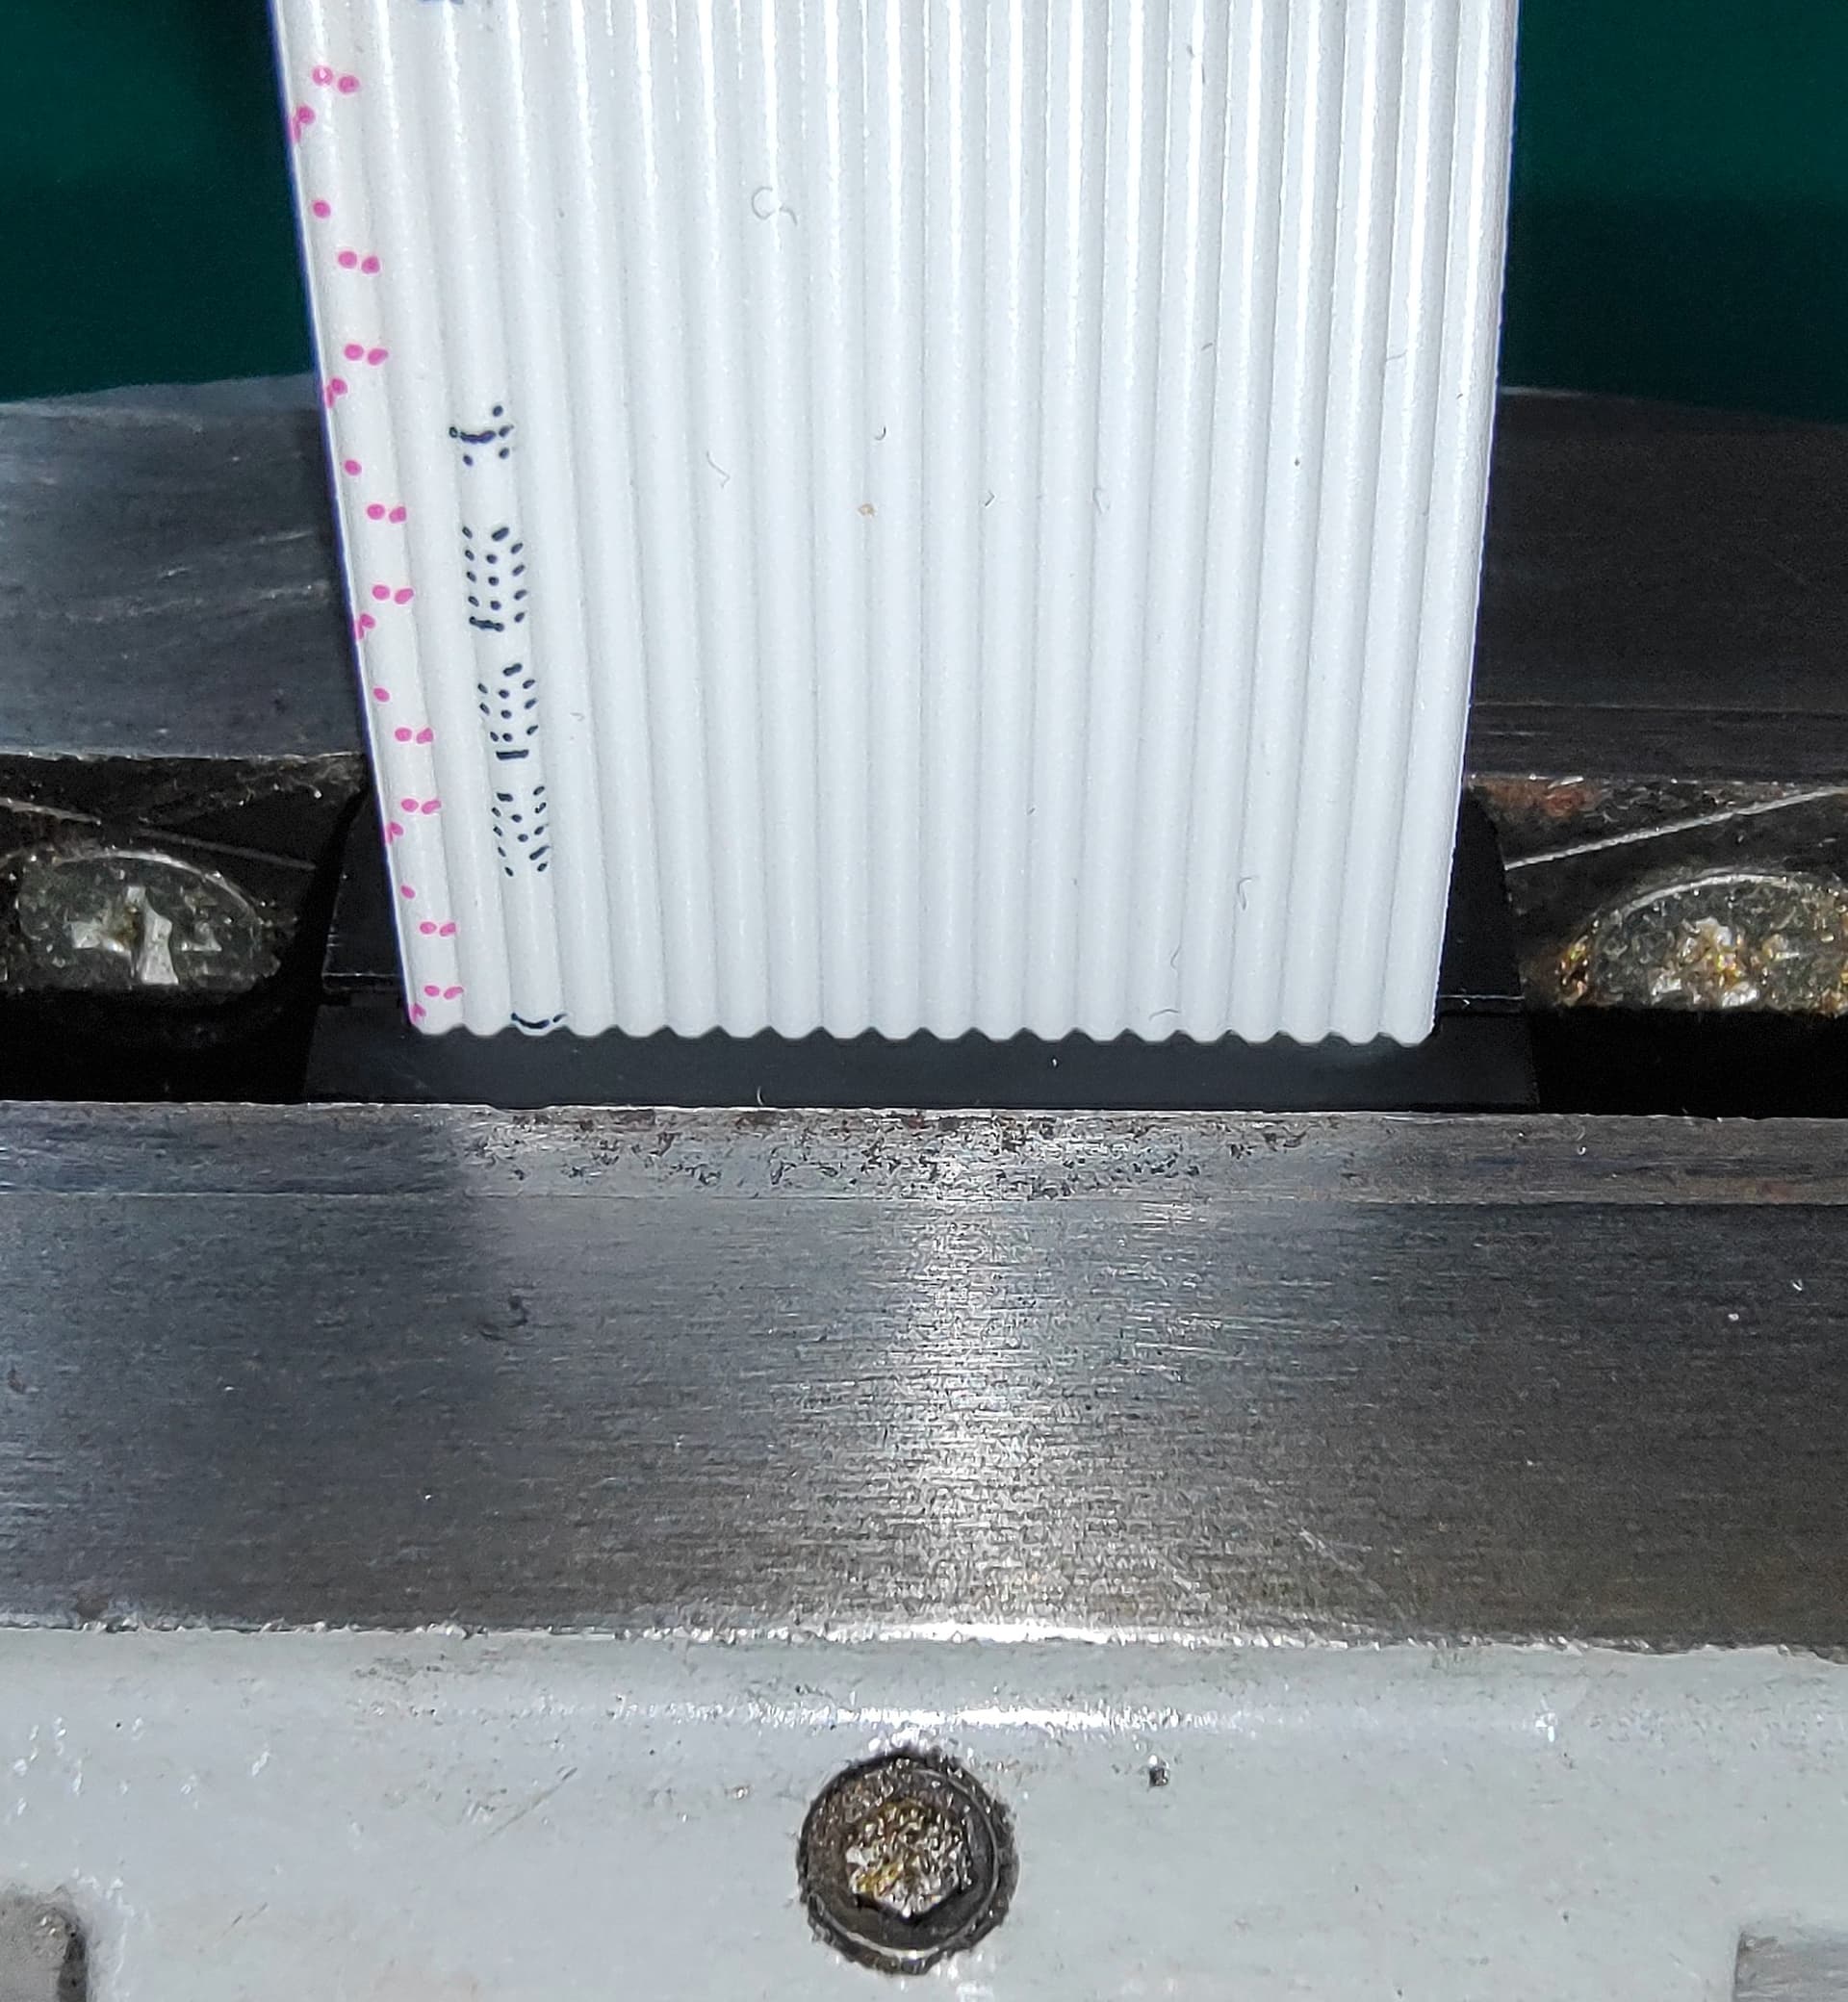
Note: I used the blue jumper wire rather than a header so I wouldn’t accidentally forget to remove it later, and because it shows up better in a photo.

As per what ChickenMan said in a previous post, on the floppy image front it seems I just need to convert all the .RAW image files I have into HFE format.

After a few false starts, I found that the HxC Floppy Emulator project does build on Linux, but they don’t ship binaries, so you need to get it from the repository on their Github at GitHub - jfdelnero/HxCFloppyEmulator: HxC Floppy Drive Emulator toolkit and build it yourself. The github is the latest place to get it from (as of this post). It used to be hosted on Sourceforge (which is what a lot of online info points you at) but no longer.

Was a simple matter of grabbing a copy of the repository and doing cd build ; make from the unpacked directory. I had gcc and a bunch of other essential build tools installed, but found I didn’t have libfreetype-dev installed, which was required. Then you can just run the main executable from the build directory with ./hxcfloppyemulator.

The GUI is not particularly flashy, but it works:
HxCFloppyEmulator Main Screen

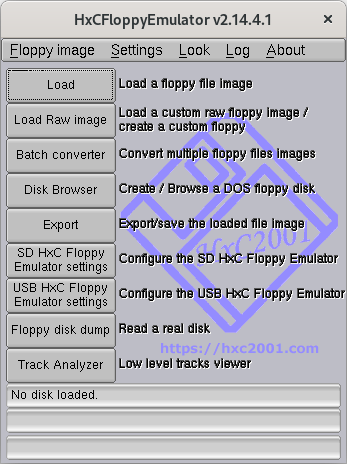
The defaults are what is supposed to be a 1.44 MB disk, but it does auto-detect some things when you feed it an image file.

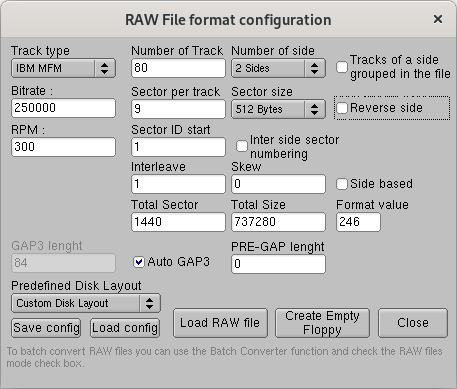
Raw file format configuration screen:
HxC RAW file format config screen

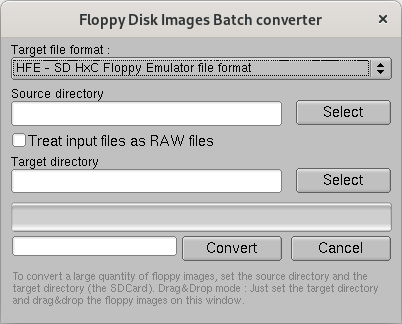
Note: If you use the batch converter, note that it will traverse subdirectories. Specifically, you DO NOT want the output to go into either the same directory or a subdirectory of the input directory, else once it has processed all the original files, it will go through and convert all the newly added files, again, and again, endlessly, as it proceeds to the next file in the directory without realising they’re already in the correct format. I’m sure you can guess how I found this out.

Batch Converter screen:
HxC Floppy Emulator Batch Converter screen

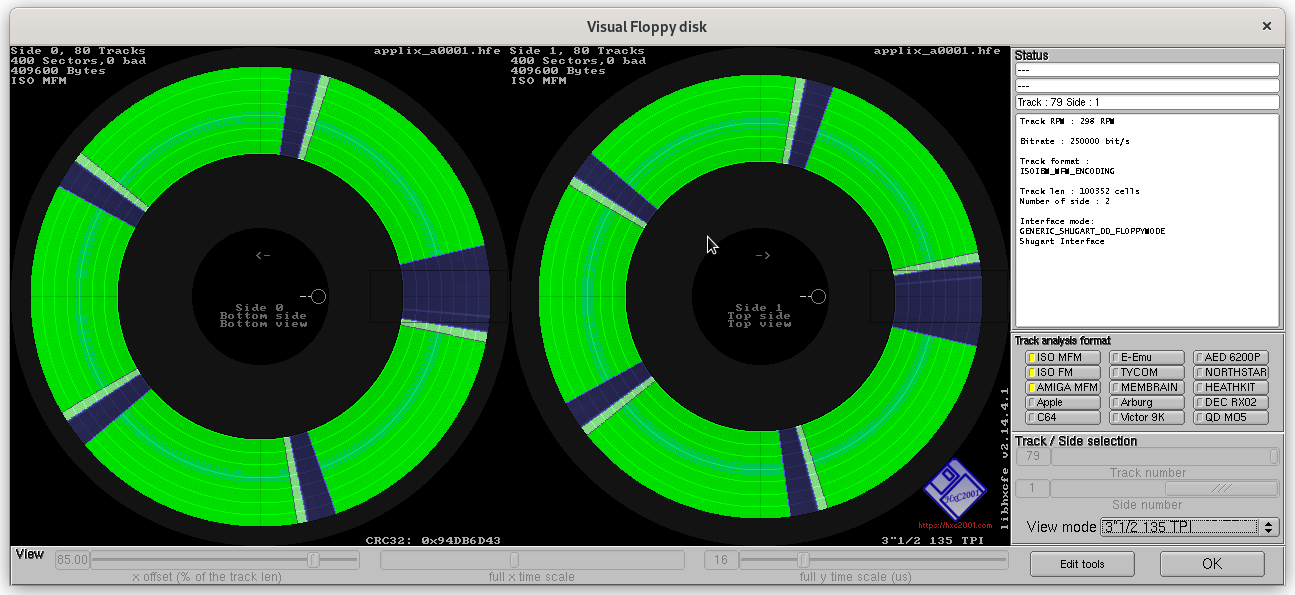
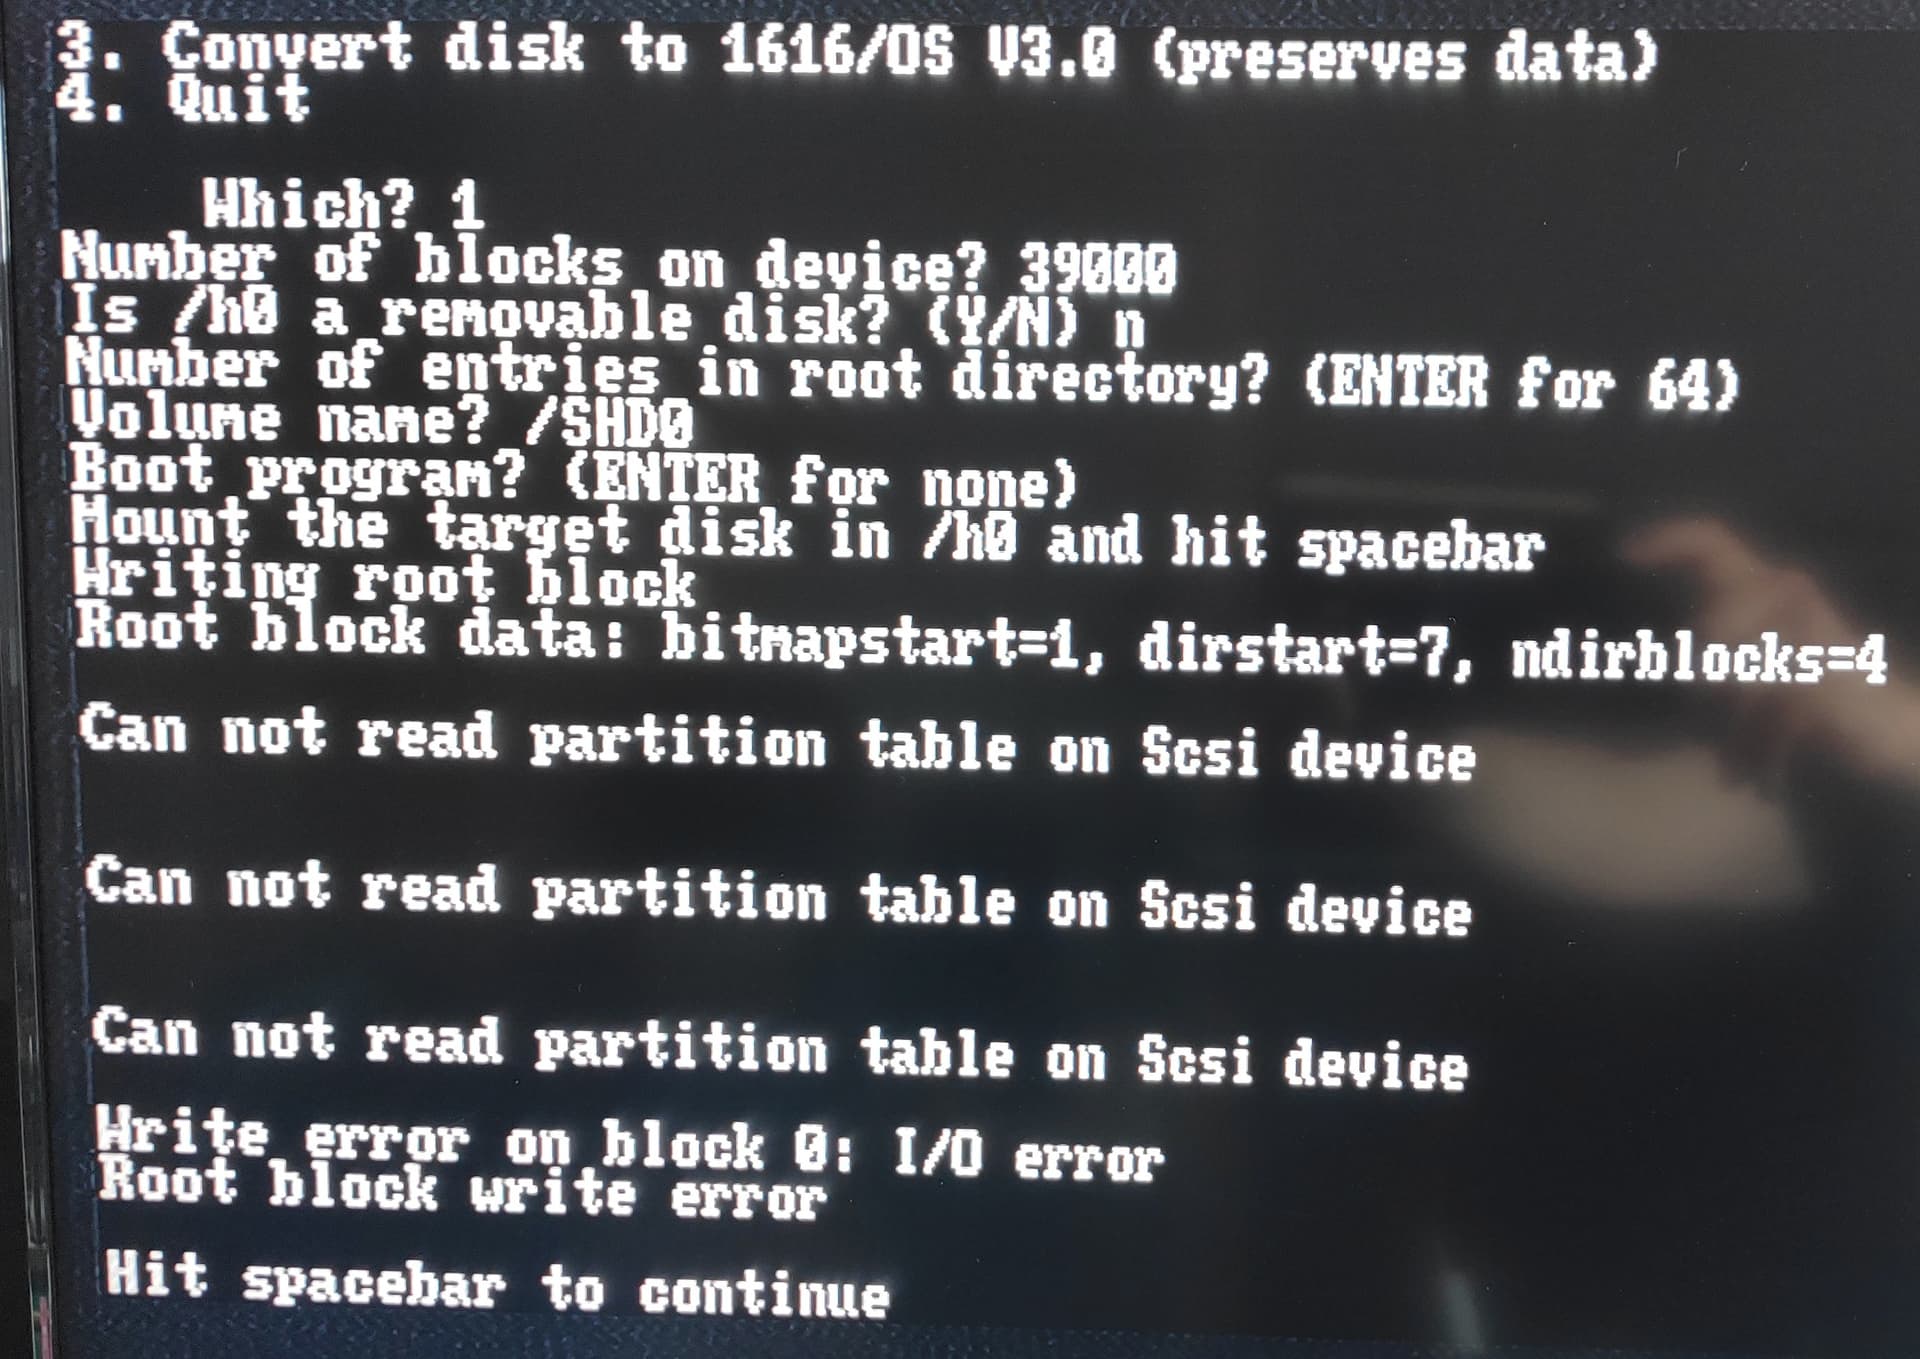
However, when I tried this, I get the same error about blocks being damaged.

To me, this still seems like the images were being processed wrong. Tried a bunch of things here, and eventually seem to have found something that seems to give some more useful results. Turns out that most of the issue was that the Applix uses disks that are 80 tracks with 10 sectors per track (5 per side), with each sector being 1024 bytes. This gives a total disk size of 819200 bytes, or 800K. Looks like the default for the GoTek is the same as the default settings in HxC, which is 80 tracks with 18 sectors per track (9 per side) and 512 bytes (ie: IBM PC format).

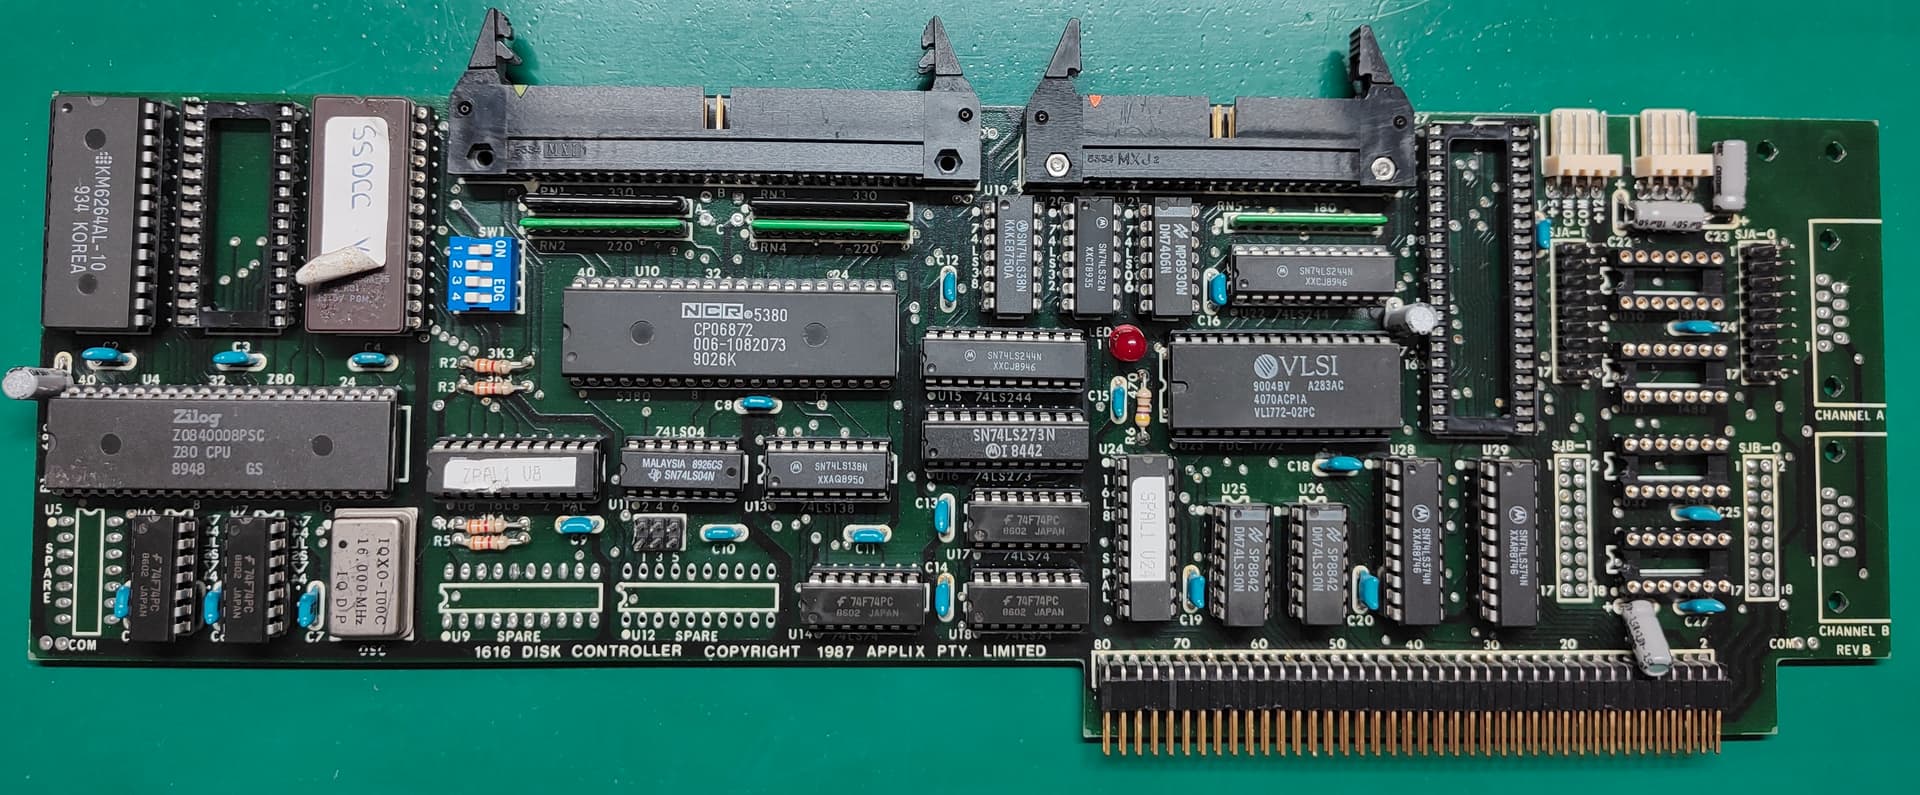
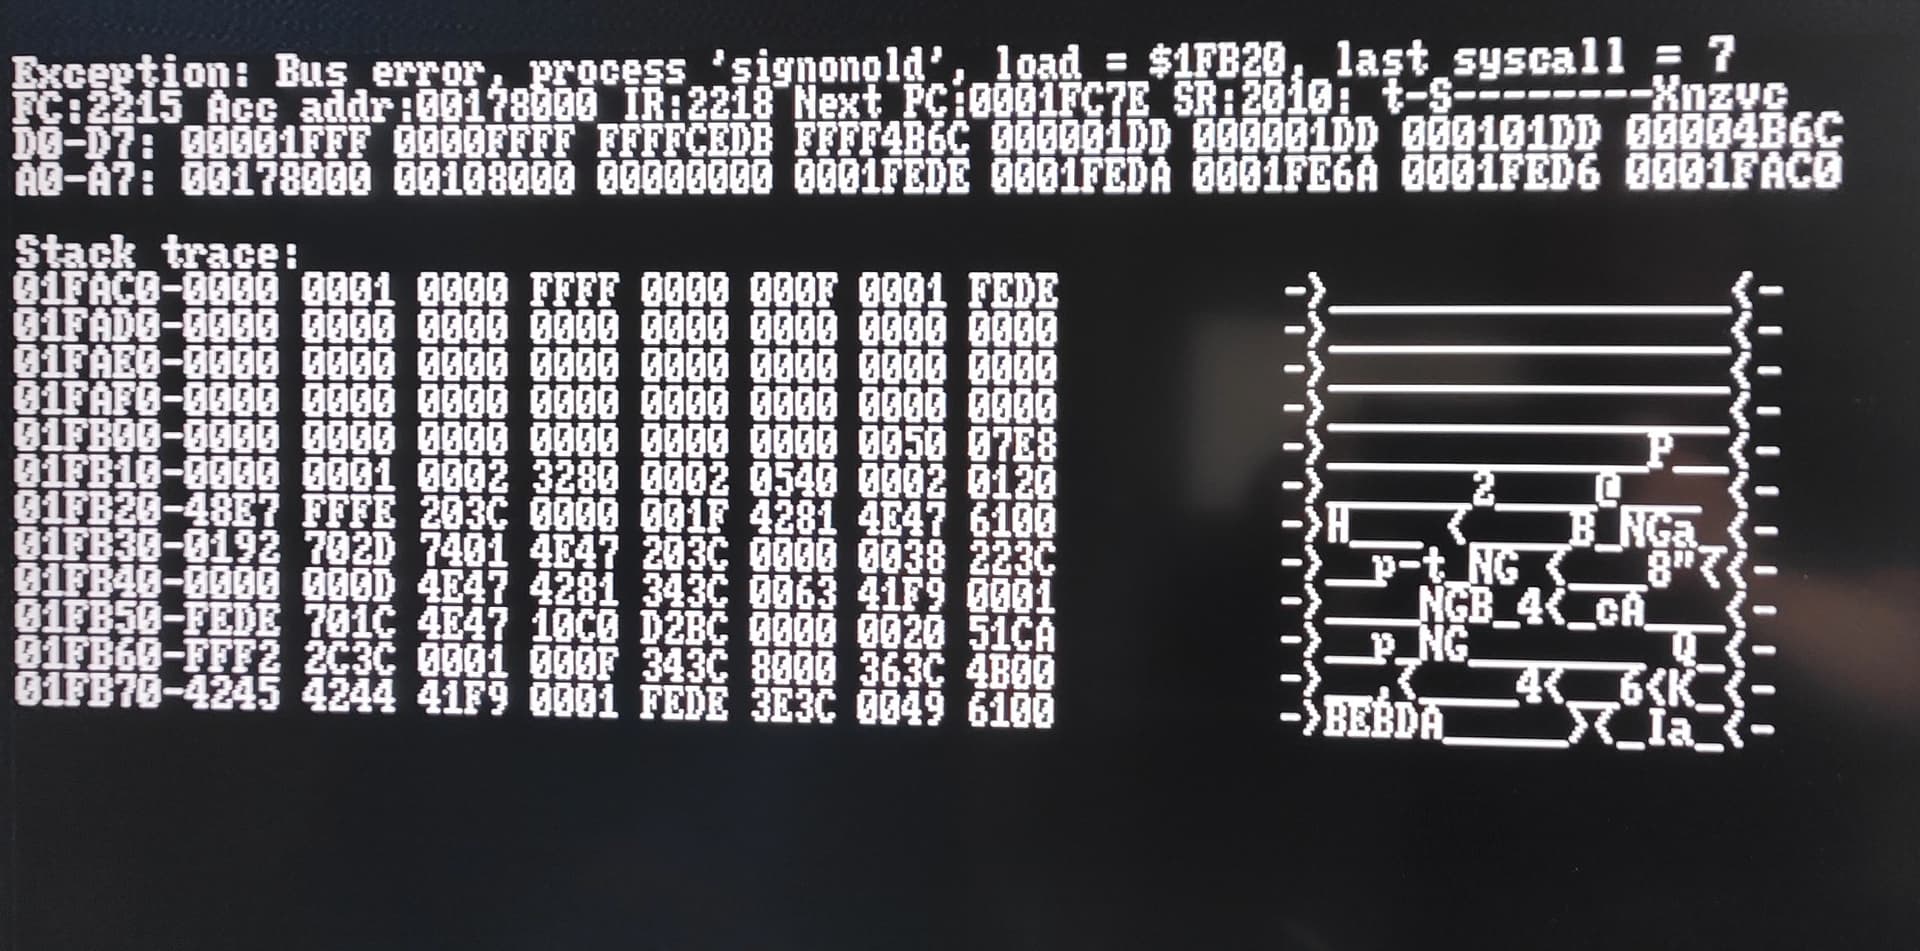
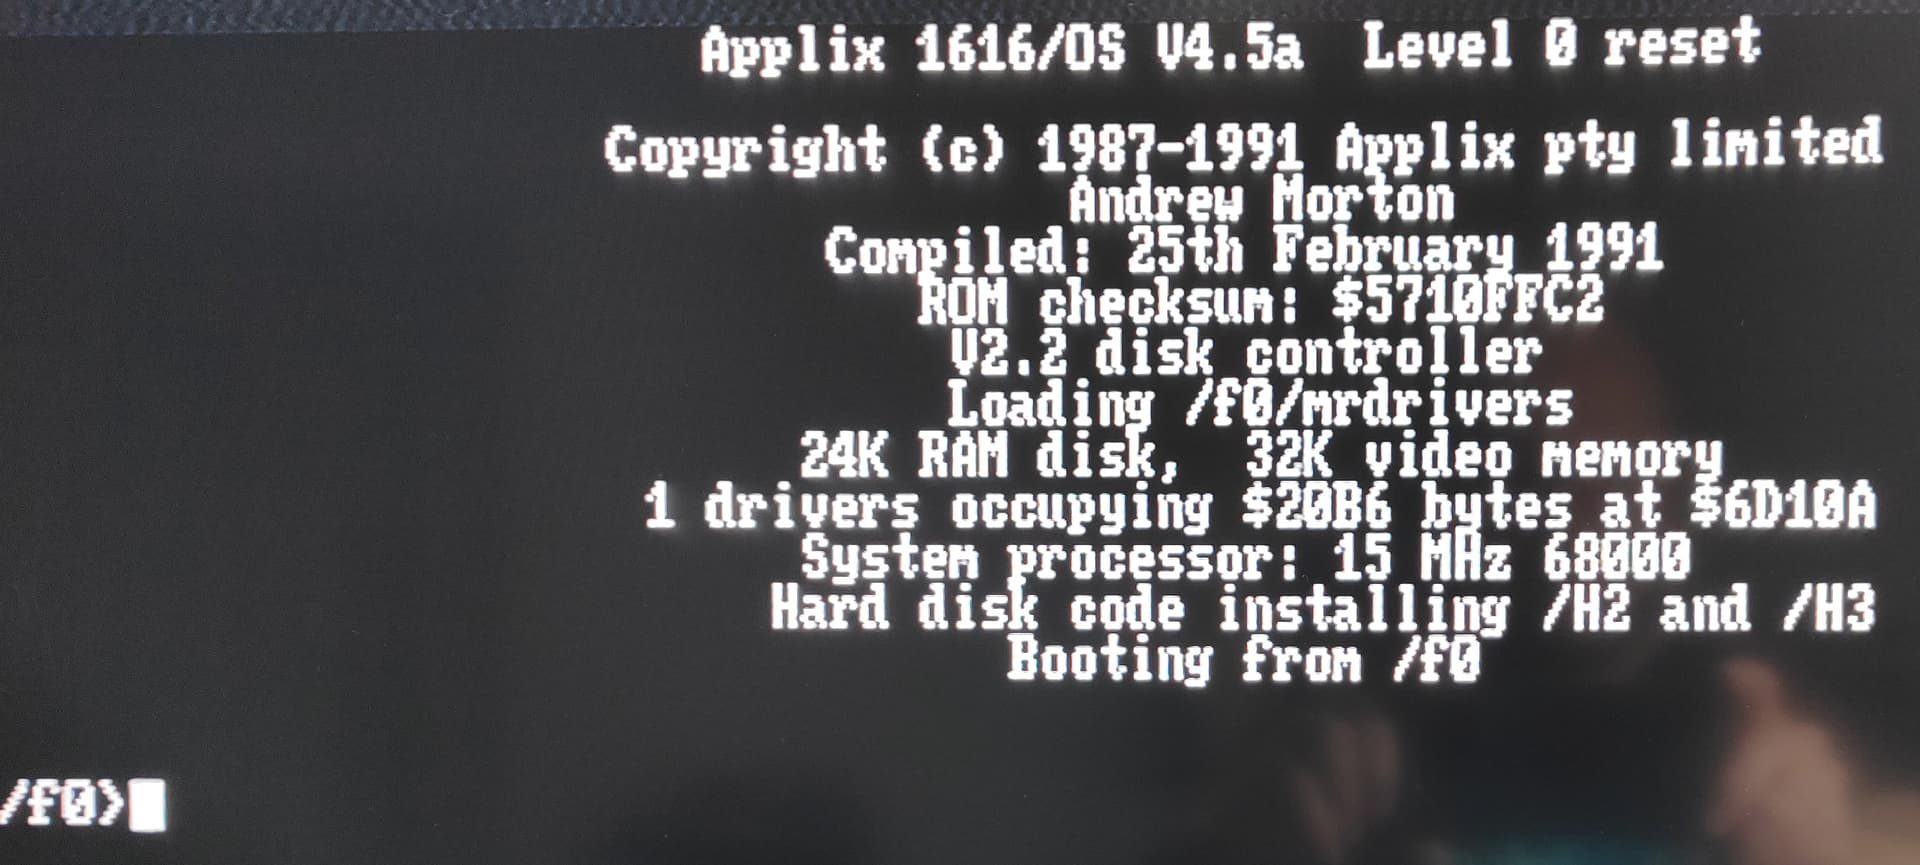
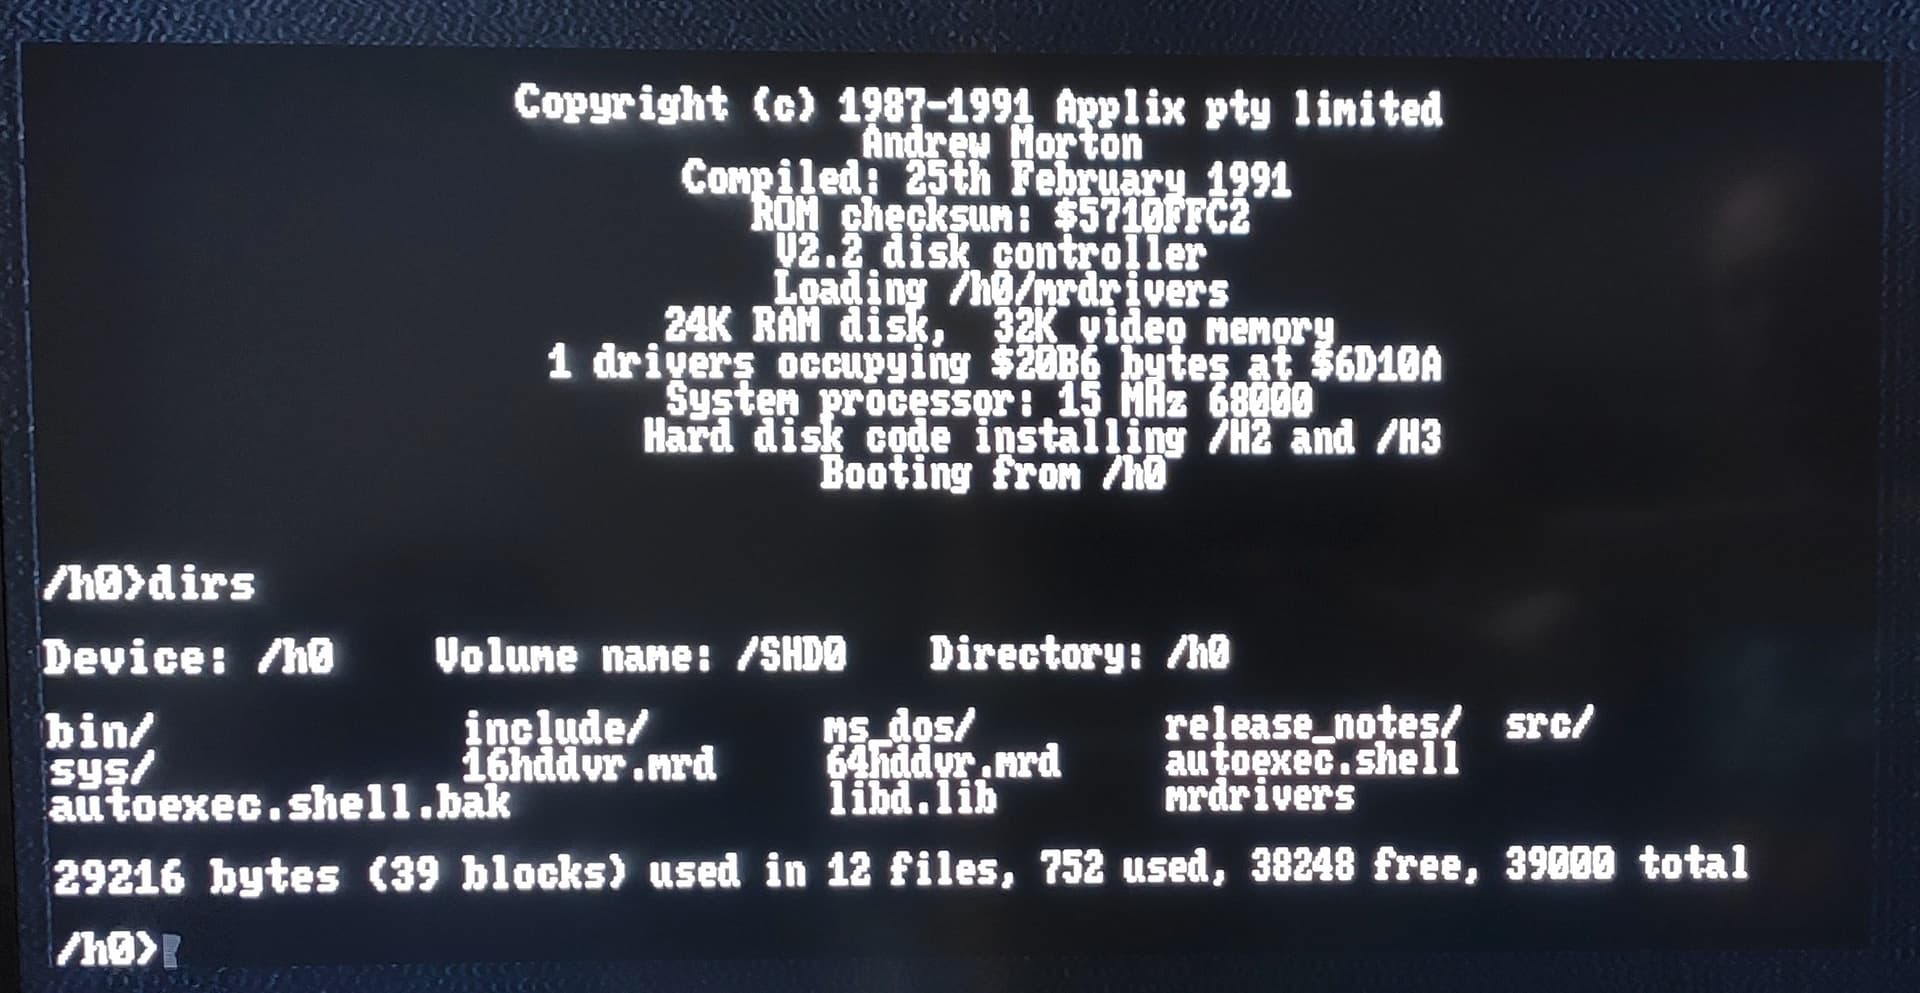
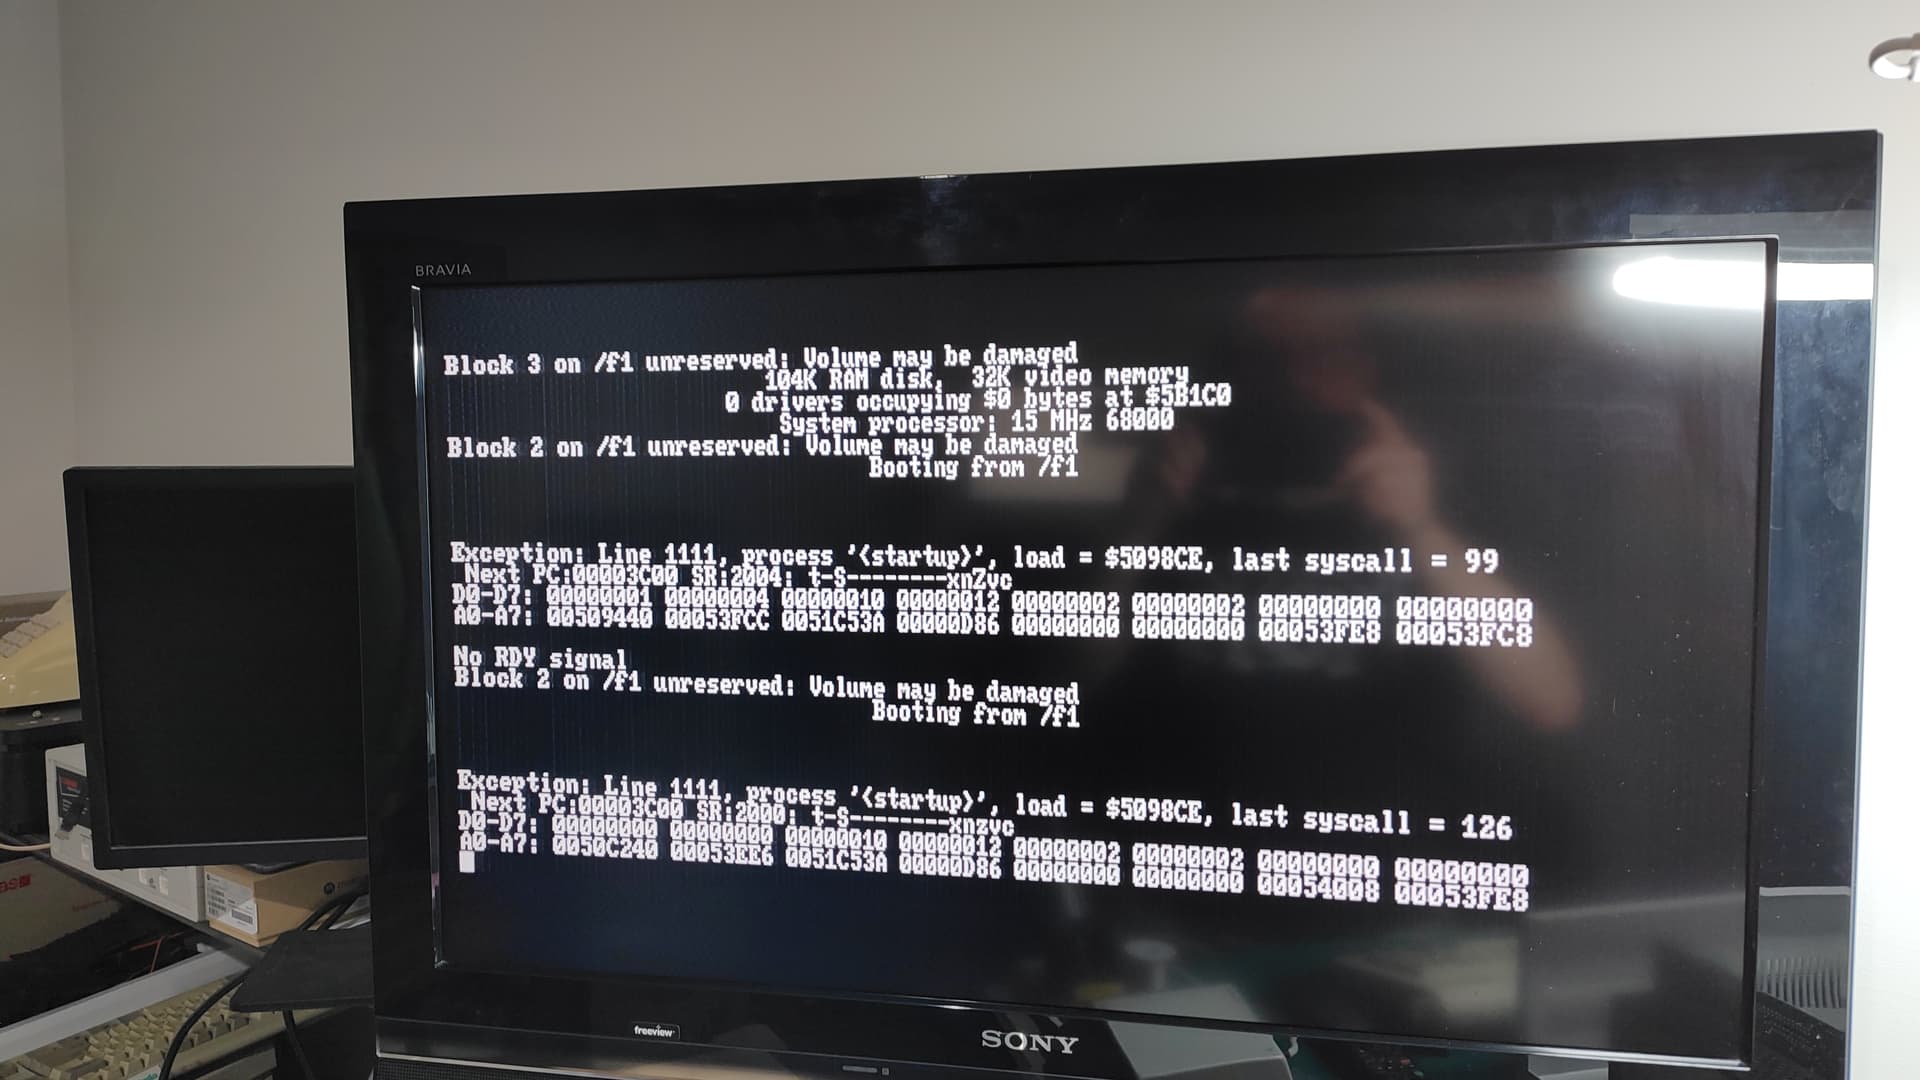
Regardless, I got it to boot, but it still seems to fail with an error. I’ve tried 2 boot disk images, so either there is a problem I’ve not discovered or I’m missing something. That said, this is also still using the original Disk Controller card (with V1.4 roms), and not the one I’ve reworked that has SCSI as well V2.2 roms), so that could also be a factor.

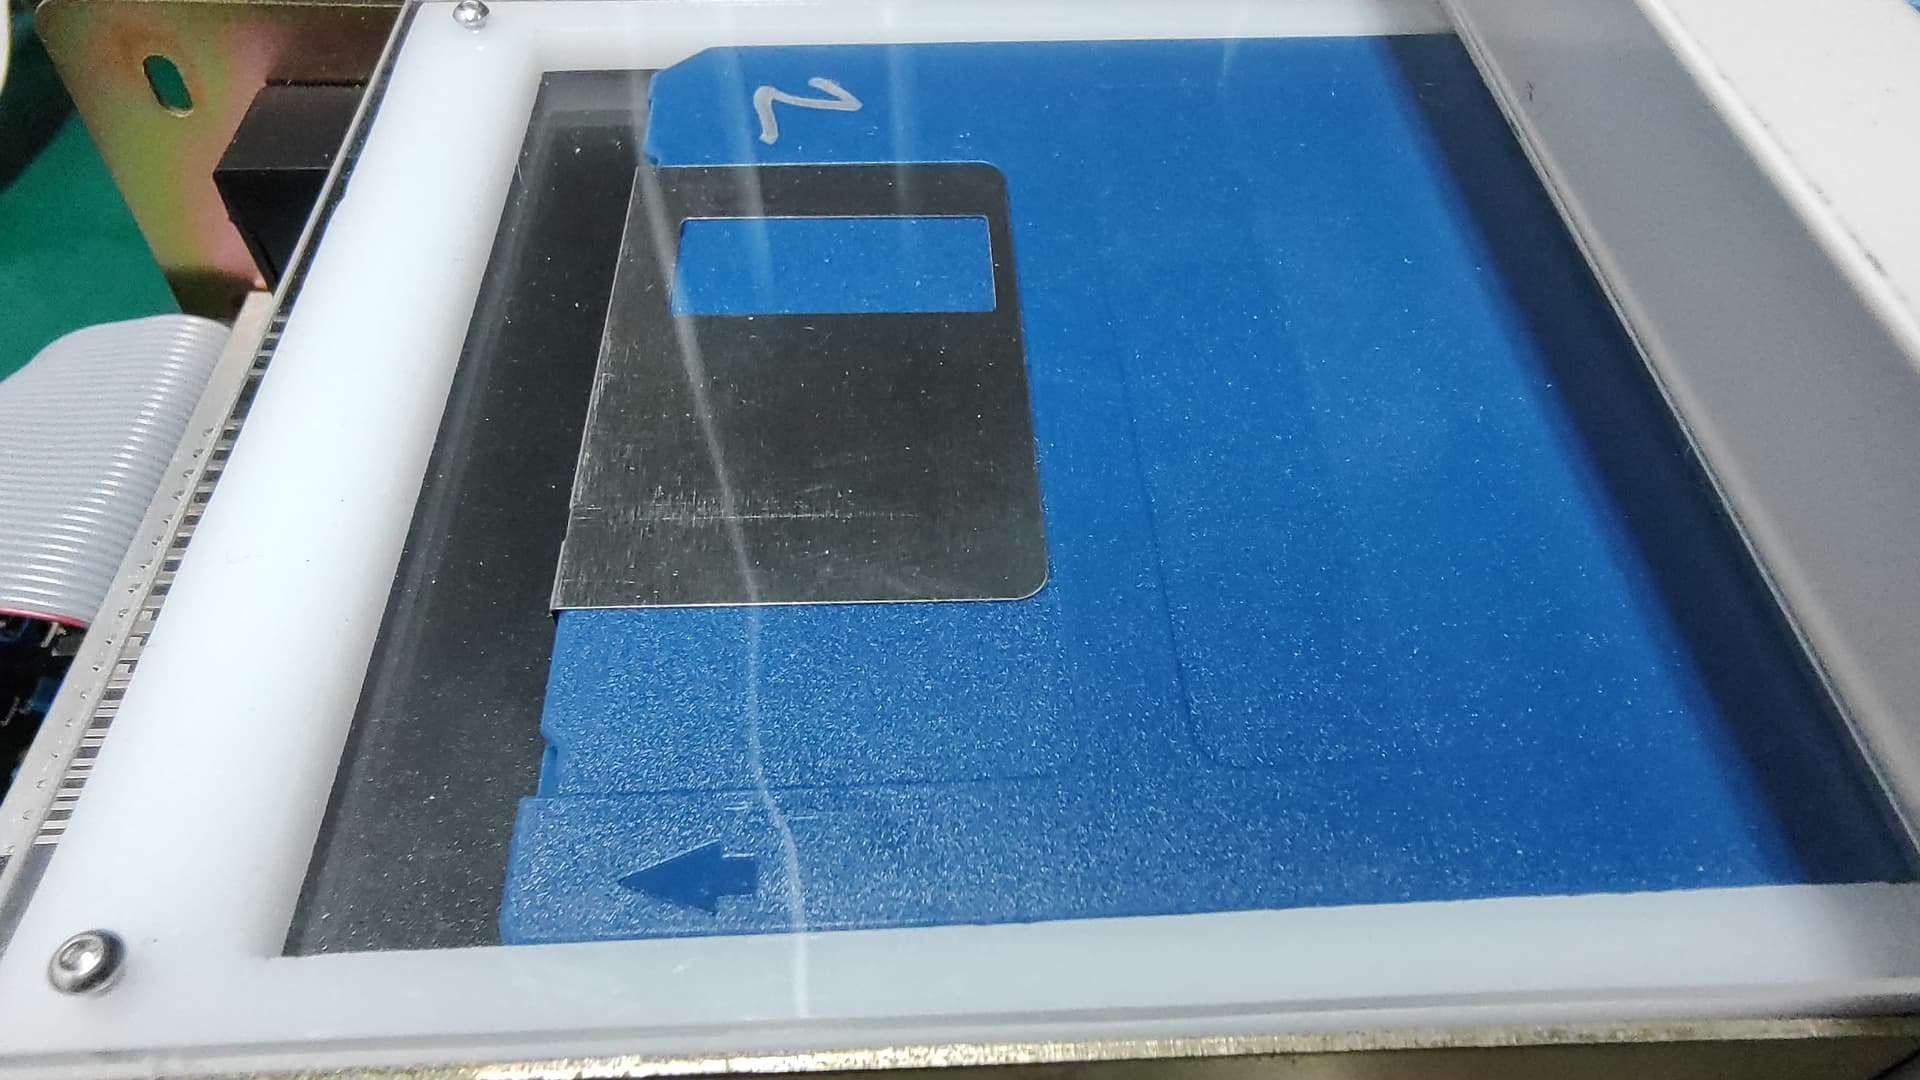
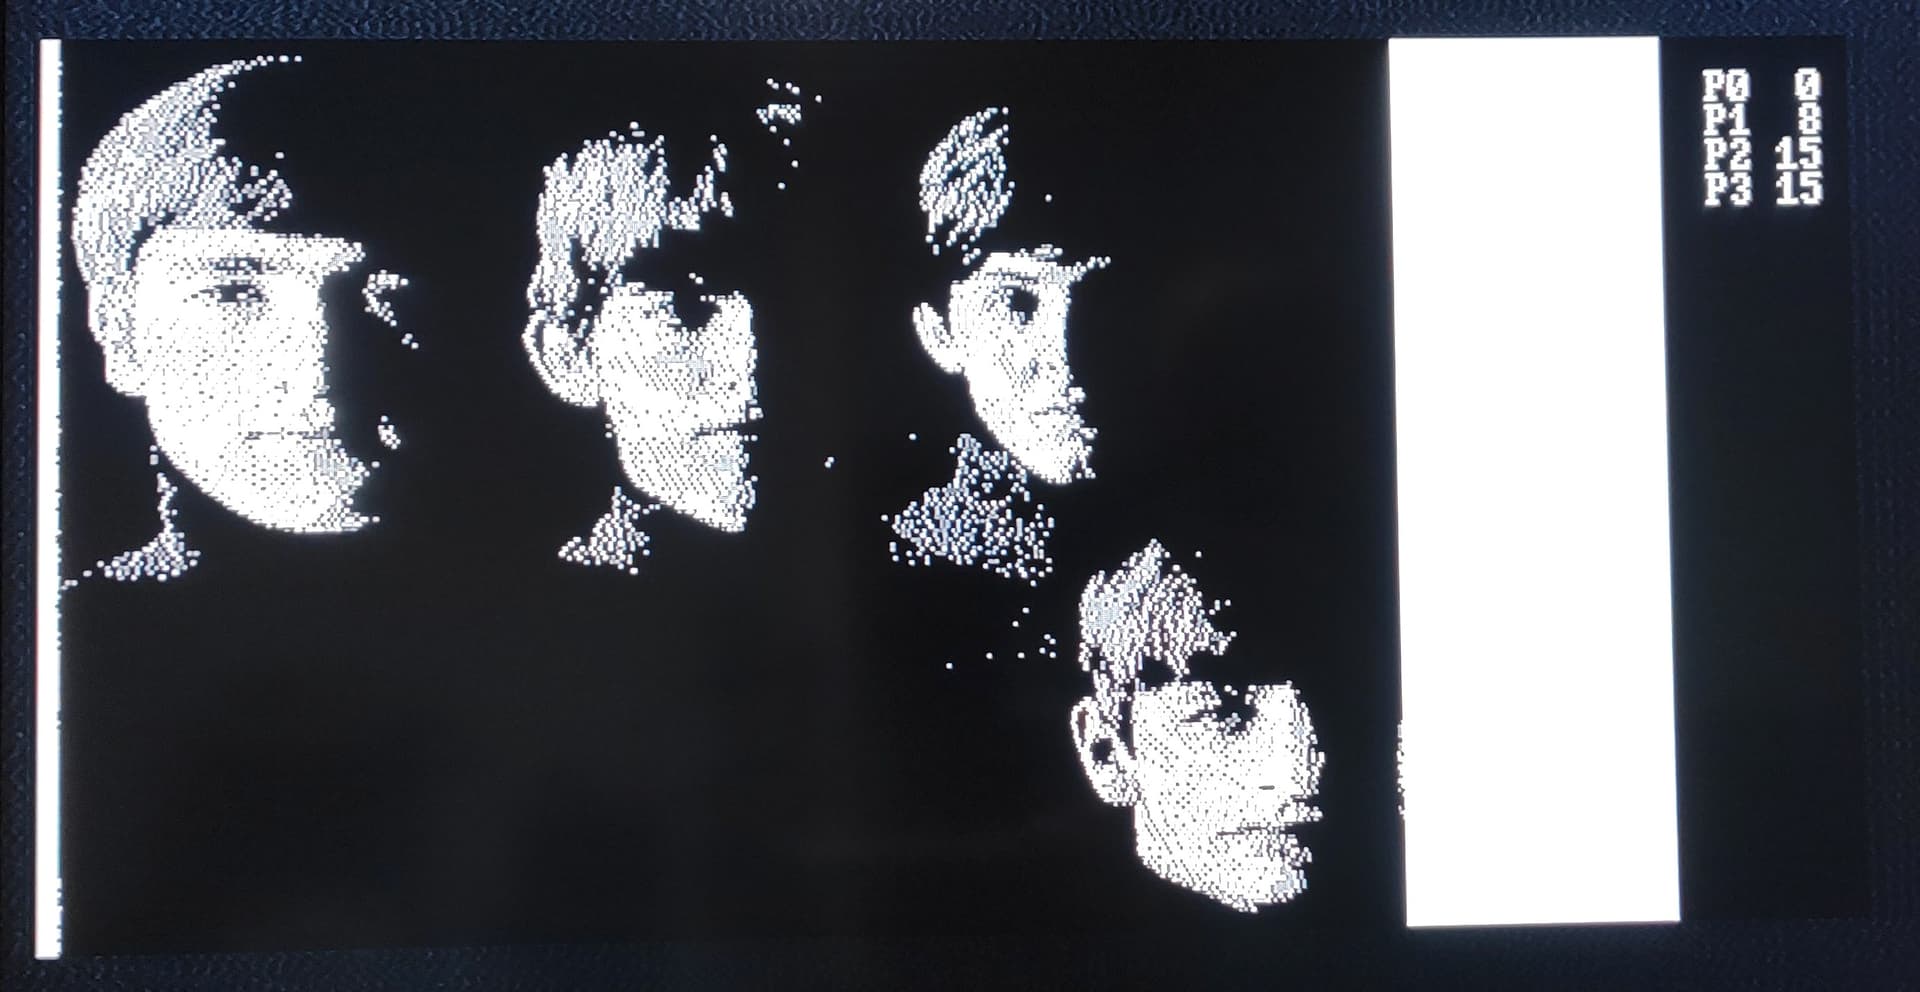
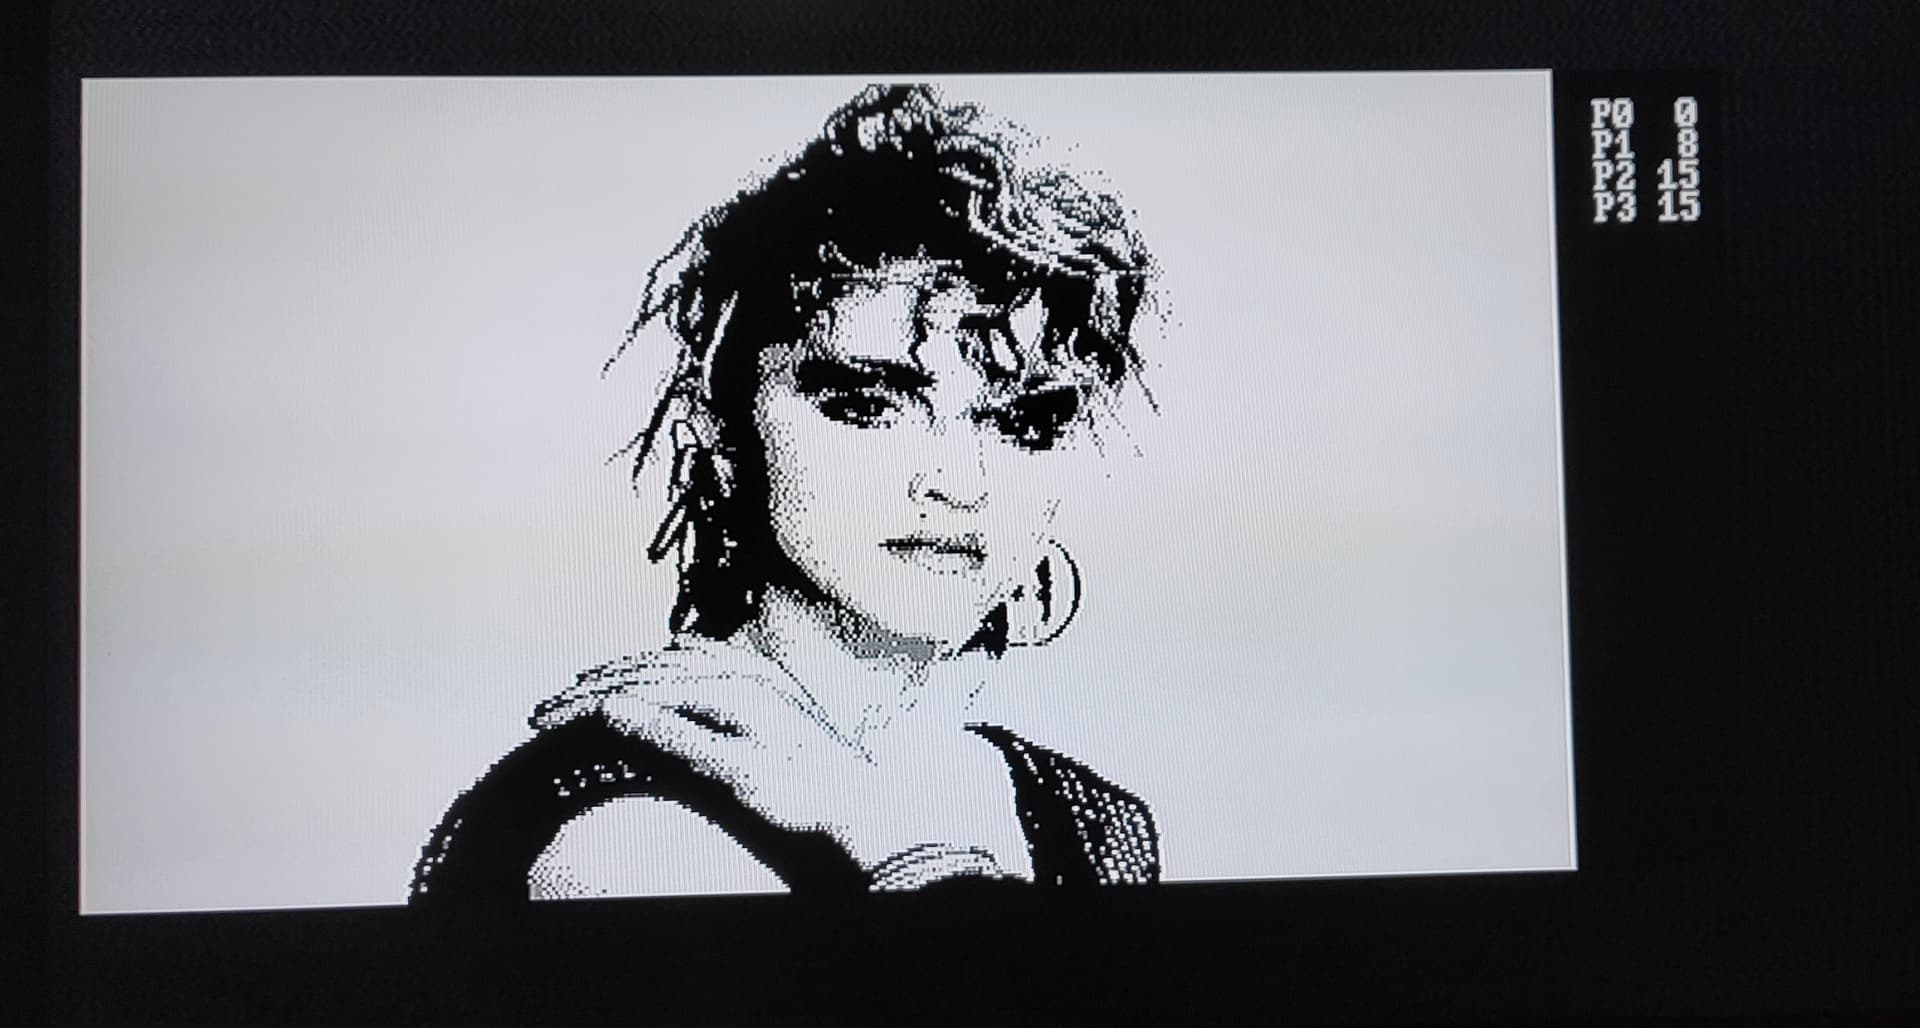
Video of it booting from the GoTek (with graphics):

On the PAL front, I’ve been recommended the DuPAL PAL DUmper project DuPAL - PAL Reversing Tools · GitHub to try and reverse engineer the PALs. The person who recommended it has used it a number of times to reverse PALs from a bunch of systems and has offered to be a sounding board if I have issues with it. Most of the components I have or have access to pretty much immediately, except the 74HCT166 (I have a 74HC166) or the MAX232. The project is 2 parts, the board (with an Arduino) to do the probing and talking to a PC over serial, and software that drives it all in the various ways necessary to figure out the logic. There’s a board design for KiCad but waiting for that would take too long. I am thinking I may try mocking this up on a breadboard (the schematics are with the board design) to see if it could actually work. If I do this, I’d modify the schematics slightly since I don’t need real RS232 levels to talk to the PC (ie: using the same USB to TTL Serial cable I used to program the GoTek).

Unfortunately, I don’t think the PAL work is going to be something I can complete in October, but I’ll see how far I can progress regardless.

2 Likes

As I’ve mentioned elsewhere, you can always use Apptools to write the disk images you have back to a floppy disk and actually boot off a real floppy :slight_smile:

1 Like

Hi ChickenMan,

I’m hoping to do just that. At the moment though I only actually have 1 floppy disk on hand that is suitable, and that is the one that came with the machine. I’d rather not overwrite that yet. A friend of mine is going give me a few spare floppies that he’s found in his stash so I can give it a go.

That said, while the drives read, they have real issues ejecting disks, so getting the Gotek fully working would be the better option. I’ve opened one up previously and I’m pretty sure I know the weak spring that is the causing the issue, but the drives aren’t the easiest thing to pull apart. It would also definitely be a lot easier to pull files across with the Gotek if I manage to get the BlueSCSI working, as I’m not aware of any hard disk images, only images of floppies.

1 Like

With regards to the Gotek/FlashFloppy setup, I dug further through the way it’s configured and while nothing seems to stand out, I forced a few options in FF.CFG (based on documentation from the construction manual for the Disk Controller), but this failed to work reliably with the V1.4 controller. The Disk Controller interface specifically lists Disk Change on pin 2 and Ready on pin 34. Forcing this explicitly for these pins in FF.CFG allows it to “somewhat work” as described. However, I still feel as though I’m missing something here.

Sometimes, waiting a bit and getting on with other stuff is the best way to let your brain solve a problem. So I thought I’d try working on other things, hoping inspiration would hit with regards to the Gotek/disk issues.

I moved on to soldering in the machined sockets for the SCSI Termination resistors onto the Disk Controller V2.2 board. Once that was done, I had to clean up the resistor network pins slightly so that there wasn’t an issue of them fitting in the machined sockets. Basically this was simply running a razor blade sideways (at right angles) over the pins to scrape off small amounts of excess solder. This works because the solder is much softer than the pins. Using solder braid may also be effective, but I’ve used the razor blade technique before and it’s always been more reliable for me.

Three resistor networks installed in the new machine sockets on the Disk Controller board, with the last one sitting on the table waiting to be installed:

Related to SCSI things, I’ve also heard back from the supplier who sold me the BlueSCSI. They’ve been off a few days due to illness but they’re hoping to have my BlueSCSI repaired and back to me in the next few days, promising to send it Express Post to make up for the delay. It’s possible this may not make it back in time for the end of October, so keep your fingers crossed.

Meanwhile I’ve also started working on putting proper standard pinout serial connectors on the Applix, using the 18 pin SJ*-0 headers. These bring out all the pins for the serial connections out of the MC1488/MC1489 RS232 level drivers. I couldn’t easily get my hands on any 18 pin (2x9 pin) IDC connectors, so I’m using 20 pin connectors and will just let the remaining pins hang off the side of the on-board header for the moment. I’m crimping these onto 20 way ribbon cable, and will solder the individual pins from the ribbon cable onto suitable RS232 connectors to mount on the back panel. I don’t have a professional IDC crimping tool, but a small vice with good parallel and flat-faced jaws does the trick.

Tips for using a vice for IDC connectors:

  • The vice jaws need to not float around too much as the vice is adjusted, particularly perpendicular to the flat of the jaws.
    – ie: They should meet each time the jaws are closed without much outside influence.
  • Don’t use a vice with jaws that are rough or heavily patterned (at least without flat jaw inserts), as they’ll damage the plastic of the connector.
    – Using some cut-offs of Aluminium angle as a pair of jaw inserts is a great work-around if the vice jaws aren’t flat.
  • Put the connector right in the center of the vice jaws if at all possible.
    – This ensures the pressure on both sides of the connector is fairly even across the connector width.
  • Ensure the jaws or jaw inserts cover the whole connector.
    – You don’t want the connector sticking out somewhere, top, bottom or even the sides if the connector is quite wide.
  • If it’s a male connector (pins) you should consider using a (possibly sacrificial) female connector as well.
    – By putting a female connector on the male one, the pins and the body of the male connector are less likely to get damaged.
  • Make sure the cable is straight before closing the vice on the connector.
  • Don’t apply too much pressure, just enough to press the connector pins through the cable.
  • Take it slow. No need to rush.

Crimping an IDC connector using a small vice (part way done):

Meanwhile, no inspiration had struck regarding the Gotek boot issues, so I decided to dig a bit into what the boot disk image that was crashing was doing.

Looking at the contents of that disk image, I noticed that autoexec.shell (basically the Applix equivalent of autoexec.bat in MSDOS) runs a a few things, one of which is a program called signonold which is what displays the logo on screen. This is what is crashing at boot when I use the Gotek, and when it crashed it would leave the screen with only one side (left) of the display updating, which is sub-optimal. It’s not on the physical floppy I have, so it never crashes that way. There was a file called autoexec.shell.bak on the disk image which was identical but didn’t call signonold, so I deleted autoexec.shell and renamed autoexec.shell.bak in it’s place. I would have just renamed the original, but the disk image is quite full and it seems the way a rename is done on the Applix involves a copy/delete. Fortunately, as this is a disk image, I can always pull it again from the original if needed. There was still an error on boot though, which was still a worry.

In the end, I decided to try this with the V2.2 Disk Controller. Had to move the Z80 across from the V1.4 Disk Controller, since as previously mentioned, the one that was in the V2.2 board was dead.

V2.2 Disk Controller with Z80 installed:

And it works. No errors on boot if signonold doesn’t run. If I do run signonold, unlike with the V1.4 card, it doesn’t leave the screen with the half display problem. This also means that the full stack trace for the crash in signonold actually displays, which may help with debugging what the actual fault is. Previously the stack trace was trimmed to just the top section, which makes it a lot less useful.

Will also point out I’m yet to try any of the FF.CFG changes that failed with the V1.4 controller on the V2.2 controller, in case somehow I managed to damage something previously. The V2.2 controller seems to work a lot better and I don’t want to accidentally damage it, at least till I can create some physical disks and run some comparisons between physical flopppy vs Gotek & disk image. On that front, I’m hoping to pick the floppy disks up tonight so I can put some disk images on them to do just this. Hopefully this will allow me to figure out if the cause of these exceptions/errors is the Gotek, or the actual machine. If it’s the machine, it could be that this is a sign of reliability issues, as the disk images on the Gotek do a lot more (eg: code execution) than the single floppy disk I have, which would thereby bring the reliability issues to the fore.

Since this machine came to me in an unknown state, it’s possible that maybe the upgrade to 15 Mhz done by a previous owner didn’t quite go to plan. It seems quite possible that the upgrade wasn’t reliable and that the owner who upgraded it then shelved the system and eventually passed the unit onto someone else. Unfortunately, as mentioned previously, the original 7.5 Mhz TPAL (timing) that was obviously in the machine from it’s original construction, and which is replaced with the 15 Mhz Upgrade, wasn’t with it when I ended up with the machine. This means I can’t just roll the machine back to the 7.5 Mhz configuration and see how things go. Since there are no reverse engineered TPALs (for 7.5 or 15 Mhz machines), I can’t just program a replacement and give it a shot. The way I’ve re-implemented the bodge wires does make reversing the 15 Mhz upgrade quite easy (only 2 wires to desolder, then just remove a bunch of sockets), but without a 7.5 Mhz TPAL, it’s all sort of moot point at the moment.

However, I went looking through the 15 Mhz Upgrade notes, and I noticed the following paragraph:

If the machine starts up but runs unreliably there may be problems with the damping resistors or slow RAMs. Improvements may be obtained by replacing some or all of the following chips with 74S or preferably 74F series parts: U57, U58, U59, U28, U30.

Currently, the machine has:

  • U57 - 74S11
  • U58 - 74LS08
  • U59 - 74LS138
  • U28 - 74LS244
  • U30 - 74LS244

I will probably review these and see what I can figure out. One of these particularly stands out, that being U58, as that one had bodge wires were directly soldered to it as part of the original 15 Mhz Upgrade. As it failed some tests (till I cleaned all the flux off of it), I replaced it out of caution, though the original was also a 74LS08, though a different brand.

While I was looking over these IC’s on the board, I was reminded that there are 2x 74HCT166’s on the board. Checking through the construction manual, these are only listed as 74LS166’s. As these are all socketed, I may be able to use one of these in the DuPAL PAL DUmper project in a pinch, which definitely requires the HCT version.

1 Like

Quick update:

While pulling one of the floppy drives out of the Applix to use with my Greaseweazel, I managed to bump the drive selector switch that is at the back of the drive. Unfortunately, the switch is not labelled on the back. While it probably is labelled on the PCB inside, I didn’t take pics of the inside when I had it open, nor do I really want to open this drive again if I don’t have to.

The drives in question are NEC FD1037A and the switch has 4 positions. After a bit of googling I came across the following PDF, which is a bunch of Hurco Field Service Bulletins from the 1990’s: https://stonemachinery.com/pdfs/Field-service-Hurco1990-1999.pdf

Hurco made and still apparently make CNC based machines, and back in the 1990’s when NEC started phasing out their floppy drive business, Hurco put out a FSB on what drives could be used to replace them in their CNC machinery, with details of the old drives as well to allow someone to set up various combos of drives appropriately for their setup.

So in that PDF doc, I found the following pics of the back of the drives on pages 216 and 217 respectively.

Snippet from Page 216:

Snippet from Page 217:
NEC FD1037A Drive Switches 2

Remember: Sometimes you can find useful info in places you don’t expect!

1 Like

Well, after a bunch of wrangling of disk images, failing floppy drives, bad floppy disks and forgotten jumper settings, I’ve managed to use Greaseweazle to:

  • Read the single working floppy I have (named Harddisk Update) to a .HFE image.
  • Write the .HFE image successfully back to a different floppy disk that then reads/works in the Applix.
  • Write a different .HFE image successfully to that floppy disk and have that read/work in the Applix.

Before using Greaseweazle, I had a brief look at Apptools (which can read info from Applix disk images), but upon reading the docs, noted that the tools don’t seem to do anything apart from look into the .RAW images. There’s nothing in there about writing said images to a floppy disk, at least from my basic examination of the docs shipped with it.

The HxC Floppy Emulator tools do have options for writing to a floppy, but that relies on it being a true hardware floppy attached to the machine. It won’t support a USB attached floppy drive, and constantly rebooting my desktop machine to swap drives (or worse, somehow damage the machine) pretty much made this a non-starter.

That said, after switching away from using the original NEC FD1037A drives from the Applix on the Greaseweazle (which was somewhat problematic) to a known good 3.5" drive (a Samsung SFD-321B I had in a box along with 3 other 3.5" drives), and then finding a few bad 3.5" DD floppy disks amongst the ones I got from a friend, I eventually got the process to work smoothly.

To read the disk and create the image using Greaseweazle in HFE format, I used:
gw read --drive A --tracks=c=0-79:h=0-1 hdutils4.hfe::bitrate=250

To write the disk from the image using Greaseweazle, I used:
gw write --drive A --tracks=c=0-79:h=0-1 hdutils4.hfe

Notes:

  • hdutils4.hfe is the filename. The 4 in there was cos this was my 4th attempt with as many drives. I changed this when writing the User Disk image that I previously converted from a .RAW 800K image to a HFE image.
  • You can’t write to disks if Write Enable on the Greaseweazle isn’t jumpered. When I got the Greaseweazle, I disabled this so I couldn’t accidentally overwrite a disk somehow (it’s jumpered by default). Of course, I totally forgot about doing that and was very confused when I couldn’t write disks. Unfortunately, due to the way it’s implemented in hardware, there’s no way for the software to read this jumper, as it literally just breaks the write-gate signal line to the floppy drive.
  • The Applix won’t work with HD floppy drives by default. The WD1772 on the Disk Controller just isn’t capable of it. it’s possible that manually overriding the HD/DD pin in the cable may allow it to work, but for the moment the NEC drives seem to work in the Applix but not with Greaseweazle.

The HxC Floppy Emulator software has a Track Analyzer, which can give you a nice visual picture of a floppy image.

Harddisk Update image in HxC’s Visual Floppy Track Analyzer:

Seems there is a few sectors with bad CRC values (in orange), but the data itself seemed to be intact.

Part of what I was worried about with the .RAW images that I converted to HFE with the HxC Floppy Emulator software was that the inter-sector gap and the track index gap are different in size, and I suspected that this might have been upsetting the Applix when reading the image off the Gotek.

User Disk image in HxC’s Visual Floppy Track Analyzer, showing the different inter-sector and track index gap sizes compared to above:

Turns out that this doesn’t seem to be as much of an issue as I thought, but it could be related to things like the sector skew pattern on the disk, though that should only slow down access and not cause read errors. I’ll have a bit more of a dig into this later, now that I have a working Harddisk Update image to compare things to.

All that said, seems that the crash I was experiencing with the .HFE image in the Gotek is not specific to the Gotek, and happens with the image on a floppy as well. This is good for the Gotek, but less good for the Applix.

The disk image I created is what is known as the “User Disk”. This is a “bootable” disk which contains a bunch of drivers that are loaded on boot by default, and it could be that these are trying to set the machine up in a way that the hardware I have is not capable of and causing confusion. Specifically I think some of the error messages I see are in fact related to it trying to probe for a SCSI hard drive. Guess I won’t know for sure till I get a SCSI drive up and running.

FWIW: The Applix memory resident drivers are all loaded automatically from a file called mrdrivers that sits in the root of the current boot device. This file can also do things like change the size of the default ram disk and a few other settings. The boot device is scanned for by the disk controller at boot and contains a special ID in the first sector to say it’s “bootable”. There’s no boot block like there is in an x86 DOS machine, as all the base OS code is in the Roms. If you want to change the drivers that are loaded, there’s a program that takes the driver stubs that you specify and merges them into a single mrdrivers file, overwriting the old one.

I’m going to go looking through a bunch of the floppy disk images for the Applix that I have access to and see if I can find anything else that seems useful to try on the machine.

Also, I think the composite input on the TV is creating issues. I can measure ~130Vac between the outside shield of the composite connection with respect to 240Vac earth (Australia), which I can actually feel sometimes when doing things if I’m grounded (eg: with an ESD grounding strap or touching the grounded ESD mat on my desk). This can be a common issue with power supplies that are double insulated (like the one in the TV), where the “ground” reference for the DC supply gets a high AC bias with respect to actual ground. While the voltage disappears almost instantly if there’s some sort of resistive path to pass it to ground, this sort of thing can cause all manner of noise in signals in the machine, which won’t help at all, plus it’s possible it could trip GFCI/RCD circuits if the current is high enough. Hopefully when the RGB2HDMI arrives that will put an end to that issue. Unfortunately, that’s still in the US, though it’s at least passed through customs on their side and seems to be waiting to be put on a plane.

As I was writing this post, my BlueSCSI has just been returned from repair, so I’ll hopefully be looking at that next. Need to figure out how to create a blank disk image on it so that the Applix can format it. The Applix doesn’t support a large hard disk. The first drive/partition(?) on the Disk Controller has a max of 40 MB, and the second one has a max of 8MB. To go beyond 2, you need extra drivers, and/or you have to put them on separate controllers (eg: the Expanded Memory SCSI card).

2 Likes

Time to tackle the SCSI interfaces.

First things first: I didn’t use the Gotek during this process. I wasn’t sure if I had issues with the Gotek or not talking to the Applix, and it seemed prudent to simply stick to doing everything by copying disk images I need to floppies, as I’d already confirmed these worked.

Some notes I gleaned from looking at the documents for setting up a SCSI hard drive on the Applix:

  • The first partition has a max size of 40 MB (with V4.* Roms) and MUST be on SCSI ID 0 LUN 0.
  • The hdconfig tool erases the disk and sets up partitions.
  • The blockdev program formats the partitions.

In BlueSCSI, you need to create a blank drive image for the machine to talk to. Given the limitations above, I stuck to a 40MB blank drive image generated using dd:
dd if=/dev/zero of=HD00_512.hda bs=1M count=40

This creates a file made of 40 blocks of 1Mbyte each, so 40MB. The filename indicates 00 for ID 0, LUN 0, then 512 indicates the sector size.

Note: While floppies need a sector size of 1024, SCSI drives need a sector size of 512. Of course, I found this out the hard way, as detailed below. :person_facepalming:

I copied the file HD00_512.hda to the SD Card that was going into the BlueSCSI. I also created a file called bluescsi.ini on the card with the following in it:

[SCSI]
System=“Generic”
Quirks=0
EnableSCSI2=0
DisableROMDrive=1

Specifically, this turns off SCSI2 negotiation. This is a really old machine and I don’t know what it would make of trying to use the SCSI2 negotiation method. I’d prefer it to be slow than flaky.

Now the docs on setting up a hard drive from the floppy disk I had contained a CRC error in that part of the disk. It’s quite possible that other parts of that disk were corrupted as well, such as the programs hdconfig or blockdev that are needed to set up a drive, so I went looking through the floppy disk images I have and found that there’s a bunch of versions of the Harddisk Update disk. A number have the docs on them (of various versions), so I went through a few of them with apptools on a Linux PC to see if I could find one that was a match to what was on the Applix Harddisk Update disk I had, under the assumption that it worked with the machine at some point in the past.

Eventually found 2 very similar disks to the one I have, which are obviously all versions of the same disk over time. One is slightly dated before the one I have, and one slightly after. I chose to use the disk that is slightly later than the one I have as it more closely matches the disk that came with the system (based on file dates, etc). It also seems to be the last version of that disk in the image archive I have.

First I copied the docs out of the disk image using apptools on my Linux PC, so I could figure out what I needed to do. Next I wrote the image to a floppy and booted it up. It loaded drivers for H2 and H3 (extra hard disk partitions), which is a nice bonus if I need more disk space.

Boot screen showing the memory resident driver that was loaded to talk to the extra drive partitions:

Nothing for it but to try this with the BlueSCSI attached. I couldn’t find the SCSI cable that I set aside for this job (about 60cm long and has 3x IDC50 pin connectors on it), but I did find a small one that is about 25cm long that reaches almost perfectly from the place I located the BlueSCSI in the case to the Disk Controller card. If I add the Memory/SCSI Expansion card, I’ll need to find another cable, but for now, this will do.

BlueSCSI installed in the case:

Now the BlueSCSI by default should try to power itself from the SCSI Termination power on the SCSI bus. There’s a cut track on the Disk Controller that disables this, as some early drives would fry things if the termination power was applied.

Rather than take out the disk controller and jumper that cut track (I really don’t want to disturb it when things seem to be working), I decided to simply put a connector on the external power connector for the BlueSCSI, and use the spare drive power socket and an extra power cable to power it from the spare power connector on the Disk Controller. I did this after the above photo.

With the BlueSCSI back in the case and connected to power, I booted the floppy and tried partitioning and formatting a disk (using hdconfig to partition and blockdev to format).

As I’m not sure if the 40MB limit in the Applix is 40x1024x1024 bytes or 40x1000x1024 bytes, I decided to play it safe and set up 2 partitions:

  • Partition /h0 I set to be 39000 blocks (so 39000 x 1024 bytes).
  • Partition /h1 I set to be 1952 blocks (so 1952 x 1024 bytes).

Note: The blockdev program wants the partition block sizes to be multiples of 8. I found this out when creating the /h1 partition, as the remaining space on the drive was 1959 blocks and it complained it wasn’t a multiple of 8. When I put in the /h0 size of 39000, it just happened to be a multiple of 8 (4875 x 8 = 39000).

Earlier, I mentioned that SCSI drives need 512 byte sector sizes. If you try 1024, it all gets confused and wont format. The blocks used by the filesystem are 1024 bytes, but the underlying sectors are 512 bytes. Of course, I only found this out as I tried with 1024 byte sectors first.

Failed formatting using the blockdev program:

After changing the filename on the SD Card to tell BlueSCSI it should use 512 byte sectors, things worked much smoother.

Successful formatting using the blockdev program:

Note: If you tell the blockdev program the disk is a fixed disk, then you need to reboot the machine to get it to recognise the newly formatted partition.

Rebooted. It saw /h0 and I could perform a directory on it! Copied the contents of the floppy (/f0) to the first hard disk partition (/h0), and then after changing a command in /h0/autoexec.shell to use /h0 instead of /f0, I rebooted again.

Successful boot off the BlueSCSI, with a directory listing of the SCSI drive:

This was quite fast to boot! The screen barely had time to sync to the Applix before the command prompt showing /h0> was ready for input.

Next up, I’m going to start meticulously going through the disk images I have access to and see what I can find. Will probably copy some of them onto the BlueSCSI to make the machine more usable.

FWIW: While I was looking through the disk images for the “Harddisk Update” disk I eventually used, I found a lot of versions of the User Disk, some with version numbers and some not. This was the disk that had programs that produced the stack exception errors I got previously. While looking through the disks, I noticed that not all of them had the signonold program that crashed on them. I suspect that the first User Disk I grabbed (which was also the first in the collection) is either very specific to some setup I don’t have, or was only suited to older versions of the 1616/OS Roms. Also, while I was setting up the BlueSCSI, when the SCSI disk wasn’t connected or was set up wrongly (eg: wrong sector size), I got a lot of “bus error” messages, so another possibility is that the Exception I had previously was the signonold program always trying to probe the SCSI hard drive and failing as it wasn’t connected.

As this machine has V4.5a Roms, I found a few V4.* User Disks that I’ll dig deeper into as I go through the disks. None of the V4.* disks seemed to have that signonold program on them. There’s definitely a lot of versions of the same thing, and going through all the versions of stuff is probably going to be the longer part of sorting through the disk images I have.

But it successfully boots off the SCSI hard disk! :tada:

1 Like

Congratulations Stuart. That’s a brilliant result and I’ve really enjoyed following your progress.

1 Like

So, some last minute things I’ve done to this machine.

Made a small aluminium bracket to hold the Disk Controller card steady. Without the bracket, the card can move slightly, and the last thing I want is for this to cause an intermittent connection somehow. The small bracket has 3 holes in it (2 for the card, 1 for the backplate), all of which are then tapped with M3 threads. I had to also drill a hole in the clear acrylic cover that sits over the slot holes, to allow a screw through the hole (3mm). I used nylon screws for the card, but used a steel screw on the back of the case, as the bracket is so thin that the doing up the screw at the back would sometimes strip the threads off a nylon screw. If the acrylic blocking plate was not present, this bracket as is wouldn’t work, as there would be a 2mm difference between the bracket and the back plate (it would need to be longer).

Small aluminium bracket attached to Disk Controller card:

The Gotek is the height of a standard 3.5" floppy drive, which is roughly 25.4mm high (1"). The NEC FD1037A drives in the Applix1616 however are about 28.6mm (1.125"). The case was made for these drives, so there’s a gap at the top. I laser-cut some acrylic and made a (somewhat dodgy) floppy disk holder that holds 1x 3.5" disk.

Floppy disk spacer/holder:

Getting it together was a pain and I’ve made it slightly too deep, so it’s easy to get a floppy stuck in there (which requires disassembly). If I keep the Gotek in the machine, I will probably replace this sometime in the future with some LEDs hooked up to various things, such as the SCSI hard drive activity LED, etc.

Copied some more files across to the machine and ran some programs. Found a program called MACPIC which displays the really old .PIC format files (as these were a common picture format on the early Macs), and a terminal program called easycom (think Telemate or Telix on DOS, or minicom on Linux).

Output from MACPIC:

Output from easycom:

So, wrap up time:

It’s one thing to do the work and document stuff on the way, but it really makes you realise how much you’ve done going back over it again. I know I’ve done quite a lot, however I feel as if there were a bunch of factors, mostly outside my control, that slowed things down and stopped me progressing further than I’d have liked.

From what I’ve discovered while restoring the Applix1616, it looks like the person who previously owned this machine had it working with the Disk Controller (V1.4, floppy only) card with 2x 3.5" floppy drives. However, after they upgraded the machine to 15 Mhz, they appear to have purchased a second Disk Controller (V2.2) to add SCSI support to the machine, while still allowing them to use the existing Disk Controller (ie: so they could keep using the machine, till they had finished building the new controller). It looks like this new card was not used as a functioning device in the machine. I’m assuming the owner either stopped working with the machine not long after, or had issues trying to get the new Disk Controller working that halted any further work. I will note that the switches on the Disk Controller V2.2 were set for a test mode (rather than a running mode), which strongly suggests that this was a project that was attempted but never completed.

It’s also unknown if the Expanded Memory/SCSI controller was ever working. These capacity Ram chips are known sometimes for failing over time, however the Ram jumpers in the machine were not set to support the card, and the card was not installed in the machine. As such, I suspect this was also purchased and attempted at the same time as the new Disk Controller, and that at least some of the Ram chips were already bad or damaged during construction. The lack of a SCSI hard drive with the machine also points to the fact that neither the Disk Controller V2.2 or the Expanded Memory/SCSI controller were seriously in use in the machine. There were also no extra brackets in the machine to hold a hard drive, nor was the case scratched around the holes provided for such mounts. Additionally, the inbuilt power supply does not really provide enough current to run many of the SCSI hard drives of that era (assuming up till about 1993), along with being able to power the rest of the machine. Of course, it’s possible an external SCSI hard drive with its own power supply was used.

The machine is now in a MUCH better state, however there were a few things that just didn’t work out or I couldn’t complete during the RetroChallenge:

  • Connecting the system to a colour display.
    – Tried a Taxan IV SuperVision RGB monitor, as well as a VGA LCD screen using a GBSControl board.
    – Issue is that the screen output is ~15 kHz, which is not supported by the devices I have on hand.
    – RGB2HDMI adapter ordered which should support this screen but has not yet arrived (still in transit).
  • Expanded Memory/SCSI card.
    – Dead Ram and no local replacements. Last I saw, the replacements were still in customs.
  • Certain pieces of Applix software.
    – Specifically that first User Disk image that I tried seems to be incompatible with 1616/OS V4.5a, or perhaps just this specific setup. Also possible that it requires other files not included with the disk.
  • Getting the Gotek and a floppy drive working at the same time.
    – I can get the floppy drive or the Gotek working, but not both at the same time on the floppy bus.
  • Wiring up the serial ports.
    – I got part way through this, but made some mistakes that, while I picked up on them, meant I couldn’t get it going in time.
    – I also suspect the MC1488/1489 chips on one of the ports are dead. These can’t be tested in the ChipTester, so I couldn’t easily pick this up earlier.
    – The ground loop caused by using the TV as a composite monitor is a real problem if the RS232 device also provides a path to ground.
  • Getting full details of the contents of the Pals (eg: Being able to produce JEDEC programming maps to create new Pals).
    – The Chiptester only pulls a basic binary dump, which is not usable to reproduce Pals. It however can be suitable for doing basic testing against known Pals (ie: confirm same output).
    – There are a few promising projects around that may be able to decode the logic in these chips, but simply not enough time to obtain/construct the hardware to use them on the Pals during the RetroChallenge.

I will also note that, during the latter half of the challenge, one of our pets passed over the rainbow bridge after close to 14 years with us. Their passing did put quite a dent in my motivation for working on the Applix at the time.

I really enjoyed rebuilding this machine. I feel as though without the documentation that was out there, and access to disk images from other users, I would not have been able to tackle this project. I’m very grateful to those people for making what they have done available, and for their time and input on the restoration itself.

That said, I’m not finished with this machine yet, and will spend some further time after the RetroChallenge doing a bunch of things, though on a much slower timetable and after a bit of a break.

The list:

  • Get proper colour output on an LCD screen using RGB2HDMI.
  • Restore the serial ports to working operation.
  • Work on getting the Expanded Memory/SCSI controller going.
  • Build up a SCSI disk image based on a number of the tools in the disk images I have access to.
    – Lots of work figuring out what is the latest version and/or what is compatible with what.
  • Get the Gotek working at the same time as a floppy drive.
  • Create SCSI disk images of various sizes (bootable, blank, etc) using the BlueSCSI.
    – I want to put these online somewhere for others who decide to rebuild/emulate an Applix1616 and need a disk image.
  • See if there is a way to get images of the Pals.
  • Look at upgrading the Disk Controller V1.4 to V2.2 to have as a spare.
    – Add SCSI connector and termination resistors.
    – Burn new V2.2 Rom.
    – Replace Z80 (now in existing Disk Controller V2.2).
  • Look at a suitable replacement power supply that can provide a bit more current.
    – I suspect the voltages aren’t as stable as they should be, especially as more parts get added to the machine.

I’ve also now found and joined an Applix mailing list (thanks to Eric Lindsay), so this list might grow over time. :wink:

Anyway, that about covers it. Already looking forward to next years RetroChallenge. See you then!

PS: I’ll update this thread when the RGB2HDMI comes in with some new pics, as well as some updates if I get to some of the other items on the list.

3 Likes

Im really sorry about the Blue SCSI - that I assume was a business I operate and there was some issues during the first batch build where supplied was out of a chip and we had to hand solder a bunch of the missing ones on manually - which lead to this. Apologies!

1 Like

This sort of stuff happens. I did consider fixing it myself, but I currently don’t have decent magnification for the size of the ICs on it, and also that all the solder paste I have is out of date (which is just asking for trouble), just made it not worth the effort. The excellent response time to emails and fact that it was repaired fairly quickly made all the difference!

1 Like

Just an update…

Was planning to get some more stuff done post-October but unfortunately things didn’t go that way.

Got the RGB2HDMI boards in the middle of November, and then my partner and I promptly managed to contract Covid (first time for both of us). :mask: Was not up to soldering or thinking through any sort of debugging processes so I left it alone. Still had a lot of gunk in my lungs after that, so any soldering was out (due to the fumes constantly triggering coughing attacks).

Early December was a bust due to some interstate travel. Got back from that, had a few days to decompress, and then was hoping I might have a few days to get around to things like the RGB2HDMI. Of course, then I somehow managed to get food poisoning. :face_vomiting: Only now just recovering from that.

Not sure I’ll get much of a chance to do anything further till after Christmas, assuming nothing else goes wrong. :crossed_fingers: